How to Finger Knit a Chunky Round Pillow (Fast and Easy DIY!)
If you’re looking for a quick DIY that looks impressive but won’t take all day, this chunky round pillow is it.
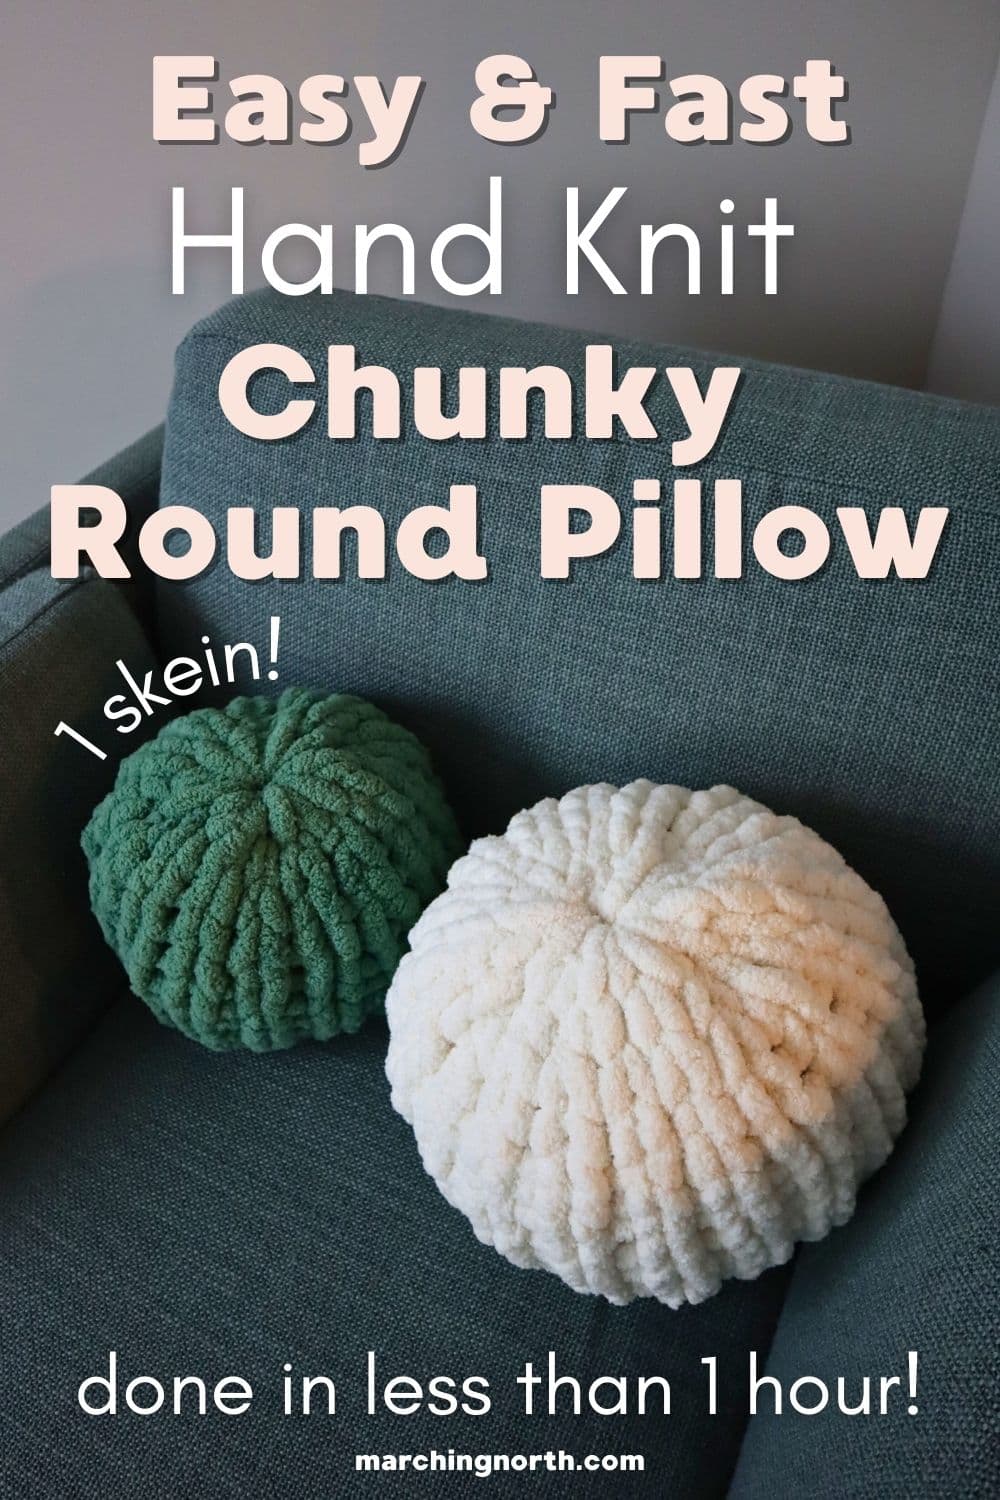
Not to mention, it only takes one skein of yarn!
Using only your fingers and some soft jumbo yarn, you can make a stylish, squishy cushion that’s perfect for tossing on the couch, your bed, or even gifting to a friend.
No knitting needles and no stress! Just a simple hand knitting project that comes together in WAY under an hour.
Don’t forget to pin this for later!
(This post may contain affiliate links. If you click one and make a purchase, I may receive a small commission at no extra cost to you. Read the disclaimer here. Thank you for your support!)
One of the best things about this project is how customizable it is.
Want a smaller pillow for an accent chair? Start with fewer chains and work fewer rows.
Want a big statement piece you can really sink into? Just add more chains at the beginning and keep building it up with extra rows.
The simple stitch pattern makes it really easy to adjust the size without overthinking it.
And since you’re working with jumbo yarn and using your hands instead of needles, this pillow works up super fast, which is perfect if you’re short on time or just want that instant gratification project.
Plus, once you see how easy it is, you might find yourself making these fluffy, round pillows for everyone you know!
Below, you’ll find the free pattern and the video tutorial.

Buy the PRINTABLE copy
Chunky Round Finger Knit Pillow – Printable PDF Pattern!
Reference this pattern any time you want with the printable PDF version!
It’s ad-free, and includes the written pattern with step by step photo tutorial!
More Free Jumbo Yarn Patterns
Check out these other free BIG yarn patterns available on my website:
- How to Finger Knit a Chunky Blanket Fast! (for Beginners)
- Cozy Free Crochet Pillow Cover Pattern (Removable!)
- Free {Super Bulky} Crochet Throw Blanket Pattern
Chunky Round Finger Knit Pillow – Tutorial
Supplies You’ll Need
- 1 skein of jumbo [size 7] yarn (I used Bernat Blanket Big)
- sharp scissors
Notes
- Difficulty Level: Super Easy
Finished Size
- As written, the finished pillow measures about 10 inches across.
Video Tutorial
Check out the tutorial video for this chunky hand knit pillow on my YouTube channel, and don’t forget to subscribe!
Instructions
Foundation Chain:
Start with a slip knot, leaving an 18-inch tail. This will be used later to cinch up the pillow.
To make a slip knot, loop the yarn around your hand, pull the working yarn through to form a loop, then slide your hand out and tighten.
Make the starting loop about 2 inches long. Reach through it, grab the yarn, and pull up another loop the same size.
Keep doing that until you have a total of 16 chains.
Lay the chain out in an untwisted circle and overlap the last chain you made over the first chain.
Insert your fingers through both loops and pull up a loop. This is the first stitch of the first row.
Grab a short piece of any yarn that’s different than the yarn you’re using and thread it through the first loop as a stitch marker.
(Optional, but it makes it easier to tell where the beginning of the row is.)
Rows 1 – 3
Continue around the circle, pulling a loop through each chain.
You’ll end up with 15 stitches total, since the first and last chain overlap.
Keep your loops consistent at about 2 inches tall. If they’re too big, you’ll get gaps in the pillow.
When you reach the starting stitch, remove the stitch marker, make the next loop in that stitch and then replace the marker in the first stitch for the next row.
Repeat until you have 3 rows done.
Rows 4 – 12
Fold the circle in half with the marked stitch at the far right—this will be your starting point.
Work across one side, flip the piece, then continue across the other.
Make sure you don’t accidentally leave any slack yarn between the stitches when you flip to the other side.
Cinching Up the First Side
Cut the yarn, leaving a tail that’s long enough to go across the top of the pillow twice.
Thread the yarn tail through the last stitch you made. (It’s the one the yarn is currently coming out of.)
Go around the edge of the pillow and thread the tail through the live loops.
Once you get through all the loops, go through the first loop one more time, and then pull the tail to cinch up the end of the pillow.
Pull gently to avoid breaking the yarn. It’s pretty strong, but a little care goes a long way.
Once you get the hole closed up, feed the tail of the yarn down into the center and flip the pillow around so you can see the inside.
Tie a knot with the yarn tail around an inner loop from one of the stitches, pull it tight and then leave the excess yarn inside the pillow.
Stuffing the Pillow
Grab some Polyfil stuffing and stuff your pillow. Try not to over stuff it so the stuffing doesn’t show through the stitches.
NOTE: If you’re worried about the filling showing through, you could make a fabric lining for the stuffing.
This is optional and I didn’t do this for the tutorial, but in case you want to, here’s what I would recommend:
Take a piece of fabric, cut it into a circle that’s approx. 20″ across.
Then hand sew a running stitch all around the edge, put your stuffing in the middle and pull the thread to cinch it up into a ball.
You can just pop that fabric ball inside the knit pillow cover and you’re good to go!
Cinching Up the Second Side
Take the yarn tail from the starting side and use your fingers to whip stitch the yarn around the edge of the pillow.
After every 3 or 4 stitches, pull the yarn tail to cinch the side up a bit at a time. That way you don’t have to pull it all at once.
After you get to the start, pull it to finish cinching up this side.
Feed the yarn tail into the center hole and push it out through a side hole. Carefully find an inner stitch loop from the outside and tie a knot around it with the tail.
Push the excess yarn into the center of the pillow.
In Conclusion
I hope you enjoyed this finger knit pillow tutorial, and I’d love to see how your pillow turns out- be sure to share it with me on social media!
Looking for more yarny projects to try?