Super Cute Appliqued Bunny Granny Square | Free Crochet Pattern
In preparation for Easter, I made an appliqued bunny granny square!
This super cute appliqued bunny granny square can be whipped up really quick and doesn’t use very much yarn.
There’s some assembly required but I think it’s worth it. It would be really cute in an Easter-themed blanket or you could put the applique on just about anything you want to make more adorable!
Copyright info: You are welcome to sell what you make while using this pattern, just don’t copy and paste this pattern or use my pictures anywhere. Instead, feel free to share a link for people to come to my site and get it themselves.
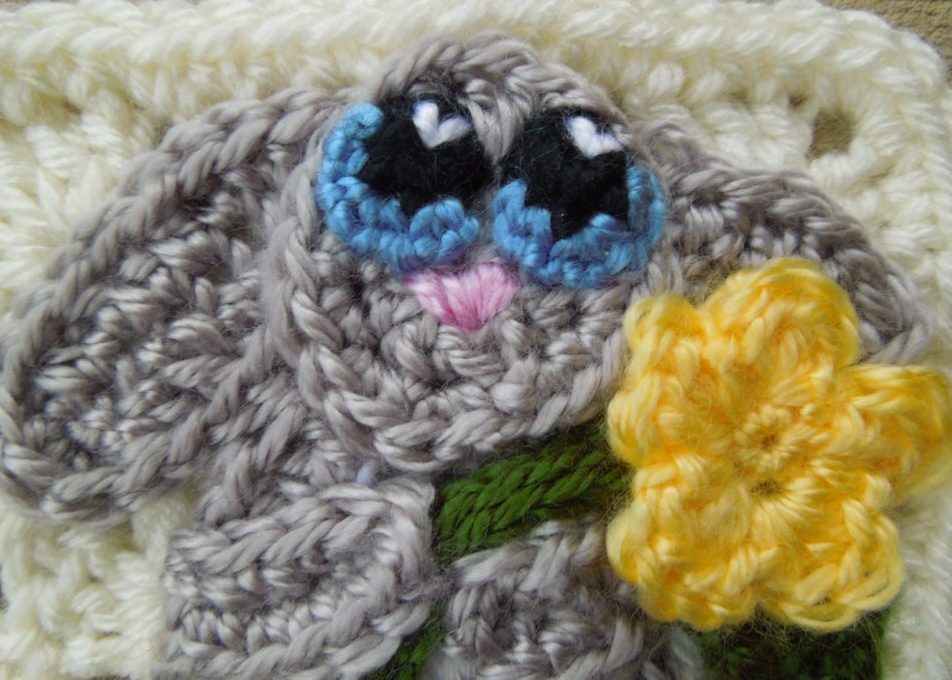
Bunny Rabbit Granny Square
(This post may contain affiliate links. If you click one and make a purchase, I may receive a small commission at no extra cost to you. Read the disclaimer here. Thank you for your support!)
For the applique, I used Yarn Bee Soft Secret in Fog (gray), White, Light Denim, Pink, Olive, Butter, and Black and a 4.25 mm hook.
Body:

1. Start with white. Magic Loop, ch 3, 9 dc into loop, sl st to top of ch 3.
2. Ch 1, 2 sc in same st, 2 sc in next st, 2 hdc in next st, 2 dc in next 2 sts, 2 hdc in next st, 2 sc in next 4 sts, sl st to 1st sc, switching to Fog when you pull up loop.
3. Ch 3, dc in same st and next, 2 hdc in next st, 1 sc in next st, 2 sc in next st, hdc in next st, 2 dc in next st, 1 dc in next 2 sts, 2 dc in next st, hdc in next st, 2 sc in next st, 1 sc in next st, 2 hdc in next st, 1 dc in next st, 2 dc in next st, 2 hdc in next st, 1 hdc in next 2 sts, 2 hdc in last st, sl st to top of ch 3. Finish off.
Head: (Fog)
1. Magic loop, ch 3, dc 9 into loop, sl st to 1st dc.
2. Ch 1, 2 sc in same st, 2 sc in next 2 sts, 2 hdc in next st, 2 dc in next st, 2 hdc in next st, 2 sc in next 4 sts, sl st to 1st sc. Finish off.
Ears: (Make 2, Fog)
Ch 10.
Sl st in 2nd ch from hook, sc in next 2 ch’s, hdc in next 2 ch’s, dc in next ch, hdc in next 2 ch’s, 4 hdc in last ch, (going up the other side of chain) hdc in next 2 ch’s, dc in next ch, hdc in next 2 ch’s, sc in next 2 ch’s, sl st in last ch, sl st to 1st st to join.
Feet: (Make 2, Fog)
Magic loop, ch 3, 9 dc in loop, sl st to top of ch 3.
1 sc in same st (don’t chain first), 2 sc in next st, 2 hdc in next st, 2 sc in next st, 1 sc in next st, sl st in same st, finish off.
Foot Pads: (Make 2, White)
Magic loop, ch1, sc 5 in loop, sl st to join, pull loop tight, finish off.
Arms: (Make 2, Fog)
Ch 5.
Sc in 2nd ch from hook and next 2 ch’s, 4 sc in last ch (going up other side of chain) sc in next 3 sts, finish off. (Don’t sl st to join to first st)
Eyes: (Make 2, use 3.5 mm hook, Black and Light Denim)
With black – Magic loop, ch 1, 4 sc in loop, sl st to 1st sc and switch to blue. Ch 1, sc in next st, 2 sc in next, 1 sc in next and sl st in same st, finish off.
Those are all the pieces for the bunny rabbit. I found the patterns for the flower and leaf on two other blogs, you can find them here:
Flower pattern (Butter)
Leaf pattern (Olive)
For the stem, I used Olive and chained until it was the length I wanted and slip stitched back down the chain.
Attach the stem and leaf to the back of the flower.
Cute Bunny Rabbit Granny Square Assembly:
First I did the face.
Sew the eyes on where you want them, I whip stitched around the edges with matching yarn so they were flatter on the face. Then I used some white yarn and added the highlight on the eyes. After that I did the nose. Thread some pink yarn on your needle and first I outlined the triangle shape and then filled it in.
Next, attach the ears to the back of the head.
Sew the head to the body.
Sew the arms onto the sides of the body and try to make them so they come together in the middle but don’t sew down the hands yet.
Sew the footpads onto the feet, then attach the feet on the bottom of the bunny’s body.
Sew the flower stem onto the middle of the body and then sew the arms over the stem so it looks like the bunny is holding the flower. I also sewed the flower to the ear to make it more secure.
At this point you have your applique done, you can attach it to whatever you like.
If you’re going to attach it to the granny square, click here for the pattern I used to make the square. (I used I Love This Yarn! in Ivory)
Now just sew your bunny applique in the middle of the square and your done!
Happy Easter!
Check out these other yarny posts:
- Boho Waves Crochet Rug | Free Crochet Pattern
- St. Patrick’s Day Beanie Hat | Free Crochet Pattern
- Punch Needle Tips You Need to Know Before You Try It
What would you put this applique on? Let me know in the comments below!