
Classic One-Color Granny Square Crochet Pattern (Free Pattern & Video!)
If you’ve been wanting to learn how to crochet a granny square, this is a great place to start.
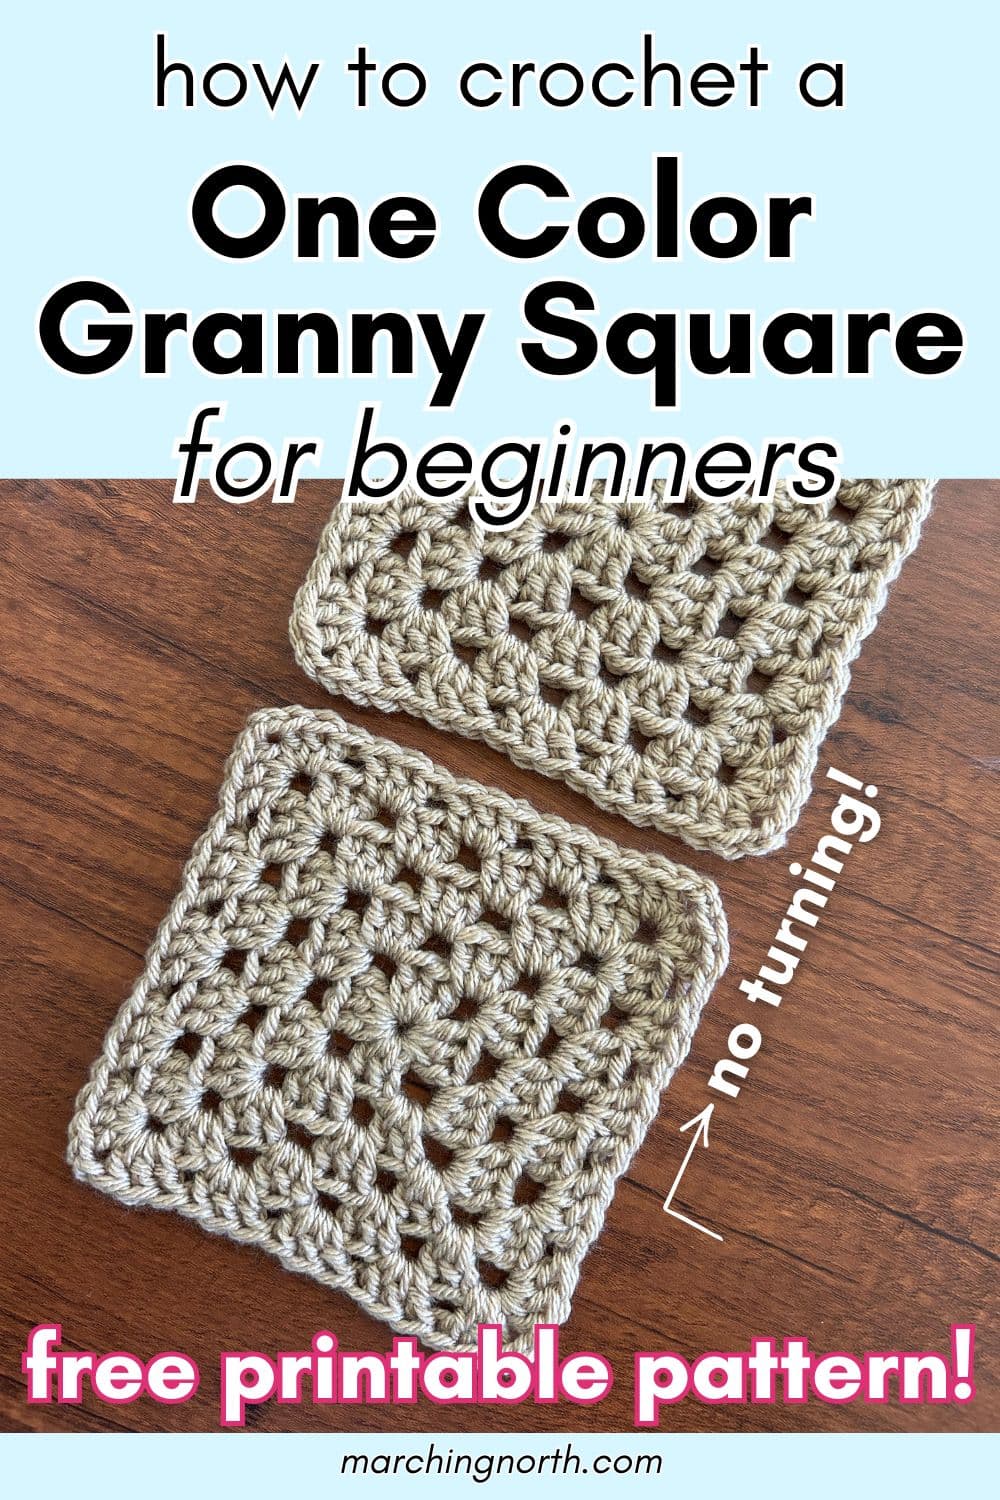
This is the classic, traditional granny square worked in a single color from center out. No color changes, no invisible joins, no weaving in a million ends.
I’ve got a full video tutorial to walk you through every round, so even if you’ve never made a granny square before, you’re in the right place.
Don’t forget to pin this for later!
(This post may contain affiliate links. If you click one and make a purchase, I may receive a small commission at no extra cost to you. Read the disclaimer here. Thank you for your support!)
This pattern works up a 5-round granny square in one continuous color.
Each round is joined with a slip stitch and started with a chain-up, which is the traditional method. Familiar, beginner-friendly, and reliable.
You can stop at any round for a smaller square, or continue past round 5 by following the same pattern – each additional round just adds one more side cluster per side.
Grab the FREE printable PDF pattern for instant download below!
Best Yarn for Granny Squares
For granny squares, I recommend a smooth, medium weight (size 4) yarn.
Smooth yarns make it much easier to work into the stitches and see what you’re doing.
Fluffy or textured yarns can be frustrating, especially when you’re learning.
I personally love acrylic for blanket squares because it’s washable, durable, and comes in a million colors. Some of my favorites:
- I Love This Yarn! from Hobby Lobby (easy to find, loads of gorgeous colors)
- Lion Brand Pound of Love (great for big blanket projects)
- Paintbox Simply Worsted Superwash Wool (a great option for bold solid colors)
Approximate Yarn Amount for one 5-round Square: Roughly 25–30 yards of worsted weight yarn. This is a great way to use up scraps!
Looking for an easy granny square blanket pattern? Check out this one!
Pattern Information
- Skill Level: Beginner
- Pattern written in US terms
- Finished Size: Approx. 5 inches across with a 5.5 mm hook and worsted weight yarn
Supplies & Materials
- Yarn: worsted weight (size 4) yarn
- Hook: 5.5 mm crochet hook
- Notions:
- yarn needle (linked ones are nickel free and include a bunch of needle sizes!)
- scissors (these thread snips are titanium coated, so if you have a nickel allergy like me, these are awesome and don’t make you break out!)
- stitch markers (optional) – you can use these to mark the corners, which is helpful for beginners
Gauge
After 5 rounds, square should be approx. 5” across.
Gauge isn’t critical for this pattern unless you’re trying to match squares for a specific project size.
For blankets, consistent gauge between squares matters more than hitting a specific measurement. Just use the same hook and yarn throughout.
Abbreviations
- ch(s): chain(s)
- st(s): stitch(es)
- sl st: slip stitch
- dc: double crochet
- sp: space
- rep: repeat
- FO: finish off (cut yarn, pull yarn tail through last loop on hook and pull to tighten)
- IJ: invisible join – how we’ll join the last stitch of the round to the first one so there isn’t a bump
Pattern Notes
About the First Corner of each round:
The first corner of every round starts with a partial cluster with the starting ch 3 + 1 dc, then ch 2 and 3 more dc.

At the end of each round, you’ll do that last double crochet to complete that first corner.
Special Stitches
Invisible Join (IJ)
On the last round, we’ll finish off with an Invisible Join. Here’s how to do that:
Cut your yarn, leaving a tail of about 6 inches. Pull the last loop on your hook all the way out to “lock” your stitch.
Thread the tail onto a yarn needle. The ch 3 at the beginning of the round counts as the first dc, and we’re going to be working into the top of the second dc, which is immediately to its left.
Insert the needle under both loops at the top of that second dc, going from front to back, and pull the yarn through.
Then insert the needle down through the center of the last dc of the round (where the yarn tail is coming out).
Pull through and adjust the tension to match the rest of the stitches.
Weave in the tail really well on the back side of the square to secure.
(You might want to watch this part in the video – it’s one of those things that’s way easier to see than to read!)
Weaving In Ends As You Go
If you’re making a bunch of these squares, I definitely recommend weaving in the tails for each square as you finish them.
There is nothing fun about having a HUGE pile of squares all made, with none of the ends woven in.
And then you just have to sit there and weave in tails for HOURS….
Unless, of course, you’re into that sort of thing. In that case, Godspeed.
Video Tutorial
Here’s the video tutorial for this crochet pattern, and be sure to subscribe to my YouTube channel so you don’t miss any new videos!
Instructions
Starting Ring
Ch 4, sl st into first ch to form a ring.
Round 1
Ch 3 [counts as first dc], (1 dc, ch 2, 3 dc) into ring, [starting partial corner made], *(ch 2, 3 dc)* into ring, repeat from * to * 1 more time, ch 2, 1 dc into ring [finishes starting corner], sl st to 2nd dc of round to join [just to the left of ch-3].
Round 2
Sl st into corner ch 2 space, (ch 3, 1 dc, ch 2, 3 dc) in same corner space, *(3 dc, ch 2, 3 dc) into next corner space*, repeat from * to * 2 more times, 1 dc into starting corner space, sl st to 2nd dc of round to join.
[There are no side spaces in Round 2 – you move directly from corner to corner.]
Round 3
Sl st into corner ch 2 space, (ch 3, 1 dc, ch 2, 3 dc) in same corner space, *3 dc into next side space, (3 dc, ch 2, 3 dc) into next corner space*, repeat from * to * 2 more times, 3 dc into last side space, 1 dc into starting corner space, sl st to 2nd dc of round to join.
Round 4
Sl st into corner ch 2 space, (ch 3, 1 dc, ch 2, 3 dc) in same corner space, *3 dc into next 2 side spaces, (3 dc, ch 2, 3 dc) into next corner space*, repeat from * to * 2 more times, 3 dc into next 2 side spaces, 1 dc into starting corner space, sl st to 2nd dc of round to join.
Round 5
Sl st into corner ch 2 space, (ch 3, 1 dc, ch 2, 3 dc) in same corner space, *3 dc into next 3 side spaces, (3 dc, ch 2, 3 dc) into next corner space*, repeat from * to * 2 more times, 3 dc into next 3 side spaces, 1 dc into starting corner space, FO and do an IJ to join.
Continuing Past Round 5
Each additional round follows the same pattern as Round 5, you’ll just have an extra side space on all the sides for each round.
And if you go past 5 rounds, you’ll just do the Invisible Join to finish off whatever your last round is.
In Conclusion
A single-color granny square is such a classic for a reason – it’s quick, satisfying, and you can make a whole pile of them while also binging Netflix.
Once you’ve got this one down, check out my perfect multicolor granny square tutorial if you want to level up with a few easy tricks that really change the game!
If you make some granny squares following this pattern, I’d love to see them!
Tag me on social media or share a picture of your makes in the Yarn Stash Facebook community!
Looking for more crochet fun? Check out these recent posts!