Easy & Free Crochet Beanie Pattern in 10 Sizes (+ Video!)
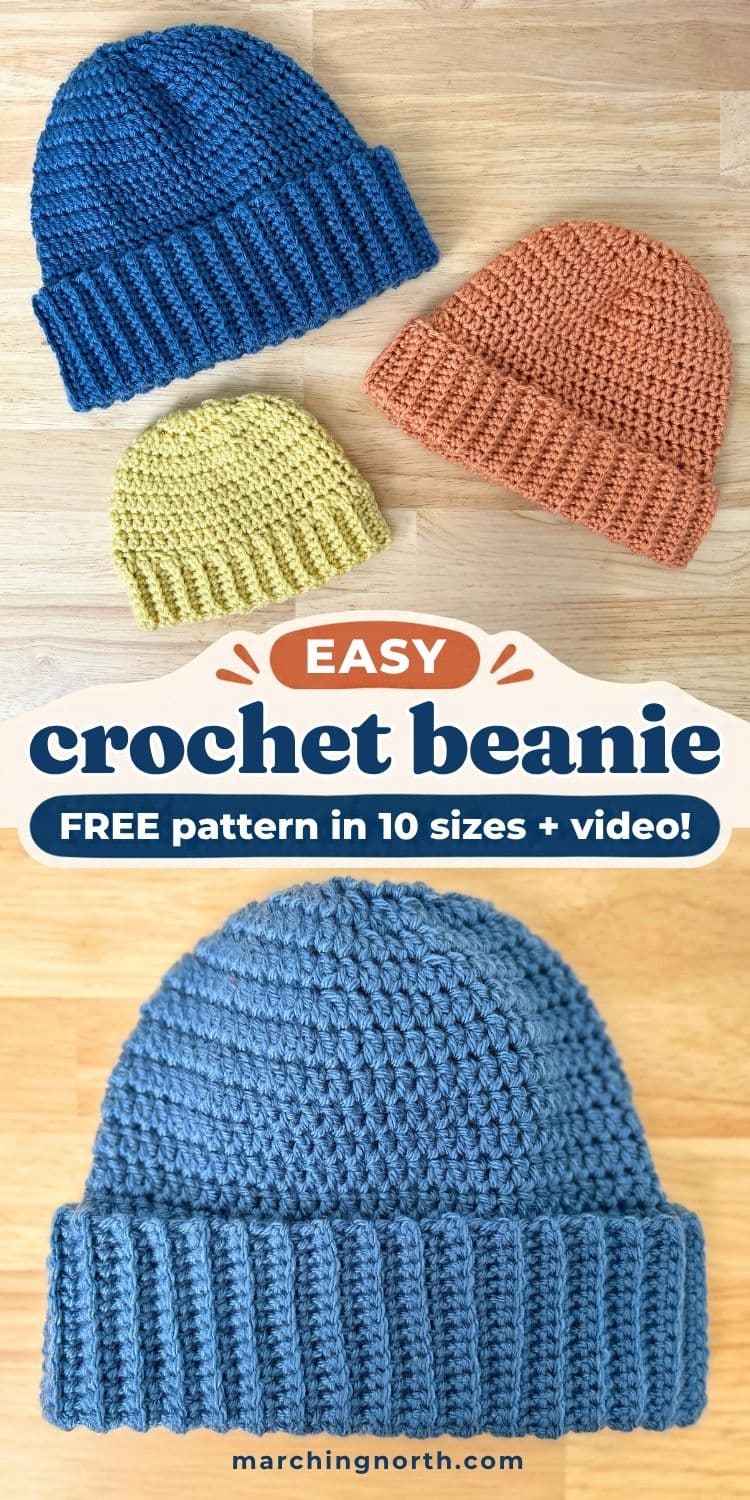
Are you looking for a crochet beanie that’s easy to make, doesn’t have a weird seam running up the back, and actually fits the head of the person you made it for? Well, you came to the right place.
The Basecamp Brimmed Beanie starts with an easy ribbed brim worked in rows.
We join that up with slip stitches, then the body is worked in continuous rounds, so once you’re past the brim there’s no join and no seam.
You can make the longer brim and fold it up or make the shorter one and leave it down, and this hat comes in 10 sizes, from preemie all the way up to adult extra large.
It’s made with worsted weight acrylic yarn, so it’s warm, washable, and easy on the budget.
Don’t forget to pin this for later!
(This post may contain affiliate links. If you click one and make a purchase, I may receive a small commission at no extra cost to you. Read the disclaimer here. Thank you for your support!)
Fun fact: When I was pregnant with each of my kids, I crocheted cute little newborn sized hats with the intention of putting them on their sweet little heads once they were born.
And every time, they didn’t fit.
When my middle son was born, I made him a newborn hat from a popular pattern, lots of people loved it and no one was complaining that the sizes were wrong.
And guess what? It didn’t even come close to fitting his melon.
I mean, the hat was the size it said it should be, but his head wasn’t.
My youngest was smaller than his brother, but he still had the big head genes.
His baby hat that didn’t fit was one I wrote for this blog when I was first starting out, following the same basic sizes everyone else used.
(It’s an old one, please don’t judge me if you check it out, lol.)
It turned out super cute.
It was appropriately sized according to the internet.
ANNDD… it was too small for him.
Dang it!!!
So when I sat down to size this hat, I went digging.
It turns out the standard head size chart from the Craft Yarn Council doesn’t actually have a set newborn size. It jumps straight from preemie, which tops out at 12 inches, to baby, which starts at 14.
It skips right over the spot where most newborns actually are.
Every designer fills that gap with their own best guess, which is why hat sizes sometimes don’t match up from one pattern to the next.
(I mean, most of us don’t have a newborn nearby when we design every pattern, so we’re doing the best we can.)
And then some babies (like mine) have big heads. And the newborn size won’t even apply on day one.
So this time, I made my size chart a little differently.
I started with the Craft Yarn Council chart, checked the baby and kid sizes against the World Health Organization’s head circumference data (the same growth data pediatricians use), and adjusted the ones that didn’t line up.
Then, I tested the tiny sizes on balloons blown up to the right size.
Scientific? You decide. But hey, it worked.

Then there’s the seam thing. I have always hated the seam that forms up the back of a hat when you join every round.
Sometimes you can hide it pretty well if your stitches have some texture.
But for a double crochet hat like this, it’s gonna be visible. And I’m a bit of a spazz about that kind of thing.
So this hat is worked in continuous rounds, and there isn’t one. Doesn’t get much more invisible than no seam, am I right?
The name comes from the idea of basecamp, the warm, reliable place you come back to.
That’s this hat. Simple, solid, and it just works. And it looks good doing it!
Keep scrolling down for the free pattern. Every size is right here in the post. But if you’d rather have it printable and ad-free, the PDF is in my shop!
Buy the PRINTABLE copy
Basecamp Brimmed Beanie: Printable PDF Pattern!
Reference this pattern any time you want with the printable PDF version!
It’s ad-free, and has all 10 sizes written out start to finish, the full size chart, and both the folded and unfolded brim options, all laid out for paper.
Pattern Information
- Skill Level: Easy (beginner friendly)
- Pattern written in US terms
- Sizes: 10 sizes, from preemie to adult extra large. The hat in these photos is the Adult Small/Teen with a folded brim.
- Brim options: Folded or not folded. The brim is written both ways, and the only thing that changes is the starting chain. Everything after the brim is exactly the same. If you go with the folded version, fold the brim up to wear it once your hat is finished.
- The Preemie and Newborn sizes are written with a brim that is not folded, because a doubled brim on a hat that small gets stiff and bulky.
- Want it slouchier? For a slouchy fit, add one or two extra straight rounds before you start the crown decreases. Everything else stays the same.
Supplies & Materials
- Yarn: worsted weight (size 4) yarn. I used Premier Anti-Pilling Everyday Worsted. Check the size chart below for how much each size needs. (You’ll need 2 skeins for Adult L and Adult XL if using 100g skeins. I just used a tiny smidge of the second skein for the Adult L with folded brim.)
- Hook: 5 mm (H) crochet hook
- Notions:
- yarn needle (linked ones are nickel free and include a bunch of needle sizes!)
- scissors (these thread snips are titanium coated, so if you have a nickel allergy like me, these are awesome and don’t make you break out!)
- stitch marker (you’ll need one to mark the first stitch of each round, since there’s no join to show you where a round starts)
Gauge
Brim ribbing: 16 rows and 18 sts = 4 inches, worked flat and unstretched.
Body: 14 sts and 9 rounds = 4 inches, measured in the straight section of the hat.
Gauge matters more on a hat than it does on a blanket, because it’s the thing that decides whether your hat fits.
The easy way to check it: make your brim, then measure it before you join it. Every size tells you how long your finished brim should be. If yours comes out a lot longer, try a smaller hook. If it comes out a lot shorter, try a bigger one.
Abbreviations
- ch(s): chain(s)
- st(s): stitch(es)
- sl st: slip stitch
- sc: single crochet
- hdc: half double crochet
- dc: double crochet
- dc2tog: double crochet 2 together (decrease)
- BLO: back loop only
- FLO: front loop only
- rep: repeat
Choosing Your Size
Choose your size by head circumference, not by age.
Head size varies a lot inside any age group, so measure the head of the person you’re making this for and pick the size that fits. If a measurement lands at the upper end of a range, make the larger size.
(Seriously, my average-height 8 year old son wears an Adult Medium. And my 6’3″ husband wears an Adult Large. You just gotta measure those heads.)
How to measure: wrap a soft measuring tape around the head just above the eyebrows and ears, right where the brim will sit. Snug, but not tight.
| Size | Head Circumference | Yarn Used (Folded Brim) | Yarn Used (Unfolded Brim) |
|---|---|---|---|
| Preemie | 10-12″ | n/a | 17g |
| Newborn | 13-14.5″ | n/a | 27g |
| 3-6 Months | 14.5-16.5″ | 49g | 36g |
| 6-12 Months | 16.5-18″ | 64g | 47g |
| Toddler | 18-19″ | 73g | 54g |
| Child | 19-20″ | 74g | 55g |
| Teen/Adult Small | 20-21″ | 87g | 63g |
| Adult Medium | 21-22.5″ | 93g | 68g |
| Adult Large | 23-24″ | 101g | 73g |
| Adult X-Large | 24-25″ | 111g | 82g |
Preemie & Newborn Size Note: I wrote these two sizes without a folded brim option, because a doubled brim can get stiff, heavy, and overly bulky on a head that small.
If you want a folded brim for those sizes anyway, just start with a longer chain. Preemie would be ch 13 and Newborn would be ch 15.
Everything else in the pattern stays exactly the same. But I really think the unfolded shorter brim is the way to go for those sizes.
Video Tutorial
If you want to watch the video tutorial for this beanie, check it out below, and be sure to subscribe to my YouTube channel so you don’t miss any new videos!
The video shows the Adult Small/Teen with a folded brim. Every other size works exactly the same way, just with different numbers.
How This Hat Is Built
Here’s a quick overview so the pattern makes sense before you start:
- The brim is a long, narrow strip of ribbing worked back and forth in rows.
- You join the short ends of that strip together to make a ring.
- You turn the ring on its side and work the first round of the body into the ends of the brim rows.
- The body is worked in continuous rounds, around and around like a spiral, so there’s no join and no seam.
- The crown gets decreased down to a small circle, and then you sew it closed.
The steps are the same for every size. Only the numbers change.
Techniques You’ll Use (And Special Stitches)
Single Crochet in the Back Bump
The back bump is the little ridge on the back side of each chain. Working into it gives the bottom edge of your brim a clean, finished look that matches the top edge.
How to do it: Flip your chain over so the back is facing you. You’ll see a row of little bumps running down the middle. Insert your hook under the bump of the 2nd chain from your hook, yarn over, pull up a loop, then yarn over and pull through both loops on your hook.
Ribbing in the Back Loop Only
Every row of the brim after the first is worked in the back loop only.
Working in just one loop leaves the other loop sitting on the surface, and doing that row after row creates the raised ridges of the ribbing. It’s also what makes the brim so stretchy.
How to do it: Look at the top of a stitch and you’ll see two loops that look like a sideways V. The back loop is the one farthest from you. Insert your hook under only that loop and make your single crochet like normal.
Joining the Brim Into a Ring
Once your brim strip is done, bring the two short ends together so they line up. Your hook should be at the front right corner, on the side facing you.
How to do it: Ch 1. Insert your hook under the front loop only of the first stitch on the edge closest to you, then under the back loop only of the first stitch on the edge farthest from you. Yarn over and pull through everything on your hook to make a slip stitch. Keep going like that down the row, one stitch from each edge at a time.
Using the front loop on one side and the back loop on the other helps the join blend right into the ribbing.
(This is one of those parts that’s way easier to see than to read, so you might want to watch this bit in the video!)
Working Into the Row Ends
The first round of the body is worked into the side of the brim, into the ends of the rows. Row ends are messier than the tops of stitches, and there’s no neat V to aim for.
Look for the little post or loop at the end of each row and work under it.
Go under more than one loop for each stitch so it’s secure, and it’s fine if sometimes you catch more than two.
There are 2 row ends between each ridge. Insert your hook in near the top, and as long as you go under at least 2 loops, you’re good. Just try to stay consistent with how you do it all the way around.
In the photo with the arrow, I’m pointing to the hole under the top hole for the second row end, because the top hole is just one loop. That’s where I was working.
Continuous Rounds and Your Stitch Marker
Most hats are worked in joined rounds, where you slip stitch at the end of every round and chain up to start the next. That’s what makes the seam up the back.
This hat skips all that. At the end of each round you just keep going into the first stitch of the next round, like a spiral.
The catch is that there’s nothing to show you where a round starts. That’s the stitch marker’s job.
How to do it: Make the first stitch of the round, then place your marker in it. When you come back around to the marked stitch, you’ve finished the round. Work into it, then move the marker up into the stitch you just made. That’s your new first stitch.
In the crown rounds, sometimes the first stitch is a dc2tog. It still gets the marker.
Double Crochet 2 Together (dc2tog)
This is the decrease that shapes the crown. It turns 2 stitches into 1.
How to do it: Yarn over, insert your hook into the next stitch, yarn over and pull up a loop, yarn over and pull through 2 loops. You’ll have 2 loops left on your hook. Yarn over, insert your hook into the next stitch, yarn over and pull up a loop, yarn over and pull through 2 loops. Now you’ll have 3 loops on your hook. Yarn over and pull through all 3.
The Pattern
Each size is written out from start to finish, so once you find your size you can read straight down without flipping back and forth. Jump to your size using the table of contents above.
Preemie
Fits head circumference: 10-12″
Yarn used: 17 g (unfolded brim)
Brim
Note: This size is written for a brim that is not folded.
Ch 7.
Row 1: Sc in back bump of 2nd ch from hook and rest of chains, ch 1, turn. (6 sts)
Row 2: Sc in BLO of every st, ch 1, turn.
Rows 3-36: Rep row 2. Finished brim should measure about 9″ long unstretched.
Bring the two short ends of the brim together so they line up. Your hook should be positioned on front right corner on the side facing you.
Ch 1, insert hook under FLO of first st on edge closest to you, and BLO of first st on edge furthest from you, sl st. Continue to work through both layers across the row, turn brim a quarter turn clockwise so ends of the rows are facing up and move onto the hat body section.
Hat Body
Setup round
For this round, we’ll be working into the ends of the ribbing rows. You’ll want to make sure you work under more than one loop for each stitch, and it’s OK if sometimes you’re working under more than 2 loops. Just try to stay consistent.
Round 1: Sc in 1st row end (next row to the left of where your hook is currently attached), hdc in next row end, dc in next 2 row ends, dc2tog, *(dc in next 4 row ends, dc2tog)*, rep from * to * 4 more times. Do not join to first st. (We’re working continuous rounds.) (30 sts)
Straight rounds (no decreases)
Round 2: Dc in first st, place marker in st, then dc in remaining sts around. (30 sts)
Round 3: Rep round 2, moving your marker up into the first st of the round. (30 sts)
Crown decrease rounds
In all these rounds, continue to move your stitch marker up into the first st after you make it, and that’s true when the first st is a dc2tog also.
Round 4: *Dc in 3 sts, dc2tog*, rep from * to * 5 more times. (24 sts)
Round 5: Dc2tog around. (12 sts)
Round 6: Dc2tog around. (6 sts)
Finishing
Cut yarn, leaving a long tail to sew up the top (about 8 to 10 inches).
Sew under each st, going around the circle counterclockwise. Once you’ve sewn under all of them, pull to cinch up the hole.
Insert needle down into center of hole and flip hat inside out. Sew under cinched up stitches around hole to secure a little more, then tie a knot, weave in the tail and cut the excess yarn.
Thread starting tail onto needle and weave in tail, cut excess yarn. Done!
Newborn
Fits head circumference: 13-14.5″
Yarn used: 27 g (unfolded brim)
Brim
Note: This size is written for a brim that is not folded.
Ch 8.
Row 1: Sc in back bump of 2nd ch from hook and rest of chains, ch 1, turn. (7 sts)
Row 2: Sc in BLO of every st, ch 1, turn.
Rows 3-45: Rep row 2. Finished brim should measure about 11.25″ long unstretched.
Bring the two short ends of the brim together so they line up. Your hook should be positioned on front right corner on the side facing you.
Ch 1, insert hook under FLO of first st on edge closest to you, and BLO of first st on edge furthest from you, sl st. Continue to work through both layers across the row, turn brim a quarter turn clockwise so ends of the rows are facing up and move onto the hat body section.
Hat Body
Setup round
For this round, we’ll be working into the ends of the ribbing rows. You’ll want to make sure you work under more than one loop for each stitch, and it’s OK if sometimes you’re working under more than 2 loops. Just try to stay consistent.
Round 1: Sc in 1st row end (next row to the left of where your hook is currently attached), hdc in next row end, dc in next 11 row ends, dc2tog, *(dc in next 13 row ends, dc2tog)*, rep from * to * 1 more time. Do not join to first st. (We’re working continuous rounds.) (42 sts)
Straight rounds (no decreases)
Round 2: Dc in first st, place marker in st, then dc in remaining sts around. (42 sts)
Rounds 3-4: Rep round 2, moving your marker up into the first st of each round. (42 sts)
Crown decrease rounds
In all these rounds, continue to move your stitch marker up into the first st after you make it, and that’s true when the first st is a dc2tog also.
Round 5: *Dc in 5 sts, dc2tog*, rep from * to * 5 more times. (36 sts)
Round 6: Dc2tog around. (18 sts)
Round 7: Dc2tog around. (9 sts)
Finishing
Cut yarn, leaving a long tail to sew up the top (about 8 to 10 inches).
Sew under each st, going around the circle counterclockwise. Once you’ve sewn under all of them, pull to cinch up the hole.
Insert needle down into center of hole and flip hat inside out. Sew under cinched up stitches around hole to secure a little more, then tie a knot, weave in the tail and cut the excess yarn.
Thread starting tail onto needle and weave in tail, cut excess yarn. Done!
3-6 Months
Fits head circumference: 14.5-16.5″
Yarn used: 49 g (folded brim)/ 36 g (unfolded)
Brim
Ch 17 for a folded brim, or ch 9 for a brim that is not folded.
Row 1: Sc in back bump of 2nd ch from hook and rest of chains, ch 1, turn. (16 sts for folded, 8 sts for unfolded)
Row 2: Sc in BLO of every st, ch 1, turn.
Rows 3-54: Rep row 2. Finished brim should measure about 13.5″ long unstretched.
Bring the two short ends of the brim together so they line up. Your hook should be positioned on front right corner on the side facing you.
Ch 1, insert hook under FLO of first st on edge closest to you, and BLO of first st on edge furthest from you, sl st. Continue to work through both layers across the row, turn brim a quarter turn clockwise so ends of the rows are facing up and move onto the hat body section.
Hat Body
Setup round
For this round, we’ll be working into the ends of the ribbing rows. You’ll want to make sure you work under more than one loop for each stitch, and it’s OK if sometimes you’re working under more than 2 loops. Just try to stay consistent.
Round 1: Sc in 1st row end (next row to the left of where your hook is currently attached), hdc in next row end, dc in next 5 row ends, dc2tog, *(dc in next 7 row ends, dc2tog)*, rep from * to * 4 more times. Do not join to first st. (We’re working continuous rounds.) (48 sts)
Straight rounds (no decreases)
Round 2: Dc in first st, place marker in st, then dc in remaining sts around. (48 sts)
Rounds 3-5: Rep round 2, moving your marker up into the first st of each round. (48 sts)
Crown decrease rounds
In all these rounds, continue to move your stitch marker up into the first st after you make it, and that’s true when the first st is a dc2tog also.
Round 6: *Dc in 6 sts, dc2tog*, rep from * to * 5 more times. (42 sts)
Round 7: Dc in 2 sts, dc2tog, *dc in 5 sts, dc2tog*, rep from * to * 4 more times, dc in last 3 sts. (36 sts)
Round 8: Dc2tog around. (18 sts)
Round 9: Dc2tog around. (9 sts)
Finishing
Cut yarn, leaving a long tail to sew up the top (about 8 to 10 inches).
Sew under each st, going around the circle counterclockwise. Once you’ve sewn under all of them, pull to cinch up the hole.
Insert needle down into center of hole and flip hat inside out. Sew under cinched up stitches around hole to secure a little more, then tie a knot, weave in the tail and cut the excess yarn.
Thread starting tail onto needle and weave in tail, cut excess yarn. Done!
6-12 Months
Fits head circumference: 16.5-18″
Yarn used: 64 g (folded brim)/ 47 g (unfolded)
Brim
Ch 19 for a folded brim, or ch 10 for a brim that is not folded.
Row 1: Sc in back bump of 2nd ch from hook and rest of chains, ch 1, turn. (18 sts for folded, 9 sts for unfolded)
Row 2: Sc in BLO of every st, ch 1, turn.
Rows 3-60: Rep row 2. Finished brim should measure about 15″ long unstretched.
Bring the two short ends of the brim together so they line up. Your hook should be positioned on front right corner on the side facing you.
Ch 1, insert hook under FLO of first st on edge closest to you, and BLO of first st on edge furthest from you, sl st. Continue to work through both layers across the row, turn brim a quarter turn clockwise so ends of the rows are facing up and move onto the hat body section.
Hat Body
Setup round
For this round, we’ll be working into the ends of the ribbing rows. You’ll want to make sure you work under more than one loop for each stitch, and it’s OK if sometimes you’re working under more than 2 loops. Just try to stay consistent.
Round 1: Sc in 1st row end (next row to the left of where your hook is currently attached), hdc in next row end, dc in next 6 row ends, dc2tog, *(dc in next 8 row ends, dc2tog)*, rep from * to * 4 more times. Do not join to first st. (We’re working continuous rounds.) (54 sts)
Straight rounds (no decreases)
Round 2: Dc in first st, place marker in st, then dc in remaining sts around. (54 sts)
Rounds 3-7: Rep round 2, moving your marker up into the first st of each round. (54 sts)
Crown decrease rounds
In all these rounds, continue to move your stitch marker up into the first st after you make it, and that’s true when the first st is a dc2tog also.
Round 8: *Dc in 7 sts, dc2tog*, rep from * to * 5 more times. (48 sts)
Round 9: Dc2tog around. (24 sts)
Round 10: Dc2tog around. (12 sts)
Finishing
Cut yarn, leaving a long tail to sew up the top (about 8 to 10 inches).
Sew under each st, going around the circle counterclockwise. Once you’ve sewn under all of them, pull to cinch up the hole.
Insert needle down into center of hole and flip hat inside out. Sew under cinched up stitches around hole to secure a little more, then tie a knot, weave in the tail and cut the excess yarn.
Thread starting tail onto needle and weave in tail, cut excess yarn. Done!
Toddler
Fits head circumference: 18-19″
Yarn used: 73 g (folded brim)/ 54 g (unfolded)
Brim
Ch 21 for a folded brim, or ch 11 for a brim that is not folded.
Row 1: Sc in back bump of 2nd ch from hook and rest of chains, ch 1, turn. (20 sts for folded, 10 sts for unfolded)
Row 2: Sc in BLO of every st, ch 1, turn.
Rows 3-63: Rep row 2. Finished brim should measure about 15.75″ long unstretched.
Bring the two short ends of the brim together so they line up. Your hook should be positioned on front right corner on the side facing you.
Ch 1, insert hook under FLO of first st on edge closest to you, and BLO of first st on edge furthest from you, sl st. Continue to work through both layers across the row, turn brim a quarter turn clockwise so ends of the rows are facing up and move onto the hat body section.
Hat Body
Setup round
For this round, we’ll be working into the ends of the ribbing rows. You’ll want to make sure you work under more than one loop for each stitch, and it’s OK if sometimes you’re working under more than 2 loops. Just try to stay consistent.
Round 1: Sc in 1st row end (next row to the left of where your hook is currently attached), hdc in next row end, dc in next 17 row ends, dc2tog, *(dc in next 19 row ends, dc2tog)*, rep from * to * 1 more time. Do not join to first st. (We’re working continuous rounds.) (60 sts)
Straight rounds (no decreases)
Round 2: Dc in first st, place marker in st, then dc in remaining sts around. (60 sts)
Rounds 3-7: Rep round 2, moving your marker up into the first st of each round. (60 sts)
Crown decrease rounds
In all these rounds, continue to move your stitch marker up into the first st after you make it, and that’s true when the first st is a dc2tog also.
Round 8: *Dc in 8 sts, dc2tog*, rep from * to * 5 more times. (54 sts)
Round 9: Dc in 3 sts, dc2tog, *dc in 7 sts, dc2tog*, rep from * to * 4 more times, dc in last 4 sts. (48 sts)
Round 10: Dc2tog around. (24 sts)
Round 11: Dc2tog around. (12 sts)
Finishing
Cut yarn, leaving a long tail to sew up the top (about 8 to 10 inches).
Sew under each st, going around the circle counterclockwise. Once you’ve sewn under all of them, pull to cinch up the hole.
Insert needle down into center of hole and flip hat inside out. Sew under cinched up stitches around hole to secure a little more, then tie a knot, weave in the tail and cut the excess yarn.
Thread starting tail onto needle and weave in tail, cut excess yarn. Done!
Child
Fits head circumference: 19-20″
Yarn used: 74 g (folded brim)/ 55 g (unfolded)
Brim
Ch 21 for a folded brim, or ch 11 for a brim that is not folded.
Row 1: Sc in back bump of 2nd ch from hook and rest of chains, ch 1, turn. (20 sts for folded, 10 sts for unfolded)
Row 2: Sc in BLO of every st, ch 1, turn.
Rows 3-66: Rep row 2. Finished brim should measure about 16.5″ long unstretched.
Bring the two short ends of the brim together so they line up. Your hook should be positioned on front right corner on the side facing you.
Ch 1, insert hook under FLO of first st on edge closest to you, and BLO of first st on edge furthest from you, sl st. Continue to work through both layers across the row, turn brim a quarter turn clockwise so ends of the rows are facing up and move onto the hat body section.
Hat Body
Setup round
For this round, we’ll be working into the ends of the ribbing rows. You’ll want to make sure you work under more than one loop for each stitch, and it’s OK if sometimes you’re working under more than 2 loops. Just try to stay consistent.
Round 1: Sc in 1st row end (next row to the left of where your hook is currently attached), hdc in next row end, dc in next 7 row ends, dc2tog, *(dc in next 9 row ends, dc2tog)*, rep from * to * 4 more times. Do not join to first st. (We’re working continuous rounds.) (60 sts)
Straight rounds (no decreases)
Round 2: Dc in first st, place marker in st, then dc in remaining sts around. (60 sts)
Rounds 3-7: Rep round 2, moving your marker up into the first st of each round. (60 sts)
Crown decrease rounds
In all these rounds, continue to move your stitch marker up into the first st after you make it, and that’s true when the first st is a dc2tog also.
Round 8: *Dc in 8 sts, dc2tog*, rep from * to * 5 more times. (54 sts)
Round 9: Dc in 3 sts, dc2tog, *dc in 7 sts, dc2tog*, rep from * to * 4 more times, dc in last 4 sts. (48 sts)
Round 10: Dc2tog around. (24 sts)
Round 11: Dc2tog around. (12 sts)
Finishing
Cut yarn, leaving a long tail to sew up the top (about 8 to 10 inches).
Sew under each st, going around the circle counterclockwise. Once you’ve sewn under all of them, pull to cinch up the hole.
Insert needle down into center of hole and flip hat inside out. Sew under cinched up stitches around hole to secure a little more, then tie a knot, weave in the tail and cut the excess yarn.
Thread starting tail onto needle and weave in tail, cut excess yarn. Done!
Teen/Adult Small
Fits head circumference: 20-21″
Yarn used: 87 g (folded brim)/ 63 g (unfolded)
This is the size shown in the video.
Brim
Ch 26 for a folded brim, or ch 13 for a brim that is not folded.
Row 1: Sc in back bump of 2nd ch from hook and rest of chains, ch 1, turn. (25 sts for folded, 12 sts for unfolded)
Row 2: Sc in BLO of every st, ch 1, turn.
Rows 3-69: Rep row 2. Finished brim should measure about 17.25″ long unstretched.
Bring the two short ends of the brim together so they line up. Your hook should be positioned on front right corner on the side facing you.
Ch 1, insert hook under FLO of first st on edge closest to you, and BLO of first st on edge furthest from you, sl st. Continue to work through both layers across the row, turn brim a quarter turn clockwise so ends of the rows are facing up and move onto the hat body section.
Hat Body
Setup round
For this round, we’ll be working into the ends of the ribbing rows. You’ll want to make sure you work under more than one loop for each stitch, and it’s OK if sometimes you’re working under more than 2 loops. Just try to stay consistent.
Round 1: Sc in 1st row end (next row to the left of where your hook is currently attached), hdc in next row end, dc in next 19 row ends, dc2tog, *(dc in next 21 row ends, dc2tog)*, rep from * to * 1 more time. Do not join to first st. (We’re working continuous rounds.) (66 sts)
Straight rounds (no decreases)
Round 2: Dc in first st, place marker in st, then dc in remaining sts around. (66 sts)
Rounds 3-7: Rep round 2, moving your marker up into the first st of each round. (66 sts)
Crown decrease rounds
In all these rounds, continue to move your stitch marker up into the first st after you make it, and that’s true when the first st is a dc2tog also.
Round 8: *Dc in 9 sts, dc2tog*, rep from * to * 5 more times. (60 sts)
Round 9: Dc in 4 sts, dc2tog, *dc in 8 sts, dc2tog*, rep from * to * 4 more times, dc in last 4 sts. (54 sts)
Round 10: *Dc in 7 sts, dc2tog*, rep from * to * 5 more times. (48 sts)
Round 11: Dc2tog around. (24 sts)
Round 12: Dc2tog around. (12 sts)
Finishing
Cut yarn, leaving a long tail to sew up the top (about 8 to 10 inches).
Sew under each st, going around the circle counterclockwise. Once you’ve sewn under all of them, pull to cinch up the hole.
Insert needle down into center of hole and flip hat inside out. Sew under cinched up stitches around hole to secure a little more, then tie a knot, weave in the tail and cut the excess yarn.
Thread starting tail onto needle and weave in tail, cut excess yarn. Done!
Adult Medium
Fits head circumference: 21-22.5″
Yarn used: 93 g (folded brim)/ 68 g (unfolded)
Brim
Ch 26 for a folded brim, or ch 13 for a brim that is not folded.
Row 1: Sc in back bump of 2nd ch from hook and rest of chains, ch 1, turn. (25 sts for folded, 12 sts for unfolded)
Row 2: Sc in BLO of every st, ch 1, turn.
Rows 3-72: Rep row 2. Finished brim should measure about 18″ long unstretched.
Bring the two short ends of the brim together so they line up. Your hook should be positioned on front right corner on the side facing you.
Ch 1, insert hook under FLO of first st on edge closest to you, and BLO of first st on edge furthest from you, sl st. Continue to work through both layers across the row, turn brim a quarter turn clockwise so ends of the rows are facing up and move onto the hat body section.
Hat Body
Setup round
For this round, we’ll be working into the ends of the ribbing rows. You’ll want to make sure you work under more than one loop for each stitch, and it’s OK if sometimes you’re working under more than 2 loops. Just try to stay consistent.
Round 1: Sc in 1st row end (next row to the left of where your hook is currently attached), hdc in next row end, dc in next 8 row ends, dc2tog, *(dc in next 10 row ends, dc2tog)*, rep from * to * 4 more times. Do not join to first st. (We’re working continuous rounds.) (66 sts)
Straight rounds (no decreases)
Round 2: Dc in first st, place marker in st, then dc in remaining sts around. (66 sts)
Rounds 3-7: Rep round 2, moving your marker up into the first st of each round. (66 sts)
Crown decrease rounds
In all these rounds, continue to move your stitch marker up into the first st after you make it, and that’s true when the first st is a dc2tog also.
Round 8: *Dc in 9 sts, dc2tog*, rep from * to * 5 more times. (60 sts)
Round 9: Dc in 4 sts, dc2tog, *dc in 8 sts, dc2tog*, rep from * to * 4 more times, dc in last 4 sts. (54 sts)
Round 10: *Dc in 7 sts, dc2tog*, rep from * to * 5 more times. (48 sts)
Round 11: Dc2tog around. (24 sts)
Round 12: Dc2tog around. (12 sts)
Finishing
Cut yarn, leaving a long tail to sew up the top (about 8 to 10 inches).
Sew under each st, going around the circle counterclockwise. Once you’ve sewn under all of them, pull to cinch up the hole.
Insert needle down into center of hole and flip hat inside out. Sew under cinched up stitches around hole to secure a little more, then tie a knot, weave in the tail and cut the excess yarn.
Thread starting tail onto needle and weave in tail, cut excess yarn. Done!
Adult Large
Fits head circumference: 23-24″
Yarn used: 101 g (folded brim)/ 73 g (unfolded)
Brim
Ch 26 for a folded brim, or ch 13 for a brim that is not folded.
Row 1: Sc in back bump of 2nd ch from hook and rest of chains, ch 1, turn. (25 sts for folded, 12 sts for unfolded)
Row 2: Sc in BLO of every st, ch 1, turn.
Rows 3-78: Rep row 2. Finished brim should measure about 19.5″ long unstretched.
Bring the two short ends of the brim together so they line up. Your hook should be positioned on front right corner on the side facing you.
Ch 1, insert hook under FLO of first st on edge closest to you, and BLO of first st on edge furthest from you, sl st. Continue to work through both layers across the row, turn brim a quarter turn clockwise so ends of the rows are facing up and move onto the hat body section.
Hat Body
Setup round
For this round, we’ll be working into the ends of the ribbing rows. You’ll want to make sure you work under more than one loop for each stitch, and it’s OK if sometimes you’re working under more than 2 loops. Just try to stay consistent.
Round 1: Sc in 1st row end (next row to the left of where your hook is currently attached), hdc in next row end, dc in next 9 row ends, dc2tog, *(dc in next 11 row ends, dc2tog)*, rep from * to * 4 more times. Do not join to first st. (We’re working continuous rounds.) (72 sts)
Straight rounds (no decreases)
Round 2: Dc in first st, place marker in st, then dc in remaining sts around. (72 sts)
Rounds 3-7: Rep round 2, moving your marker up into the first st of each round. (72 sts)
Crown decrease rounds
In all these rounds, continue to move your stitch marker up into the first st after you make it, and that’s true when the first st is a dc2tog also.
Round 8: *Dc in 10 sts, dc2tog*, rep from * to * 5 more times. (66 sts)
Round 9: Dc in 4 sts, dc2tog, *dc in 9 sts, dc2tog*, rep from * to * 4 more times, dc in last 5 sts. (60 sts)
Round 10: *Dc in 8 sts, dc2tog*, rep from * to * 5 more times. (54 sts)
Round 11: Dc in 3 sts, dc2tog, *dc in 7 sts, dc2tog*, rep from * to * 4 more times, dc in last 4 sts. (48 sts)
Round 12: Dc2tog around. (24 sts)
Round 13: Dc2tog around. (12 sts)
Finishing
Cut yarn, leaving a long tail to sew up the top (about 8 to 10 inches).
Sew under each st, going around the circle counterclockwise. Once you’ve sewn under all of them, pull to cinch up the hole.
Insert needle down into center of hole and flip hat inside out. Sew under cinched up stitches around hole to secure a little more, then tie a knot, weave in the tail and cut the excess yarn.
Thread starting tail onto needle and weave in tail, cut excess yarn. Done!
Adult X-Large
Fits head circumference: 24-25″
Yarn used: 111 g (folded brim)/ 82 g (unfolded)
Brim
Ch 26 for a folded brim, or ch 13 for a brim that is not folded.
Row 1: Sc in back bump of 2nd ch from hook and rest of chains, ch 1, turn. (25 sts for folded, 12 sts for unfolded)
Row 2: Sc in BLO of every st, ch 1, turn.
Rows 3-84: Rep row 2. Finished brim should measure about 21″ long unstretched.
Bring the two short ends of the brim together so they line up. Your hook should be positioned on front right corner on the side facing you.
Ch 1, insert hook under FLO of first st on edge closest to you, and BLO of first st on edge furthest from you, sl st. Continue to work through both layers across the row, turn brim a quarter turn clockwise so ends of the rows are facing up and move onto the hat body section.
Hat Body
Setup round
For this round, we’ll be working into the ends of the ribbing rows. You’ll want to make sure you work under more than one loop for each stitch, and it’s OK if sometimes you’re working under more than 2 loops. Just try to stay consistent.
Round 1: Sc in 1st row end (next row to the left of where your hook is currently attached), hdc in next row end, dc in next 10 row ends, dc2tog, *(dc in next 12 row ends, dc2tog)*, rep from * to * 4 more times. Do not join to first st. (We’re working continuous rounds.) (78 sts)
Straight rounds (no decreases)
Round 2: Dc in first st, place marker in st, then dc in remaining sts around. (78 sts)
Rounds 3-7: Rep round 2, moving your marker up into the first st of each round. (78 sts)
Crown decrease rounds
In all these rounds, continue to move your stitch marker up into the first st after you make it, and that’s true when the first st is a dc2tog also.
Round 8: *Dc in 11 sts, dc2tog*, rep from * to * 5 more times. (72 sts)
Round 9: Dc in 5 sts, dc2tog, *dc in 10 sts, dc2tog*, rep from * to * 4 more times, dc in last 5 sts. (66 sts)
Round 10: *Dc in 9 sts, dc2tog*, rep from * to * 5 more times. (60 sts)
Round 11: Dc in 4 sts, dc2tog, *dc in 8 sts, dc2tog*, rep from * to * 4 more times, dc in last 4 sts. (54 sts)
Round 12: *Dc in 7 sts, dc2tog*, rep from * to * 5 more times. (48 sts)
Round 13: Dc2tog around. (24 sts)
Round 14: Dc2tog around. (12 sts)
Finishing
Cut yarn, leaving a long tail to sew up the top (about 8 to 10 inches).
Sew under each st, going around the circle counterclockwise. Once you’ve sewn under all of them, pull to cinch up the hole.
Insert needle down into center of hole and flip hat inside out. Sew under cinched up stitches around hole to secure a little more, then tie a knot, weave in the tail and cut the excess yarn.
Thread starting tail onto needle and weave in tail, cut excess yarn. Done!
Care Instructions
So how do you wash this thing, anyway?
Here’s my low-maintenance advice, coming from a busy mom whose laundry philosophy is mostly “did it survive?”:
Machine wash cold on a gentle cycle and tumble dry low.
This yarn is acrylic, which is basically plastic, so heat is the one thing that will really hurt it. A hot dryer leaves the fabric limp and stretched out, and your brim won’t spring back the way it should.
It’s anti-pilling yarn, so it should stay smooth instead of going fuzzy after a few washes. Toss it in a mesh laundry bag or wash it with soft things, because zippers and hooks will snag your stitches.
Want the Printable Version?
Every size is right here in this post, completely free. You don’t need to buy anything to make this hat.
But if you’d rather have it on paper without scrolling past ads, the printable PDF has all 10 sizes written out start to finish, the full size chart, and both brim options, all laid out to print.
In Conclusion
I hope you enjoyed this free crochet beanie pattern!
Once the brim is done, the rest of this hat really flies. The body is just double crochet around and around, and the crown is over in a handful of rounds.
And please measure that head before you start. It really is the difference between a hat that fits and one that goes in a drawer.
If you make one I would love to see it!
Tag me on social media or share a picture of your makes in the Yarn Stash Facebook community!
Looking for more crochet fun? Check out these recent posts!