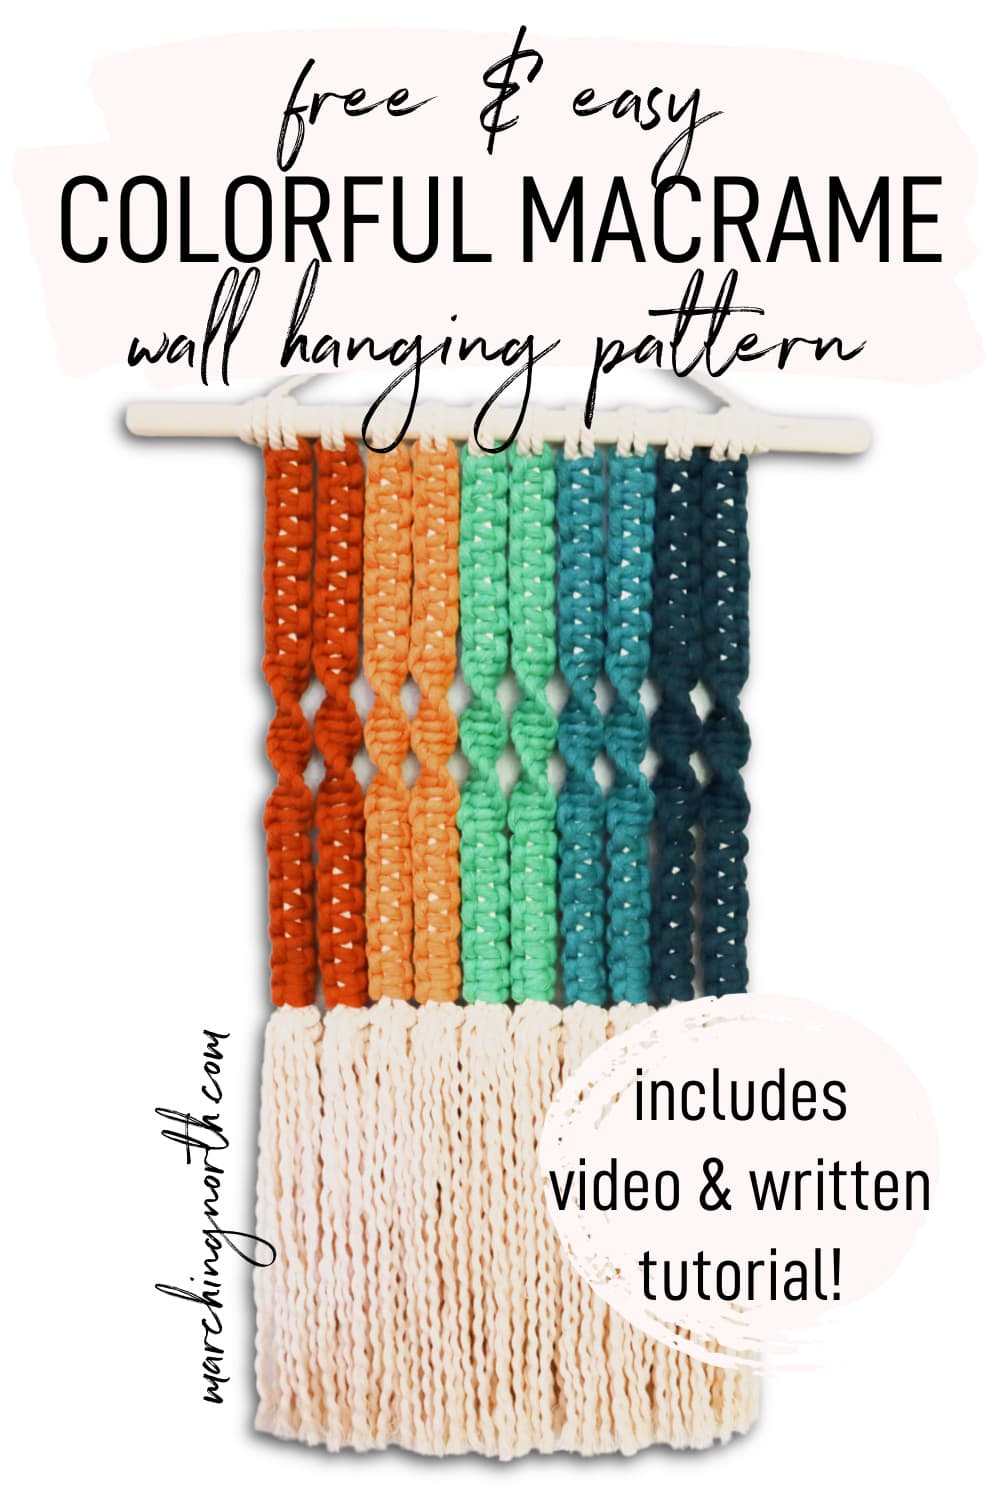
Easy & Colorful Macrame Wall Hanging (Free Pattern and Tutorial!)
Learn how to make this colorful and simple macrame piece that will look perfect in your living room with this step-by-step tutorial and video!
Want to remember this? Post this Colorful Macrame Wall Hanging tutorial to your favorite DIY Pinterest board!
(This post may contain affiliate links. If you click one and make a purchase, I may receive a small commission at no extra cost to you. Read the disclaimer here. Thank you for your support!)
This macrame pattern is a very beginner friendly home decor project that uses a few simple knots, a wooden dowel and some cotton macrame cord.
The knots we’ll be using in this free DIY macrame wall hanging pattern are:
- lark’s head knot
- square knots
- half knot spirals
- double half hitch knots
- Rya knots
Before we get started, if you don’t know some of these knots (or any of them)- I got you covered!
Check out my ultimate guide to all the basic macrame knots right here. You can even grab my free illustrated guide to the 5 most important knots while you’re there.
Looking to upgrade your macrame skills beyond the basic knots?
Check out my step by step macrame knot ebook!
It’s a must have for every macrame artist that wants to create their own works of art.
Get your copy of 60 Macrame Knots & Knot Patterns eBook today!
Click here to find out more about this helpful macrame knot book that features step by step photo tutorials for 60 different macrame knots and knot patterns!
It’s a perfect resource to help you take your macrame creations to the next level.

Where to Get Macrame Supplies
My favorite place to buy cord for macrame projects is from a shop called Niroma Studio.
They’re always having great sales and the quality of their cord is top notch!
If you’re looking for suggestions on macrame supplies, check out my post here with all of my favorite supplies and where I get them.
Supplies You’ll Need
- 12″ wooden dowel (1/2″ diameter)
- 5 mm cotton macrame rope in the following lengths:
- 10 pieces @ 46″ long
- 1 piece @ 20″ long
- 20 pieces @ 25″ – 30″ long (for fringe – length depends on how long you want your fringe to be, you can also use up scrap cord here!)
- 5 mm single strand cotton string in however many colors you want (I used 5)
- total of 10 pieces @ 108″ long (I used 2 pieces of each color)
- large eye needle
- scissors
Video Tutorial
You can check out the step by step video tutorial for this project over on my YouTube channel.
Don’t forget to subscribe so you don’t miss any of my new videos!
Free and Easy Colorful Macrame Wall Hanging Free Pattern
Step 1: Attach cords to the dowel
Take one of your 10 pieces of 5 mm cord, fold it in half and attach it to the wooden dowel using a lark’s head knot.
Repeat that with the rest of the cords, attaching them all with lark’s head knots and space them out evenly.
Step 2: Add colorful cord
Flip the whole thing around to the other side, and loosen the lark’s head knot on the far left.
Take one of your pieces of colorful cord (whichever color you want to start with, I went with brown), fold it in half and thread it through the lark’s head knot.
Tighten the knot back up.
You’re going to use the colorful cord as the working cords and the natural colored cord will be the filler cord for your square knot/spiral knot sennit.
Step 3: Tie main knots
Using the colorful cord, tie 7 square knots stacked on top of each other.
Now tie 12 spiral half knots stacked on each other under the square knots.
Last, tie 7 more square knots under the spiral knots.
Repeat that whole process for each of the cords.
If you want to get an ombre effect like mine, use 2 cords of each color going across with 5 colors all together.
Step 4: Weave in ends
Once all the knots have been tied, flip your work around to the back.
Grab your large eye needle or a crochet hook, and thread the colorful ends up under the bottom two square knots to tuck them in.
Repeat that for all the sennits, and then cut the excess colorful cord, leaving the filler cords hanging out at the bottom.
Step 5: Double half hitch knot section
Grab your 20″ piece of natural cord, and use it as the filler cord for a row of double half hitch knots going across under the square knots.
Leave about an inch of space between the double half hitch row and the square knots so we can add some fringe.
Step 6: Add fringe
Grab your 20 pieces of 25″ to 30″ cord and we’re going to attach them in the space we left using Rya knots.
Use one piece and attach it with a Rya knot to the far left pair of cords.
Then attach another piece with another Rya knot right above that so the two pieces of fringe are stacked on top of each other for the second row.
Repeat that across, attaching 2 pieces of fringe with Rya knots to each pair of filler cords.
After you get all the Rya knot fringe done, flip your piece around and tuck the ends of the filler cord from the double half hitch row under a knot or two and cut off the excess cord.
Step 7: Trim and finish up
Once you get all the fringe attached, it’s time to trim it up.
I used a guide line to get nice straight fringe, and you can see more details about how to do that in this post.
After you cut it the way you want it, you can untwist the rope and if you want to brush it you can do that now as well.
I prefer to untwist it and leave it like that, brushed out fringe is a little to high maintenance for me, lol.
Done!
I hope you enjoyed this simple project and make one of these lovely macrame wall hangings!
If you made one of these, please share a picture over on Instagram and tag me @marchingnorth so I can take a look. I love seeing all of your awesome creations!
By the way, be sure to check out my Facebook group, Macrame for Beginners and Beyond with Marching North.
It’s a wonderful supportive group and such a fun place to share pictures of your latest creations!
Join the Macrame for Beginners and Beyond Facebook Group!
If you’re new to macrame or if you’ve been knotting for a while, connecting with other macrame lovers is always a great idea!
Come check out our Facebook group, Macrame for Beginners and Beyond. It’s a friendly community where you can ask questions, get inspiration, and share your awesome work with other macrame lovers! Come join the conversation today!
If you’re looking for more easy macrame projects, check out the tutorials below and click the macrame menu at the top of the page under the Tutorials tab to see all the free patterns available on my site!