DIY Mini Checkered Macrame Wall Hanging Free Pattern
Let me show you how to make a really cool and easy checkered macrame wall hanging in this step-by-step tutorial!
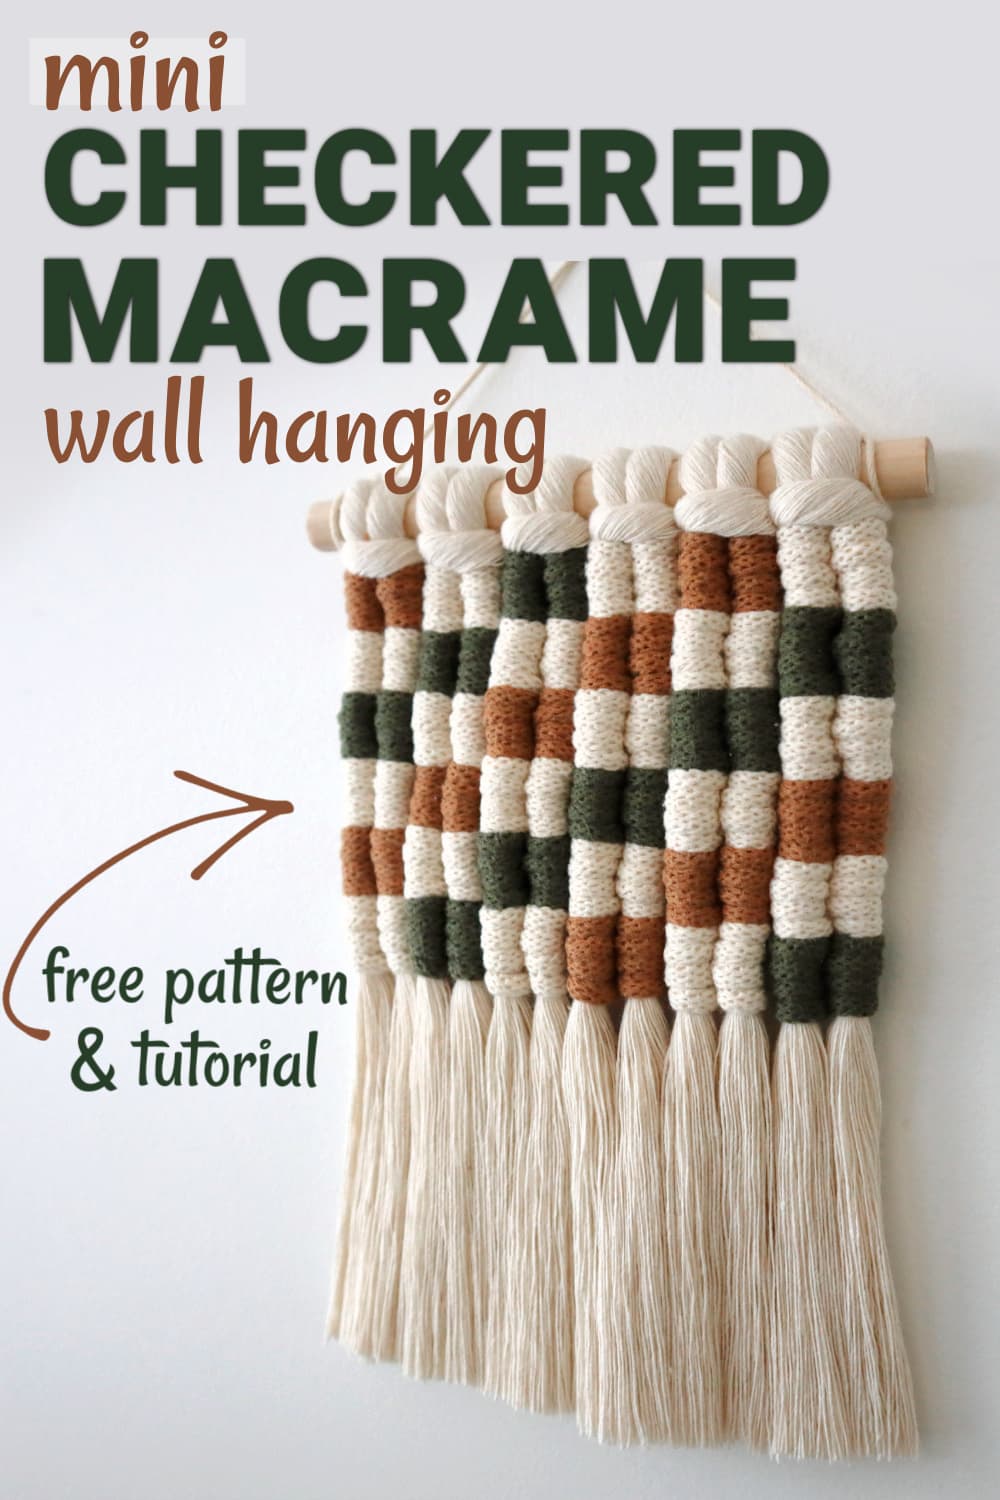
This free macrame pattern uses a whole 2 knots, and it’s a great way to add some trendy checkered vibes to a small space on your wall.
Want to remember this? Post this mini checkered macrame wall hanging tutorial to your favorite DIY Pinterest board!
(This post may contain affiliate links. If you click one and make a purchase, I may receive a small commission at no extra cost to you. Read the disclaimer here. Thank you for your support!)
If you’ve never tried pixel macrame before, this is an easy way to learn how it’s done and upgrade your macrame skills.
You could make a whole bunch of these mini macrame wall hangings and place them all over your house. I think this small macrame wall hanging would look really nice on a gallery wall.
Or if you have a random tiny spot on your wall that’s too small for anything, that’s a great place to squeeze in this cute little macrame piece.
Learn all the important macrame knots (the easy way)
If you’re new to macrame and need to learn the basic macrame knots, I’ve got you covered!
Check out this step-by-step beginner’s guide to all the simple knots you’ll need to know to get started, including:
- larks head knot
- square knot
- spiral knot
- half-hitch knots
- double half hitch knots
- vertical double half hitch knot (that’s the one we’re using for this wall hanging!)
- and all the other most common knots!
Most macrame projects are made of 2 or 3 knots, and I’ll show you all of them (and more) in this tutorial.
Plus, there’s a free printable guide with pictures and stuff! You gotta check it out.

Supplies You’ll Need
- 6 inch dowel (1/2″ diameter)
- Filler Cords: 8 or 9 mm single strand cotton string (or you can use smaller string that’s doubled or tripled up if you don’t have that size on hand)
- 6 pieces @ 26″ long
- Working Cords: 5 mm braided cotton cord (I used Bobbiny)
- Natural
- 3 pieces @ 67″ long (that’s how long my arm span is, so if yours is similar you can just use that as your measuring device)
- 1 piece @ 26″ long
- Caramel (brown)
- 2 pieces @ 67″ long
- Avocado (green)
- 2 pieces @ 67″ long
- Natural
- Scissors
- Comb
- Yarn needle (or tapestry needle)
- Piece of string for hanging cord (I used butcher twine)
Checkered Mini Macrame Wall Hanging – Video Tutorial
Check out the video tutorial for this free pattern over on my YouTube channel, and don’t forget to subscribe so you don’t miss any new videos!
Checkered Mini Macrame Wall Hanging – Written Pattern
Step 1: Getting started
Take one of your 9 mm cords (or if you’re using doubled up pieces of smaller macrame cord, hold them together as one) and attach it to the wooden dowel using a lark’s head knot.
Repeat that with the other 5 filler cords.
Secure the dowel to your workspace so it’s not moving around the whole time you’re trying to work. I taped a couple loops of butcher twine down and used that to hold the dowel.
Step 2: Making the first square
Each square will be made with 4 diagonal double half hitch knots. Two going to the left and two going back to the right.
Start with one of your long pieces of natural cord. The first square will be up in the top right corner of the wall hanging.
Hold the cord behind the far right filler cord so the right end of the cord is sticking out to the right of the filler cord.
Wrap the long end of the working cord around the filler cord going around it in front from left to right. Bring it behind the cord above the little end that was sticking out.
Pull the cord to tighten it up, but don’t pull to hard since it’s not anchored yet. That’s the first half of the first vertical double half hitch knot.
Now, bring the long working end around again the same way, below the first half of the knot. Bring the end of the cord through the loop, then pull the long end of the cord to tighten the knot.
Also pull the short end too so it’s tightened on both sides.
Now you’ve done the first vertical double half hitch knot!
Bring the working cord over to the left and behind the next filler cord over.
Repeat the process of making a vertical double half hitch knot around the next cord.
Now we have to make 2 knots going back the other way to finish the square.
Bring the working cord behind the same filler cord we just used, and leave a loop sticking out to the left.
Wrap the cord around going from right to left, and bring the end through the loop.
Pull to tighten, and you’ll be pulling the working cord toward the right side.
Now to finish that vertical double half hitch knot, bring the working cord in front of the filler cord going from right to left, and then wrap it around and pull the end through the loop.
The last step to finish the first square is to tie one more vertical double half hitch knot around the far right filler cord.
Leave the working cord just hanging there for now, we’ll pick it up again when we start the 3rd diagonal row of squares.
Step 3: Making the rest of the squares
Now that we got the first natural square done, it’s time to do the first brown and green squares.
Row 2: To the left of the natural square, use one of the brown cords to make the next square to the left of the first one.
The process is exactly the same as the first square.
Repeat all that with a piece of the green cord underneath the natural square.
For the next row and from here on out we’ll be working in diagonal rows going from the bottom right to the top left.
Row 3: Pick up the natural cord that was hanging from the first square, and use it to tie a square under the green square.
Then pull the cord over and to the left and tie the next 2 squares going in a diagonal line.
Row 4: Grab the brown cord and tie the first square of the row on the far right under the natural square.
Then grab the green cord and tie the next square in the row, and repeat that pattern 2 more times so you have brown, green, brown, green.
Row 5: Pick up the natural cord and use it to tie a square under the brown square.
You’ll need to attach another piece of cord at this point. I tied the first half of the square and then attached a new cord on the left side.
It’s the same process as attaching the cord on the right side, but reversed.
Then pull the cord over and to the left and tie the next 4 squares going in a diagonal line.
I had just enough cord to finish this row with the one we just added.
Row 6: Start this row with the green cord and alternate brown and green for 6 squares. When your piece of cord gets too short to work with attach a new piece and continue on.
Row 7: Attach a new piece of natural cord and tie a row of 5 squares.
Row 8: Tie a row of brown and green squares, starting with a brown one.
Row 9: Attach the shorter piece of natural cord and tie a row of 3 squares with it.
Row 10: Make a row with one green and one brown square.
Row 11: Use the natural cord to tie one last natural square in the far left corner of our mini wall hanging.
Whew, you did it! High five!
Step 4: Weaving in the ends
Flip your wall hanging over and now it’s time to deal with the craziness that’s going on back there.
I’m not gonna lie, it’s a hot mess.
But no one will see this side (unless people come to your house and flip all your decor over, which is pretty weird and you should probably have a talk with them about that).
Grab your yarn needle and thread one of the cord ends onto it. Sew the end under a few loops to secure it, and then cut off the excess cord.
Repeat that with the rest of the ends, and just make sure they aren’t visible from the front.
Step 5: Brushing and cutting the fringe
Now for the fun part!
Cut the fringe in a straight-ish line. The fringe length is up to you, I just went with what felt right. No measurements needed.
Brush the fringe out really well and trim it until it’s straight, then brush it out and re-trim again obsessively until it’s perfect.
It’s a good idea to start with your fringe a little longer so your obsessive trimming doesn’t make it too short.
(I can’t be the only one with this problem, right??)
If you want, you can use some stiffening spray but I didn’t. Your call.
Step 6: Adding a hanger
I didn’t show this step because I didn’t do anything fancy, but I’ll give you a basic rundown.
Take a piece of butcher twine (or jute, or even another piece of macrame cord) and tie it with a basic double knot on one side of your dowel.
Then figure out how long you want the hanger to be and leave enough slack to account for that. Then tie the other end on the other side of the dowel with a double knot.
Trim the excess cord off, leaving about an inch or so on each side. Then glue those ends down to the back so they don’t show.
If you want to get a little fancier and have a nicer finish, you can use the constrictor knot to make a hanger.
The simple version works just fine for this though, so you do whichever one you want.
Or you could skip the hanger all together and put 2 nails in the wall and rest the dowel on those. Make sure they’re small nails since the wall hanging is little.
Hang it up and admire your awesome work! High five again!
Done!
I hope you enjoyed this free macrame wall hanging pattern!
If you make one of these, please share a pic over on Instagram and tag me @marchingnorth so I can take a look. I love seeing all of your awesome creations!
More Free Macrame Patterns for You
Looking for some more free macrame wall hanging patterns? I’ve got lots of macrame patterns to share, check out the latest ones below: