How to Make a Punch Needle Trivet | Free Pattern & Tutorial
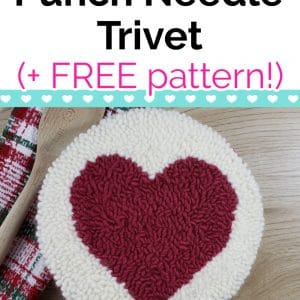
This Punch Needle Trivet is a quick, easy, and functional punch needle project. Plus, it’s super cute!

It’s simple enough for a beginner, but also a great project for a more seasoned punch needler.
This tutorial includes a free printable heart punch needle pattern for everyone who subscribes to my newsletter.
You’ll find a form at the bottom of this post if you’d like to sign up!
If you need some help with how to punch this pattern, check out my Punch Needle with Yarn tutorial. (In that post, I used the Ultra Punch to demonstrate, but the technique is the same with the large punch needles, just bigger.)
In this tutorial, I’ll show you the whole process for finishing this hot pad/trivet.
There’s a bit of hand sewing involved, but don’t be intimidated. It’s a basic whip stitch, and if I can do it you can too! (Sewing isn’t my strongest skill, but sometimes it’s necessary.)
I recommend using wool yarn for this hot pad because acrylic yarn can melt if it gets too hot. You could also use cotton bulky yarn, just make sure whatever you choose is heatproof.
Also, the felt for the bottom needs to be wool felt and not regular old craft felt. Once again, the acrylic stuff can melt at high temperatures, and that’s no fun!
I’ll link to the exact wool yarn and wool felt I used in the supply list.
Without further ado, let’s get started!
(This post may contain affiliate links. If you click one and make a purchase, I may receive a small commission at no extra cost to you. Read the disclaimer here. Thank you for your support!)
Supplies You’ll Need to Make the Punch Needle Heart Trivet
- Completed Punch Needle Heart Pattern made with this wool yarn in burgundy and cream and Monk’s cloth (free pattern available in the Resource Library)
- Aleene’s OK To Wash It fabric glue
- A sheet of white wool felt (not acrylic felt, it can melt!)
- Sewing needle and white thread
- An extra piece of burgundy wool yarn (for trim)
- Scissors
Punch Needle Heart Trivet Tutorial
Print out the pattern (get yours at the bottom of this post), transfer, and punch the design onto a piece of Monk’s cloth.
Once you have your punching done, remove it from your hoop or frame and lay it face (loop side) down on your workspace.
Squirt a line of Aleene’s Ok To Wash It glue on the Monk’s cloth around the edge.
Use a small paintbrush or your finger and spread it out, extending out about an inch and a half from the punch needle part.
Let the glue dry.
Once it’s all dry, cut the Monk’s cloth all the way around, leaving about an inch and a quarter border all the way around, give or take.
Next, cut into the Monk’s cloth border every couple of inches all the way around.
Cut almost all the way to the loops, but be careful not to cut into the holes where the loops are.
Now we’re going to fold back the tabs you just created and secure them with glue on the back of the trivet.
Before you start this, gather a few small heavy things you can set on top of the tabs to hold them down while the glue dries. (You could also use hot glue for this part, I just prefer to use fabric glue.)
Put a little glue on the back of one tab and fold it to the back of the trivet.
Pull it over snuggly, but don’t pull it back too far so that the edge rolls (you want it to lay flat when it’s finished).
Apply glue on the next tab and repeat.
I found that if I didn’t hold the tabs down for a few minutes while they dried, they wouldn’t stay down. My method was to apply glue to three or four tabs, fold them down one at a time and hold them in place.
Once I had several tabs glued I put something heavy on top to hold them down while I moved on to the next section of tabs.
After they’re all glued down and weighted with heavy objects, let the trivet dry. I waited a few hours while I went and did other stuff.
When it’s dry, lay it face-up on top of the piece of felt.
Use a pen or pencil to trace around the trivet on the felt. Make the felt circle about ⅛” larger than the trivet. Cut out the circle with your scissors.
Flip the trivet over and apply more fabric glue all over the back.
Spread it around, and then center the felt and press it down to secure it. Make sure the side of the felt with tracing marks is the side being glued down.
Let the glue dry for a few minutes.
Thread your needle and sew all the way around the edge. I used a basic whip stitch. Keep it neat because it will be visible on the bottom once the project is complete.
You’ll probably need to rethread your needle a few times, I did twice.
Hint: when you have to rethread your needle, hide the knot in between the layers of felt and Monk’s cloth by sewing down into the felt from in between the layers before you start the whip stitch.
Once it’s all sewn, it’s time to glue on the trim.
Run a bead of fabric glue around the edge where the felt and loops meet.
Only glue a few inches at a time and press the piece of red wool neatly onto the bead of glue.
Carefully continue gluing the yarn all the way around.
When you reach the end, cut the yarn so it meets the other piece without overlapping (but without a gap) and glue it down well.
Aleene’s Ok to Wash It dries clear so it’s ok if some is showing, just don’t go too nuts.
Let the punch needle trivet dry completely.
Ta-Da!
You just made a Punch Needle Heart Trivet!
This technique can be used to make all sorts of trivets and hot pads. I love using the wool felting yarn for this project.
If your Punch Needle trivet gets dirty, spot clean it as best you can. You can also wash this trivet in cold water. To be extra careful, hand wash it.
I’ll do a little experimenting with mine and see how it does in the washer and let you know the results.
Related Posts
- Punch Needle for Beginners Tutorial
- Punch Needle Tips You Need to Know BEFORE You Try It
- Adorable Punch Needle Earrings Tutorial
Thank you so much for the PUNCH NEEDLE TRIVET pattern! I like to give small gifts to my friends for no particular reason and this just fits. It doesn’t have to be just for Valentines Day.
When I read through your instructions and excellent photos I said to myself – now for this you will need to practice patience!! Glue it, hold it in place, put weighted objects on it to hold it etc… It is just common sense but it’s so pretty I just want to make and admire it. First though, I need to get supplies. Thank you as well for the punchneedle supply checklist that I can print and take to my local craft shop. If they don’t carry them I will go online and order them. Glad I’ve got some time off to do this project. It really excites me to be able to try it out. I saw it done years ago but never got the details on “how to” — thanks to you I now have them. 🙂
I have signed up, subscribcribed and what ever else you asked at least three times and still cannot get to your resource library. I never got to the heart pattern for the trivet. Don’t know how to go forward. Is your site not working properly ? I used the code that was given to me in my email from you.
I’m so sorry you’re having trouble getting in! Try selecting the password in the email, copying and then pasting it into the password field on the Resource Library page. I hope this helps! It’s working properly, I tested it to make sure!