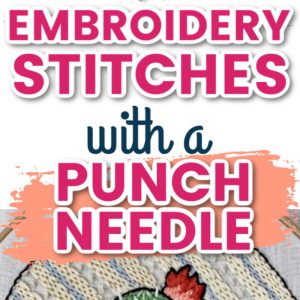
How to do Embroidery Stitches with a Punch Needle
Did you know you can do embroidery stitches with a punch needle? You can!
Traditionally, the looped side is the “right” side in punch needle embroidery, but the flat side also can look really cool.
Technically there’s no “right side” anyway, you can do whatever you want as long as it works.
In this tutorial, I’m going to show you a few techniques I use to do embroidery with the Ultra Punch needle that resembles a long and short stitch commonly seen in hand embroidery.
Check out some patterns in my shop that use this technique!
Don’t forget to pin this for later!

What’s the benefit of doing punch needle embroidery vs hand embroidery?
That’s a good question!
Doing this stitch with a punch needle is fast and it uses a bit less embroidery floss since there’s not as much floss on the back of the work (although the amount saved probably isn’t a lot).
I love the look of hand embroidery, but if you are more comfortable with punch needle this is a great technique to try.
In the video below, I did the spines of the cactus with hand embroidery stitches because there’s just not a good way to do that with a punch needle.
It’s fun to mix the different techniques together for more texture.
One of my favorite ways to add texture is doing rows of loops with a lot of space between them. In the picture above you can see where I did that between the diagonal stripes.
It comes out looking sort of like a row of French knots.
If you want to do this type of embroidery on anything that will need to be washed or abused, like a pillow or shirt, I’d recommend just sticking to regular hand embroidery.
I’ll explain why in more detail down below.
Can you do embroidery stitches with larger punch needles?
I’ve only done this style of punch needle with the Ultra Punch at this time, but that doesn’t mean it’s the only way.
This should work with larger punch needles (like the Oxford) and bulky yarn/Monk’s cloth as well.
One of the fun parts of punch needle is playing around with different techniques and materials.
Eventually, I’ll test this out with my large punch needle and I’ll let you guys know how it goes!
If you have tried embroidery stitches with a large punch needle, let us know in the comments!
(This post may contain affiliate links. If you click one and make a purchase, I may receive a small commission at no extra cost to you. Read the disclaimer here. Thank you for your support!)
Supplies you’ll need to do embroidery stitches with your punch needle
Check out the video below for a full tutorial.
While you’re there, take a minute to subscribe to my YouTube channel! I post new crafty tutorials every week.
Thanks for your support!
Some Punch Needle Tips to Keep in Mind:
#1: Using the right fabric is crucial.
I’m using weaver’s cloth in this tutorial, and it works really well because of the tight weave.
You can probably do this with other fabrics too, but they have to have a similar tight weave.
#2: Keep the stitches pretty short.
You don’t want to make your stitches too long, I try to keep mine around a 1/2 to 3/4 inch at the longest.
If you do want to make longer stitches, you’ll need to hold the loop in place on the back each time you pick up your punch needle.
You can do that and make extra long stitches that look like a satin stitch.
I personally haven’t had a whole lot of luck with that technique and prefer to just do an actual satin stitch with a needle and thread, but that’s just me.
#3: Save this for decor items.
I don’t recommend punching like this on anything that will be used and abused, or anything that will need washing.
Save it for wall decor and things like that.
Why? Traditional style punch needle is stronger and more secure because of the tension caused by the stitches pushing against each other in the fabric.
With this embroidery punching technique, there are fewer loops in the fabric and therefore less tension and less security.
#4: Glue is your friend.
It doesn’t hurt to add some glue to the back, especially when the loops on the back are really far apart.
I don’t glue the whole back usually, but I do add some to the spaced-out parts, just in case.
In Summary
I hope you enjoyed this tutorial and will try doing embroidery stitches with your punch needle.
If you do, please share a picture of it on Instagram and tag me @marchingnorth so I can see!
Related Posts
- How to do Punch Needle on Jeans // Tutorial + Video
- DIY Punch Needle Threaders // Tutorial + Video
- 13 Awesome Punch Needle Kits!
- DIY Macrame Market Bag // Tutorial + Video
Thank you for not sharing my e. Mail address.
Don’t worry, I won’t!
Would like to find a needle punch group to join. I feel more confident if I am doing things with other people. Any ideas. Live in Cheshunt, Hertfordshire.
I’m not sure about groups that are local to you (I’m in the US) but you could join our punch needle Facebook group! I know it’s not in person, but it’s still pretty fun 🙂 https://www.facebook.com/groups/modernpunchneedlewithyarn
I have done some punch needle before, but the most
Beautiful work I seen buy a Friend awhile visiting Brazil,
Was a bath towel she added a friends name. Since the different color of
the name of that person just stud out against the loops from the bath towel
In the back she covered the stitches with a pice of material to match the
Towel
I wish I could have found tutorials like this when I was first learning. I’m still learning and it’s all helps but punch needle is finally being recognized as a real hobby. I love it. I hope to do it until I dial