DIY Macrame Mason Jar Hanger | Free Pattern + Video!
Learn how to make a cute and simple macrame mason jar hanger with this free pattern and step by step tutorial!
Don’t forget to pin this for later!
(This post may contain affiliate links. If you click one and make a purchase, I may receive a small commission at no extra cost to you. Read the disclaimer here. Thank you for your support!)
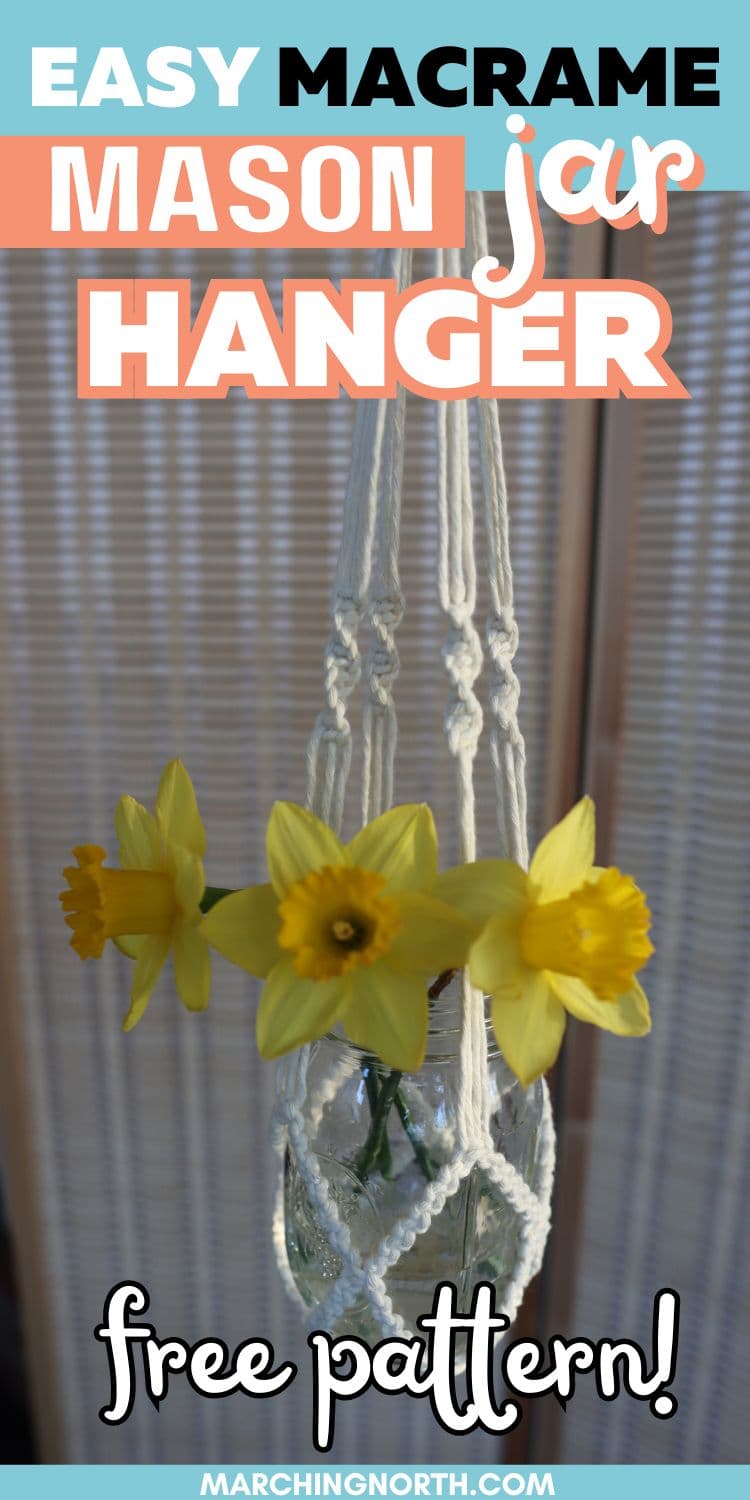
It’s officially spring, and the daffodils in my yard are blooming like crazy.
Don’t you just love that time of year?
It’s been a cold, dreary, weirdly windy winter (say that 10 times fast) and I’m just so ready to put that behind us all and get back to complaining about how hot it is.
Amiright??
All joking aside (and yes I was joking, I’m actually thrilled warm weather is on it’s way), those daffodils inspired me to make this cute macrame mason jar holder so I had somewhere cute to hang them.
So, let’s dive in and make it!
Below, you’ll find the free pattern and the video tutorial.
If you’re new to macrame and want to learn the basic knots, I can help you with that!
Also, be sure to sign up below for my free printable PDF knot guide so you can keep it handy while you’re working on your projects!
More Macrame Plant Hanger Patterns
I’ve got a whole lot of free macrame plant hanger patterns for you to try, here are a few to get you started:
- Easy 3 Arm Spiral Macrame Plant Hanger (Free Pattern + Video!)
- Free DIY Macrame Plant Hanger Pattern (Low Key & Tassel Free!)
- How to Make a Simple Macrame Plant Hanger (Easy Tutorial!)
- How to Make a Double Macrame Plant Hanger (Tutorial & Video!)
Macrame Mason Jar Hanger Tutorial
Supplies You’ll Need
- 2 mm single strand macrame string
- 1″ keychain ring (or you could use a 2″ wooden ring if that’s what you have on hand)
- scissors
- masking tape (to hold your work down)
- measuring tape
Cut List
- 8 pieces @ 86 inches long (218.44 cm)
- 1 piece @ 20 inches long (50.8 cm)
Video Tutorial
Check out the tutorial video for this macrame ornament on my YouTube channel, and don’t forget to subscribe!
STEP 1:
Take one of your 86 inch long cords, fold it in half evenly to find the center and lay it on your desk.
Now, attach 6 of the other 86″ cords to the center part of that first cord using larks head knots.
Cross the two ends of the holding cord to form a loop.

Now attach the last cord with a larks head knot right in the center of where the two ends cross.
Pull the ends of the hanging cord to cinch up the loop and tighten that last larks head knot up.
STEP 2:
For this part, I taped my work down to the bottom of the mason jar so I could make sure I space the square knots out just right and covered the bottom of the jar.
Starting with the two cords that you pulled to cinch up the circle as the working cords, and the two cords in between them as the filler cords, tie a square knot.
That will lock it in to place so it doesn’t keep loosening on you.
Then go around the loop and tie 3 more square knots with the other sets of 4 cords.
For the next row, we’ll be alternating from the first row, so grab 2 cords from one knot, and two cords from the next knot over and tie a square knot about a half inch or so away from the first row.
Repeat that around so you have 4 square knots total.
For the 3rd row of square knots, you’ll do the same thing, but leave a little bit more space from the previous row. You want these square knots to be right at the edge of the mason jar bottom.
Repeat that around, tying 4 square knots all together.
You can take your work off the mason jar now and just tape it down to your desk.
Starting on any side you want, grab the 2 left cords coming out of one of the square knots.
Tie 12 alternating half hitch knots with those 2 cords.
To do that, you’ll take the left cord and cross it over the right cord in a “4” shape.
Then wrap the end of the crossed over cord around the other one and bring the end through the loop of the “4”.
Pull it to tighten it up all the way up by the square knot.
For the next knot, do the same thing but in reverse. So you’ll cross the right cord over the left cord in a reverse “4” shape. Wrap it around and bring the end through the loop.
Pull it to tighten it up the same way.
That’s 2 alternating half hitch knots, so just repeat that process back and forth until you have 12 all together.
For the two cords coming out of the right side of the same square knot, you’ll do the same thing.
I like to start with the reverse “4” half hitch knot first, just because it makes me feel like all is right with the world.
So repeat that around until you have 8 little sections with 12 alternating half hitch knots each.
Grab one of the half hitch sections that’s coming out of the right side of a square knot, and then also grab the half hitch section to the right of that.
Join them together with a square knot right up next to the alternating half hitches you just tied.
Repeat that around. You’ll tie 4 square knots all together.
Alright, we’re going to repeat all that again. First do the alternating half hitch knot sections just like you did earlier.
Then join them with a square knot exactly the same way as before.
Tape your plant hanger basket upside down with the working cords facing you.
Take one of the arms (the 4 cords coming out of one of the last square knots you tied) and measure down 5 inches.
At that 5 inch mark, tie 12 spiral half knots.
A spiral half knot is the same as a square knot, but instead of switching sides, you just keep tying the first half of the square knot over and over again.
So one half knot = one spiral knot.
(BTW, this all of these knots are included in my free knot guide I mentioned earlier, so if you don’t know them yet, go grab that. Don’t worry, I’ll wait. 🙂
Anyway, tie 12 of them. Then repeat that with the other 3 arms.
I recommend lining up the square knot from each arm and taping all the arms down right where you need to tie the spiral knots before you tie the rest. That way it’s all nice and straight.
Now we need to attach our ring to the top. But first, take a minute to organize all the cords so it doesn’t get all weird and crazy. Trust me, it’ll look better if you straighten them all out first.
Then, shove all the cords through your ring of choice.
I used a 1 inch keychain ring, but you can also use a wooden ring or whatever you have on hand. Just make sure it’s sturdy.
Fold the cords over and tape them down so they stay in place.
Now you’re going to grab your 20 inch long piece of cord, and use it to tie a wrapping knot just under the ring around all the cords.
(That’s another one of the knots in my free knot guide if you don’t know how to do that one yet.)
Once you get the wrapping knot tied, go ahead and trim the wrapping knot cords and tuck them in.
The last step we have to do is tie overhand knots in the ends of the cords up fairly close to the wrapping knot.
Trim the excess cord just under the overhand knots and your mason jar hanger is done!
In Conclusion
I hope you enjoyed this macrame macrame mason jar hanger pattern and will make one to display your favorite flowers, plants or whatever you want to display!
Looking for more macrame patterns to try?