DIY Macrame Sunflower Wall Hanging (Tutorial & Video!)
Learn how to make an easy floral macrame wall hanging in this step by step tutorial and video!
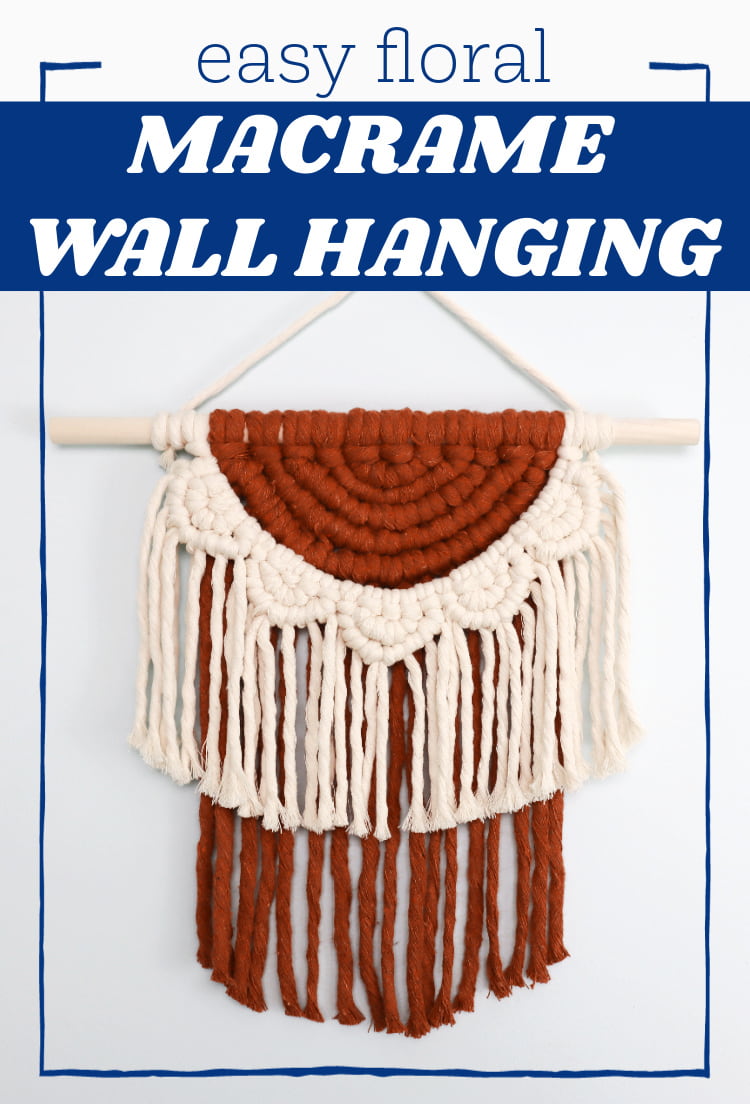
Want to remember this? Post this Macrame Flower Wall Hanging tutorial to your favorite DIY Pinterest board!
(This post may contain affiliate links. If you click one and make a purchase, I may receive a small commission at no extra cost to you. Read the disclaimer here. Thank you for your support!)
I actually came up with the pattern for this wall hanging two Christmas’s ago when I was making some DIY gifts. After I shared a picture on Instagram, several people asked me for a tutorial, so I finally got around to making it.
This is an easy DIY pattern, and it’s made using lark’s head knots and double half hitch knots.
The finished design looks like half of a large flower hanging on your wall. It’s a super cool pattern and the perfect addition to your living room wall decor!

If you want to customize this wall hanging with some bolder accents, you could try adding some silk flowers using hot glue. Or you could thread the stems of the faux flowers down through some of the strands of rope.
The finished wall hanging would be beautiful as decor for a bridal shower or as a birthday gift!
If you’re new to macrame, you can learn those knots and other important basic knots (like the square knot and wrapping knot) over in my Basic Macrame Knots for Beginner’s post!
Looking for More Free Macrame Wall Hanging Patterns?
Check out this list of 16 free macrame wall hanging patterns with video tutorials and written instructions!
Supplies You’ll Need
- 7 mm single strand macrame cord (I used the color Rust) in the following lengths:
- 9 pieces @ 67″ long
- 5 mm single strand macrame cord (natural) in the following lengths
- 1 piece @ 43″ long
- 15 pieces @ 34″ long
- 5 pieces @ 24″ long
- 1/2″ wooden dowel (12″ long)
- sharp scissors
DIY Macrame Flower Wall Hanging Tutorial
Step 1: Make the center of the flower
Attach 2 pieces of the 7mm cord to the center of the dowel using lark’s head knots.
Use the left cord as the filler cord and tie 3 double half hitch knots going to the right.
Take the end of the filler cord and bring it in front of and over the dowel. Bring the end through the loop.
Take the end of the cord again and bring it up behind and over the dowel. Bring it through the loop and tighten.
For the rest of the pattern, I’m going to refer to this knot as a one sided lark’s head knot.
Attach another piece of 7mm cord to the dowel on the right side with a lark’s head knot.
Use the right cord as the filler cord and tie a row of double half hitch knots going all the way to the left. Attach the filler cord to the dowel with a one sided lark’s head knot.
Attach another piece of 7mm cord to the dowel on the left side with a lark’s head knot. Use the left cord as the filler cord and tie 3 double half hitch knots.
Now we’re going to attach another piece of cord to the filler cord to fill in the gap. Take another piece of 7mm cord and fold it in half. Attach it to the filler cord with a reverse lark’s head knot (or cow hitch).
Continue tying the rest of the double half hitch knots across the row. Attach the filler cord to the dowel with a one sided lark’s head knot.
Repeat this pattern two more times, until you have 5 rows all together.
Step 2: Attach the holding cord for the petals
Grab your 43″ piece of 5mm cord. Find the center, and then slide your hands out to the left and right.
Drop the left side of the cord but keep holding it on the right side. Attach the cord to the right side of the dowel at the place where you’re holding.
Now, bring the left cord over to the other side of the dowel and attach it to the dowel with a one sided lark’s head knot.
Tighten it up a bit so it’s hanging right at the curve of the center part we just finished.
Step 3: Make the petals
Attach 2 pieces of 34″ long 5mm cord right in the center of the holding cord with lark’s head knots.
Use the left cord as the filler cord and tie 3 double half hitch knots going to the right. Then, attach the filler cord to the dowel with a one sided lark’s head knot.
Add another piece of 34″ cord to the right side of the knot you just tied. Use the right cord as the filler cord and tie 3 double half hitch knots going to the left.
Attach one of the 24″ pieces of 5mm cord to the holding cord using a reverse lark’s head knot. Continue tying the rest of the double half hitch knots going to the left.
Attach the filler cord to the dowel with a one sided lark’s head knot.
Repeat that for the remaining 4 petals. There will be 5 petals all together.
Step 4: Trim the fringe
Now all that’s left to do is trim the fringe! At first, I left the ends sort of messy and uneven. I liked that, but I later decided to trim the fringe more straight and even, and I like how that turned out as well.
Done!
I hope you made one of these macramé wall hangings! It’s the perfect piece to add some fun floral design to your home decor.
If you make one of these, please share a picture over on Instagram and tag me @marchingnorth so I can take a look.
I just love seeing all of your unique designs, it really makes my day!