How to Make Velvet Pumpkins (Easiest DIY Ever!)
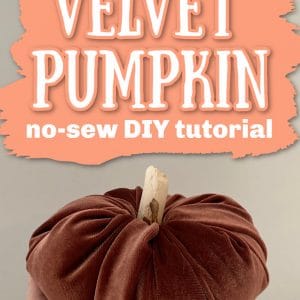
Learn how to make velvet pumpkins for fall in this crazy simple step by step tutorial and video!
It’s pumpkin everything season! I don’t know about you, but this is my favorite time of the year.
If you’re looking for some quick DIY fall decor ideas, keep reading to see how to make velvet pumpkins that are super easy and so so cute.
Don’t forget to pin this for later!

(This post may contain affiliate links. If you click one and make a purchase, I may receive a small commission at no extra cost to you. Read the disclaimer here. Thank you for your support!)
They take almost no time to make (you could probably make several in an hour) and these DIY velvet pumpkins will add some cozy texture to your fall decor!
One great thing about this craft project is you can use up some of those cardboard toilet paper rolls you’ve been saving up for a rainy day.
You have those laying around, right? Please tell me it’s not just me.
Not only are these DIY velvet pumpkins absolutely adorable on your mantle, but you’re recycling, too. Win-win!
How do You Make a No Sew Velvet Pumpkin?
For my pumpkin fabric, I used some lovely rust colored stretch velvet that I got a few months ago with the intent to make a cute headband.
I still haven’t made the headband, I should probably get on that!
If you want, you could use a different color of velvet, or make a variety of fabric pumpkins. Feel free to get creative!
To make the pumpkin stem look more like real pumpkin stems, I used a stick I found out in my yard.
You could also use actual pumpkin stems that you cut off some real pumpkins. Sometimes you can find one with a crazy long stem!
What Do You Fill Velvet Pumpkins With?
I recommend Poly Fill stuffing, which you can find at just about any craft store or online.
If you have any old throw pillows around that you don’t want anymore, you can also repurpose the stuffing out of those.
Another option is old yarn, rope or fabric scraps you have leftover from other projects. I have a whole bin full of macrame cord off cuts for this type of occasion!
Also, you can add some dried beans or rice to the bottom of your DIY velvet pumpkins before you add the stuffing to give it a little more weight.
How Do You Embellish a Velvet Pumpkin?
After you finish your DIY velvet pumpkins, you can add all kinds of embellishments or just leave them as they are!
You could glue or sew on sequins, add a pretty ribbon around the stem, or even spray the top with adhesive and sprinkle on some glitter.
Make a bunch of pumpkins with different types of fabric and glue some googly eyes on there.
Want to make some winter themed velvet pumpkins? Spray the top with craft adhesive and add some fake snow! The possibilities are seriously endless.
Supplies You’ll Need to Make DIY Velvet Pumpkins
- stretch velvet fabric in rust (I bought a yard, you’ll need a piece at least 19″ wide)
- 1/2 of a toilet paper roll (cut it right down the middle)
- a few handfuls of Poly Fill stuffing
- a short stick for the stem (you can also use real pumpkin stems, or even twisted brown craft paper)
- strong craft glue or hot glue if you prefer
- sharp scissors
How to Make Velvet Pumpkins
Watch how to make velvet pumpkins in this step by step tutorial video from the Marching North YouTube channel!
Step 1: Cut the fabric into a circle
You’ll want to start with a 19″ x 19″ square of stretch velvet.
Fold it in half, and then in half again (into quarters) and make sure it’s lined up nice and straight.
Now you’re going to cut an arc shape from one corner to the opposite corner.
Be sure you’re cutting the side opposite of where the center of the fabric is. In the picture above, the center of the fabric is in the bottom left hand corner, and I’m cutting opposite of that, from the bottom right to the top left corner.
More DIY Fall Decor Ideas
- DIY Boho Fall Wreath with Macrame, Pom Poms, and Yarn Flowers // Tutorial & Video
- Macrame Ghost Wall Hanging // Tutorial & Video
- Free Maple Leaf Punch Needle Pattern // Tutorial & Video
Step 2: Add the Tube and Stuffing
Cut your toilet paper roll in half (save one half for another pumpkin).
Unfold the circle of fabric and lay it out on your work surface wrong side up. Then place the half toilet paper tube in the center of the circle.
Grab a few handfuls of Poly Fill stuffing and place it evenly around the tube. It’ll squish down quite a bit so add enough that it’s about twice as big as your desired finished pumpkin size.
I didn’t do this here, but you could also add a handful or two of dried beans or rice to the bottom, before adding the Poly Fill. The dried beans or rice give it a bit more weight and it’ll sit nicely on your mantle.
Step 3: Form the Pumpkin
To form the pumpkin shape, grab the fabric on either side, pull it up and over the Poly Fill, and stuff it down into the tube.
At first this will be a little tricky, but just keep going around and stuffing the fabric in the tube while holding it with your other hand. After a few stuffs it’ll start to stay put on it’s own.
If you get it all stuffed but you need to adjust one side, use the end of a crochet hook or a pencil to poke it all down into place.
Step 4: Add the Stem
To add the stem, put a generous amount of craft glue on the end of the stick.
Then push and twist it down into the center of the pumpkin. Hold it in place for a minute or so and then it should be good to go!
If you decide to use real pumpkin stems for your stem, you might need to trim the bottom a bit so it fits in the tube but besides that it’s the same process.
Done!
I hope you enjoyed this fun tutorial for DIY velvet pumpkins!
If you make some of your own, please share a picture on Instagram and tag me @marchingnorth. I love seeing your creations, it makes my day!
How to Make Velvet Pumpkins
Learn how to make Velvet Pumpkins to decorate your fall mantle in this step by step tutorial.
This easy DIY fall decor projects only takes 10 minutes and you probably have the supplies laying around your house!
Materials
- 19" x 19" square of stretch velvet fabric (I used a rusty orange color)
- a few handfuls of Poly Fil stuffing
- cardboard toilet paper roll, cut in half
- short stick for the stem
- strong craft glue
- sharp scissors
Instructions
- Fold the square of fabric in quarters. Then cut it in an arc shape to make an almost perfect circle.
- Lay the circle of velvet fabric out on your work space wrong side up. Place half of a cardboard toilet paper roll in the center of the circle. Then, add handfuls of Poly Fil stuffing evenly around the tube.
- Grab opposite sides of the circle, wrap the fabric up and over the stuffing and begin stuffing it down into the center of the tube. Go all the way around the circle and keep stuffing until it's all secured and in the shape of a pumpkin.
- Add a generous amount of glue to the bottom of the stick and push it down into the center of the tube. Twist it and hold it in place to dry for a few seconds.
- Done!
Notes
Feel free to use another color of velvet for this project! There are lots of pretty colors of stretch velvet you could try.