Granny Crochet Bandana (Easy Free Pattern & Tutorial UPDATED!)
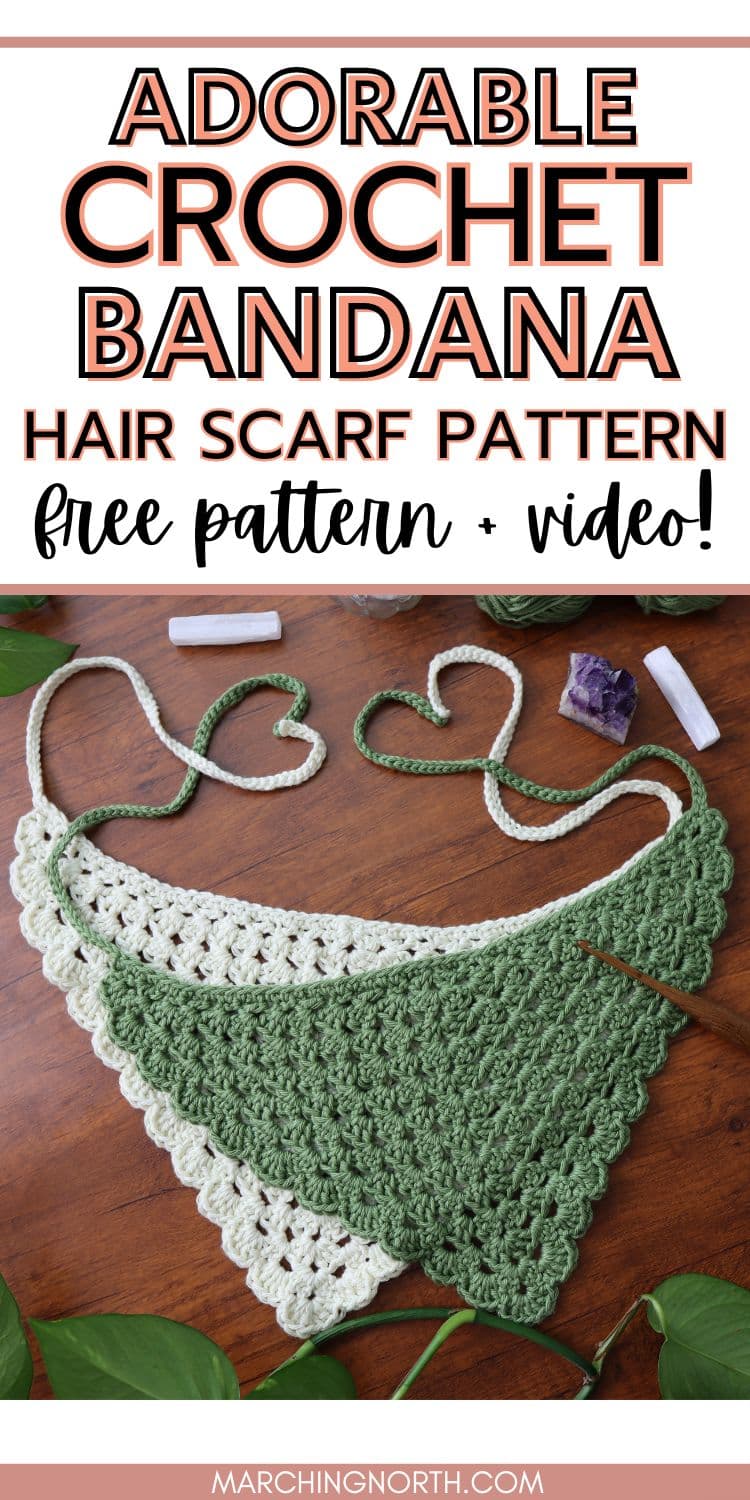
Make an easy and adorable crochet bandana that’s perfect for summer with this step by step tutorial and free pattern!
Don’t forget to pin this for later!
(This post may contain affiliate links. If you click one and make a purchase, I may receive a small commission at no extra cost to you. Read the disclaimer here. Thank you for your support!)
This is a simple pattern and an easy project that only uses basic crochet stitches and granny clusters. It includes the written pattern and a video to walk you through the whole process.
I recommend using cotton yarn for this project, although you can use acrylic yarn or other types of yarn if you want.
It’s the perfect accessory for summer, but you’ll definitely want to go with cotton yarn so you don’t get all sweaty.

NOTE: This is an updated version of my original crochet granny bandana pattern.
That pattern has been super popular, but there were a few things that I wanted to update.
I think the new version is even better and it’s the perfect fun project for an advanced beginner!
What’s New (with this pattern)
On the original version, the edges were a little extra ruffly and stick out a little bit. Also, it’s a little bulkier on the sides.
Some people love that about the original, but some people wanted another option. So, here it is!
In this version, I changed the amount of stitches in the beginning and end of each row, and I also reduced it by one row to make it a bit smaller.
And one more thing that I added was another option to start on row 1!
For those of you that detest the magic ring (it’s OK, I totally understand)- you now have another option to start row 1.
Get the Printable Pattern!
Below, you’ll find the free version of this pattern and the video to go along with it.
If you want to grab the printable, ad free PDF pattern, you can get it in my shop!
Grab your PRINTABLE copy
Granny Bandana Hair Scarf – Printable PDF Pattern!
Reference this pattern any time you want with the printable PDF version! It’s ad free, and includes this new, updated version of the pattern as well as the popular original.
Sizing Options
You can easily customize the size of this crochet head kerchief by reducing or adding rows.
If you want a slightly larger bandana with more head coverage, go up to 13 rows (or even 14, although I haven’t tried that and it might lay funny.)
For a smaller bandana, like for a kiddo, reduce the rows.
My method for sizing these for kids or smaller heads is to do a few rows until I think it looks about right, and hold it up on their head to see if it goes from ear to ear, like right behind the middles of their ears.
If it does, it’s probably good! Then you can move on to the border and straps.
You can also measure the distance from behind the middle of someone’s ears going over their head to see about how wide the front of the bandana needs to be to fit them.
Once you reach that size, go ahead and move on to the border and straps.
The border will add a little extra width to the bandana, but as long as you go with the middle of their ears and not the bottom, it’ll be fine.
As for the straps, if you’re making the bandana a lot smaller, like for a toddler, you can also reduce the number of chains to make shorter straps.
I don’t recommend going too much shorter, though. Longer straps make it much easier to tie.
More Crochet Bandana Patterns!
Check out these other free crochet bandana patterns from Marching North:
Pattern Information
- Skill Level: Easy
- Pattern written in US terms
Materials
- 1 skein of worsted weight cotton yarn (I used “I Love This Yarn” from Hobby Lobby). You should only need one ball of yarn.
- Hook Size: 5 mm (I love my Furls Hook!)
- tapestry needle
- sharp scissors
Finished Size
- Approx. 16” across and 8.5” tall
- Straps are approx. 13.5” long
- I didn’t do a gauge swatch for this pattern.
Abbreviations
- Ch – chain stitch
- St – stitch
- Sp – space
- Sl st – slip stitch
- Dc – double crochet
- FO – Finish off: cut the yarn, leaving a tail of 5 or 6 inches. Pull the loop your hook is on until the yarn end comes through and pull gently to tighten.
- Rep – repeat
Special Stitches
Magic Ring or Magic Circle (right handed instructions, for left handed, wrap in the opposite direction):
Pinch yarn tail between the thumb and index finger of your left hand with end of yarn pointing down, then wrap yarn around two fingers, going clockwise.
Wrap all the way around and cross the yarn over on the back of your fingers in an X shape, then hold the end of the working yarn in place with your ring finger.
Insert crochet hook under the loop closest to your fingertips on the back side of your fingers and grab the other yarn loop and pull it through.
Twist the crochet hook toward you and upward. This will twist the loop of yarn onto the hook into a lowercase cursive “e” shape.
Insert the hook under the farthest back loop on the back of your fingers again, and pull the loop through the loop on your hook. That makes your first chain.
You’ll make 2 more chains to complete the chain 3 needed in Row 1.
Notes
Ch 3 counts as a stitch at beginning of each row.
You can add an extra row to make this bandana larger, or make less rows to make it smaller. Pattern as written fits an average sized adult woman’s head.
There are two options for how to start Row 1 below. Only do one of them.
If you opt for the chain 4 option, you’ll have a small hole, but there are holes on the whole bandana so it will blend in just fine.
Video Tutorial
Check out the video tutorial for this crochet bandana pattern, and don’t forget to subscribe!
Bandana Free Crochet Pattern
For Row 1: Only do one of these options!
Row 1 – Magic Ring Option
Make a magic ring, ch 3 (counts as first st), (2 dc, ch 1, 3 dc) in ring. Pull short end of yarn to tighten. Turn.
Row 1 – Ch 4 Option
Attach yarn to hook with a slip knot, ch 4 (counts as starting ring + first st), (2 dc, ch 1, 3 dc) in first ch. Turn.
Row 2
Ch 3, dc into same st, (3 dc, ch 1, 3 dc) in corner sp, 2 dc in top of ch-3, turn.
Row 3
Ch 3, dc into same st, 3 dc in next sp, (3 dc, ch 1, 3 dc) in corner sp, 3 dc in next sp, 2 dc in top of ch-3, turn.
Row 4 – 12
Ch 3, dc into same st, 3 dc in each sp along first side, (3 dc, ch 1, 3 dc) in corner sp, 3 dc in each sp along second side, 2 dc in top of ch-3, turn.
Leave yarn attached for next part.
Scalloped Edge
Ch 1, sk first dc, sl st into next dc, 3 dc in first sp, sl st into center dc of 3 dc cluster, *make 5 dc in next sp, sl st in center dc of next cluster; rep from * to corner, work 7 dc in corner sp, sl st to center dc of next cluster, rep from * to last space, make 3 dc in last space, sl st in last st (this is the st before the ch-3).
Leave yarn attached for next part.
Ties
First Tie
Ch 61.
Sk first ch, sl st into 2nd ch from hook and each remaining ch, sl st into same st that strap started on.
Front Edge
Sc 46 times along front edge of bandana. (Last sc will be in last st before scallops begin.)
Second Tie
Ch 61.
Sk first ch, sl st into 2nd ch from hook and each remaining ch, sl st into same st that strap started on.
FO.
In Conclusion
I hope you enjoyed this cute crochet bandana pattern!
Looking for more free crochet patterns? Check out the ones down below. I even have a couple other free crochet bandana patterns!
okay so i made it and followed the directions to the tee but when I went to try it on and it stuck out on the sides really bad. do u have any suggestions on how to fix it?
Do you allow people to use your patterns to create items to sell? I feel like this would be a great item for a craft market.
Of course! I just ask you don’t sell the actual pattern, but you’re welcome to sell whatever you make. If you want to mention where you got the pattern, I certainly wouldn’t mind. 🙂
This is so cute and quick to make! I made one this weekend for my daughter and mother-in-law. I am going to try experimenting with different borders too. I just finished a large, complex crochet project and was looking for something easy on my brain. Thanks for this great pattern!
This granny bandana is so cute and summery – love the scalloped edge! Today I’ve featured your pattern on Crafts on Display, I hope you enjoy it – https://craftsondisplay.com/crochet/summer-bandana-185503/
I love the bandana pattern. I’ve made a couple so far. I was wondering if you knew of a charity that would be interested in them