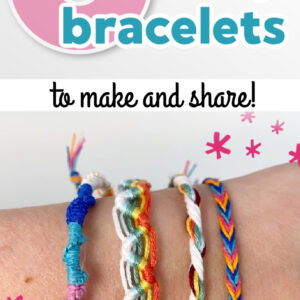
6 Easy Friendship Bracelet Patterns (Tutorials & Videos!)
Looking for a fun craft project ideas to make with friends? Check out these 6 easy friendship bracelet patterns that are totally beginner friendly and make great gifts to give your friends!
Want to remember this? Post these Easy Friendship Bracelet Patterns to your favorite DIY Pinterest board!

(This post may contain affiliate links. If you click one and make a purchase, I may receive a small commission at no extra cost to you. Read the disclaimer here. Thank you for your support!)
The awesome thing about these bracelet patterns is that they are adjustable and customizable, so they easily fit all wrist sizes and you can add your own twist on the design! Just by using different colors of thread you can get a whole new look.
These friendship bracelets are a fun project for kids of all ages and adults too! It’s a fun craft activity you can do together with best friends, sisters, mom, grandma and more.
In addition to being great for slumber parties, these friendship bracelet patterns are just plain fun to wear. I find myself getting nostalgic about going to summer camp and Girl Scout meetings!
The types of bracelets we’ll be making in this tutorial are the chevron pattern, candy stripe, Chinese staircase (or Chinese ladder), Peruvian wave, fishtail braid, and a simple twisted pattern.
Supplies for Making Friendship Bracelets
All you need for these DIY friendship bracelets are some embroidery thread or colorful hemp cord (plus a couple of them need a piece of 1.5 mm rope), tape or a safety pin, scissors, and a few easy knots and braids.
Here are my favorite supplies to use for making friendship bracelets:
- DMC embroidery floss
- 1 mm hemp cord
- masking tape (to hold it to your desk)
- corkboard and T-pins (another way to secure your work)
- safety pins (you can attach your work to your pants or your couch while you work)
- alphabet beads
- colorful beads
- wooden beads
- craft glue (to secure your finishing knots if you want)
- scissors
Below you’ll find a written and video tutorial for each of these easy friendship bracelets. Let’s get started!
Chevron Pattern Bracelet
Supplies You’ll Need:
- 6 colors of embroidery floss (2 pieces of each color about 36″ long)
- tape
- scissors
Subscribe to the Marching North YouTube channel!
How to Make a Chevron Friendship Bracelet:
Step 1: Secure the floss to your work station
Hold all your pieces of floss together and tie an overhand knot close to one end. Tape that end down to your desk or use a safety pin or cork board to attach it securely where ever you’re working.
Arrange the strands of floss so that you have the colors mirrored on each side like in the photo below.
Step 2: Tie the forward knot to the right
Pick up the piece of floss all the way on the left and the one right next to it.
Hold the left most cord in the shape of a four over the other cord like the first picture below. Wrap the thread around and pull the end through the loop.
Pull the end to tighten it up and repeat that whole process one more time.
Continue tying the forward knot with each color until you reach the center.
Step 3: Tie the backward knot to the left
Pick up the piece of floss all the way on the right and the one next to it.
Hold the right most cord in the shape of a backward four over the other cord.
Wrap the thread around and pull the end through the loop.
Pull the end to tighten it and repeat that whole process again with the same cords.
Continue tying the backward knot with each color until you reach the center.
Step 4: Connect the two sides
Take the two center cords and cross them right over left. Wrap the end of the right cord around and through to make a backward knot and tighten it up.
Repeat one more time.
That completes one row. The next row will be worked with the next color of thread, in my case the white pieces.
Continue cycling through the threads and tying rows until your bracelet is as long as you want it.
An average length is 6 or 7 inches depending on your wrist size, but the great thing about making your own friendship bracelets is you can get a custom fit!
Candy Stripe Friendship Bracelet
Another fun friendship bracelet pattern that’s similar to the chevron is the candy stripe friendship bracelet pattern.
Supplies You’ll Need:
- a few colors of embroidery floss @ 36″ long (I used 6 but you can use anywhere from 4-8 pieces)
- tape or a safety pin
- scissors
How to Make a Candy Stripe Friendship Bracelet
Step 1: Secure the floss to your work station
Hold all your pieces of floss together and tie a simple overhand knot close to one end.
Tape that end down to your desk or use a safety pin or cork board to attach it securely where ever you’re working.
Spread the pieces of floss out in the order you want your stripes to be.
Step 2: Start tying forward knots
Starting with the cord all the way on the left, hold it in front of the next cord over in the shape of a four.
Wrap it around, bring the end through the loop, and tighten it up. Now repeat that again with the same cord and tighten.
Now move to the next cord going to the right. Use the same cord to tie the forward knot two times around it and tighten.
Repeat that going all the way across to the right side.
Step 3: Keep tying rows of forward knots
Continue that process, starting on the left each time and working all the way across until the bracelet is your desired length.
All the bracelet patterns below are featured in this step by step video over on my channel:
Chinese Spiral Staircases (Chinese Ladder) Bracelet
Supplies You’ll Need:
- 5 or 6 pieces of 1 mm hemp cord or embroidery floss @ 32″ long
- tape to secure it to the table
- scissors
How to Make the Chinese Ladder Bracelet:
Step 1: Secure the floss to your work station
Hold all your pieces of floss together and tie a simple overhand knot close to one end.
Tape that end down to your desk or use a safety pin or cork board to attach it securely where ever you’re working.
Step 2: Tying double half hitch knots
Separate one pieces of floss from the others and hold it over to the right while holding the the rest of the floss bundled together on the left.
Wrap the piece on the right around your fingers and over the bundle like I did in the first picture below.
Pull the end through the loop and tighten it up.
Step 3: Keep tying knots!
Continue tying the same knots with the first piece of cord until you get 20 knots or until the first section is as long as you want.
Step 4: Switch colors
Put the first color back in with the others and separate out your next color.
Then start knotting with the new color until the section is the same length as the first one.
Keep switching the colors as you finish the sections until your bracelet is the length you want.
Tie an overhand knot to finish it up.
Peruvian Wave Bracelet
Supplies You’ll Need:
- 5 or 6 pieces of embroidery floss @ 24″ long
- 1 piece of 1.5 mm cotton cord or butchers twine @ 16″ long
- tape to secure it to the table
- scissors
How to Make the Peruvian Wave Bracelet:
Step 1: Secure the cords to your work station
Tie your pieces of embroidery floss and cotton cord together on one end with an overhand knot leaving about a 4″ tail.
Tape that end down to your work surface (or pin it with a safety pin if you’re working on a soft surface.)
You want the cotton cord to be over on the right and the floss spread out on the left like the picture below.
Step 2: Tie diagonal double half hitch knots to the left
Cross the cotton cord from the right over and across the embroidery floss.
Then grab the right most piece of floss and tie a double half hitch knot going to the left.
You’ll wrap the floss over and around and pull the end through the loop, and then repeat that again with the same cord.
Then grab the next color of floss and repeat. You’ll do that with each piece of floss until you reach the left side.
Make sure you’re holding the cotton cord at a diagonal angle down and to the left.
Step 3: Tie diagonal double half hitch knots to the right
Now you’re going to hold the cotton cord across going to the right.
Grab the same piece of floss you used for the last knot of the first row (in my case it’s the pink piece) and tie a double half hitch knot around the cotton cord going down and to the right.
Do that with the remaining cords until you’re all the way back on the right again.
Repeat steps 2 and 3 until the bracelet is as long as you want. Then secure the end with an overhand knot.
Fishtail Braid Bracelet
This is a super easy pattern that uses a very simple braid technique. The pattern makes beautiful bracelets!
Try this pattern for Valentine’s Day with red, pink and white floss.
Supplies You’ll Need:
- 4 pieces of 1 mm hemp cord or embroidery floss @ 46″ long
- tape to secure it to the table
- scissors
How to Make a Fishtail Braid Bracelet:
Step 1: Secure your floss
For this bracelet, I started with longer pieces of floss, doubled them over and tied an overhand knot to form a loop.
You can also cut the cords in half and tie an overhand knot if you don’t want a loop. Either way, tie a knot and secure that end to your workspace.
Separate the floss out so there are one piece of each color on the right and the left and have them mirrored like the first photo below.
You’ll want it to be easy to see where the center is while you’re braiding.
Step 2: Tie the fishtail braid
Take the right most piece of floss and bring it over the other right pieces of floss into the center.
Then take the left most piece of floss and bring it over all the left pieces of floss to the center, crossing over the first piece that came from the right side.
Do the same thing with the next color, and continue until the braid is your desired length.
Step 3: Tie a knot to secure
Tie an overhand knot at the end of the fishtail braid and your DIY bracelet is ready to go!
Simple Twisted Bracelet
This is a very easy friendship bracelet pattern, and it’s perfect for young children and kids of all abilities and ages!
Supplies You’ll Need:
- 5 pieces of embroidery floss @ 16″ long
- 1 piece of 1.5 mm cotton cord @ 16″ long
- tape to secure it to the table
- scissors
How to Make the Simple Twisted Friendship Bracelet:
Step 1: Secure your floss and cord
Tie an overhand knot in one end of the cords, leaving about a 4″ tail and secure them to your workspace.
Step 2: Do the twist!
Keep the embroidery floss over on the right in a bundle and the piece of cotton cord over on the left.
First your going to twist the embroidery floss around counter clockwise until it rolls up on itself when you give it any slack.
Once it’s super twisted, tape it down to the desk and move on to the cotton cord. You’ll twist it the same way, in the same direction.
Step 3: Twist the two sides together
Hold onto the cotton cord so it stays twisted and carefully untape the embroidery floss.
Hold the two sections together and they should naturally start twisting together.
If they don’t cooperate that’s OK, just twist them together counterclockwise. They should twist together neatly.
Tie an overhand knot at the bottom so they stay twisted together and your bracelet is ready to wear!
More Friendship Bracelets
Believe it for not, there are even more patterns for unique friendship bracelets available out there! Here are a few other techniques to check out:
- Kumihimo technique (also called a Jellyfish bracelet because the threads hang down like jellyfish tentacles)
- Diamond pattern friendship bracelet (similar to the chevron but with a diamond motif instead)
- Hemp Macrame Bracelets (these fun 90’s inspired macrame bracelets use basic knots like the square knot, and you can incorporate beads in the middle of the bracelet if you want!)
Ways to Finish the Ends of Your Friendship Bracelets
There are lots of ways you can start and end your bracelet besides just tying it on with a knot!
Honestly that’s my favorite way because it reminds me of being a kid, but maybe you want a removable bracelet. I can understand that!
One way to make a removable bracelet is with a sliding closure. In this tutorial for 3 hemp friendship bracelets, I show you how to make a sliding bracelet closure that’s surprisingly simple.
In that post I’m using hemp cord, but it will work with floss too. Just be sure to glue it well and let it dry before you adjust it.
I also found this amazing video with SO many types of friendship bracelet closures! Seriously, she covers all the most popular ones and it’s very helpful. Be sure to check it out!
In Conclusion
I hope you enjoyed these easy friendship bracelet patterns!
If you make one using this tutorial, please share a picture on Instagram and tag me @marchingnorth. I love seeing your awesome creations, it really makes my day!
Related Posts
- How to Tie Dye a Hoodie with Natural Dye (from Avocados!)
- 17 Best Modern Hand Embroidery Kits (for Beginners!)
- Macrame for Beginners (Ultimate Guide!)
- How to Make a Punch Needle Mirror Rug (like on TikTok!)