Giant Continuous Granny Square Blanket Pattern (with Video!)
This continuous granny square blanket is quick and easy to work up and a great pattern for beginners!
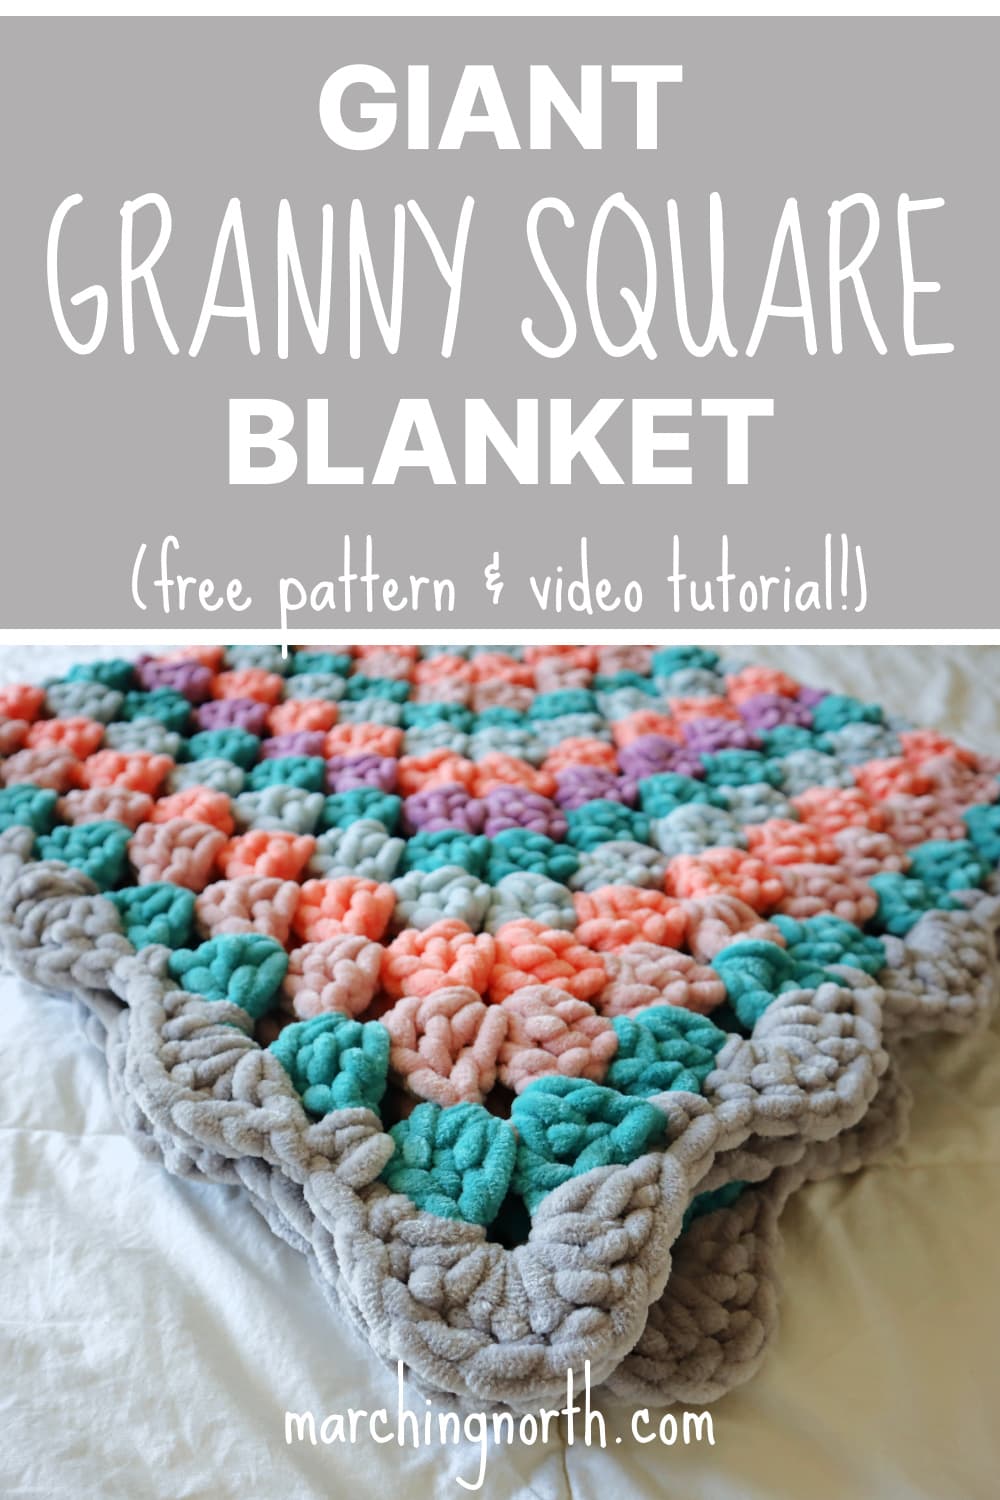
Learn how to make your own colorful chunky crochet blanket in this step by step free crochet pattern and video tutorial.
Want to remember this? Post this free Continuous Granny Square Blanket Pattern to your favorite Crochet Pinterest board!
(This post may contain affiliate links. If you click one and make a purchase, I may receive a small commission at no extra cost to you. Read the disclaimer here. Thank you for your support!)
The granny square pattern we’ll be using for this blanket is super simple. We’ll be using a few basic crochet techniques, like the slip stitch, double crochet, and a few other easy stitches.
Granny squares are made by crocheting granny clusters, or groups of 3 double crochet stitches in a chain space.
Once you get the basic rhythm of the basic granny square down, they’re so relaxing and enjoyable to make.
If you’re looking for a crochet project you don’t have to use much brain power for, this granny square project is perfect!

Buy the PRINTABLE copy
Continuous Granny Square Blanket – Printable PDF Pattern!
Reference this pattern any time you want with the printable PDF version!
It’s ad-free, and includes the printable written pattern plus photo tutorials and tips to help you out!
You can make this blanket as large or small as you want just by changing the amount of rows you crochet.
My blanket is more of a baby blanket size, but you could easily make it larger.
Since we’re doing a continuous square, the resulting blanket will be a square and not a rectangle so keep that in mind.
Best Yarn for a Giant Granny Square Blanket
The yarn I’m using for this blanket is a super bulky chenille yarn called Sweet Snuggles. I picked it up at Michaels.
There are lots of versions of this yarn, and here are a few of my favorite options:
- Baby Snuggle Solid
- Luxury Velvet
- I Wanna Make a Blankie yarn (not chenille but the same weight and very soft!)
You don’t have to use chenille yarn specifically, as long as you use the same weight of yarn.
For example, the I Wanna Make a Blankie yarn above isn’t chenille, but it does work really great for blankets (as the name suggests), and I’ve used it for another chunky blanket pattern before and loved it.
If you want to use worsted weight yarn, you could hold 4 or 5 strands together and that would probably work for this crochet granny square blanket as well.
You can use a different size yarn for this pattern, just make sure you adjust your hook size to match and if you use smaller yarn it’ll take a lot more rows to get your desired size.
Ok, now that we’ve covered all of that, let’s get started!
Continuous Granny Square Blanket Pattern
Notes
- Pattern is written in US terms
- You’ll change colors for each round.
- To join on new yarn for color changes, tie the new color in same chain space where you ended the previous round. Insert hook into the space and pull up a loop, yarn over and pull through. This counts as the first ch of ch 3 for each round.
- Make an even number of rounds if you plan to do the scalloped border. Otherwise the scallops of the border won’t line up correctly.
Abbreviations
- sl st – slip stitch
- sc – single crochet
- hdc – half double crochet
- dc – double crochet
- ch sp – chain space
Special Stitches
- dc cluster – cluster of 3 double crochet in one chain space
- corner – 3 double crochet, ch 2, 3 double crochet in corner space
Supplies You’ll Need
- Chenille Polyester Yarn (Size #7 Jumbo) – I used “Sweet Snuggles” from Michaels in the following colors:
- Lavender – 2 skeins
- Blush – 2 skeins
- Coral – 2 skeins
- Teal – 2 skeins
- Silver – 2 skeins
- Size 10 mm crochet hook
- sharp scissors
Gauge
Gauge is not important for this pattern.
Finished Measurements
Blanket measures approx. 46″ x 46″ if made as written. You can make it larger by adding more rows.
Video Tutorial
Check out the video tutorial over on my YouTube channel Yarn Stash with Marching North, and don’t forget to subscribe!
Continuous Granny Square Crochet Blanket – Written Tutorial
Main Blanket Pattern
Foundation Ring: Attach yarn to hook with a slip knot, ch 4. Insert hook into first ch and make a sl st to join into a ring.
Alternatively, you can use a magic ring (or magic circle), and make round 1 in the magic ring before tightening.
Round 1: Ch 3 (counts as first dc here and throughout), make 2 dc into ring. *Ch 2, make 3 dc into ring* repeat 3 times. To join first round, make a hdc into 3rd ch of starting ch. Cut yarn and finish off.
Round 2: Tie next color of yarn into same corner space we ended on. (See pattern notes or watch video for more info about attaching new yarn). Ch 3, (2 dc, ch 2, 3 dc) in first corner space. *Ch 1, make corner* repeat 3 times. Join to top of ch 3 with a single crochet. Cut yarn and finish off.
Round 3: Tie next color of yarn into same ch1 space we ended on. Ch 3, 2 dc in same space. *Ch 1, make corner, ch 1, 3 dc in side space* repeat 3 times, ch 1, make corner, attach to top of ch 3 with a sc. Cut yarn and finish off.
Rounds 4 – 16: Repeat Round 3, make 3 dc in each side space, ch 1 in between each granny cluster, and make corners in each corner space. Change yarn colors for each round however you like.
NOTE: if you want to make a solid color blanket, just make continuous rounds without cutting yarn. Add on more yarn whenever you run out using the same method of joining in next ch-1 sp, or by tying the ends of the yarn together.
Scalloped Border
Tie your border color onto the ch 1 space just before the top corner on the top right side. Use method to join new yarn explained in the notes of this pattern.
Note: Make sure you’re working with a mostly full skein of yarn for the border so you don’t run out, or have some backup on hand.
Sc in same space, make 9 dc in next corner space.
*Sc in next space, make 7 dc in next space, sc in next space.*
Repeat that across until you reach the next corner space. Make 9 dc in corner space.
Continue this all the way around the blanket until you reach your starting point.
Sl st into first sc of round. Cut yarn and finish off.
Finishing
All that’s left at this point is to weave in your ends and cut the excess yarn!
Done!
I hope you enjoyed this Continuous Crochet Blanket Pattern!
If you make one of these, please share a pic over on Instagram and tag me @marchingnorth so I can see. I love seeing your creations, it makes my day!
Want more free crochet patterns & tutorials? Check out these ones below!
if i wanted to make it longer could i just do rows starting in the corner and ending on the next corner, to make a rectangle?