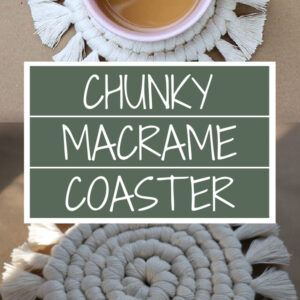
Chunky Round Macrame Coasters (Pattern & Tutorial!)
This pattern chunky round macrame coasters is awesome because it’s FAST!
If you’ve ever made a circle macrame coaster, you know they take forever. This version will work up nice and quick, and they make great mug rugs, coasters, or even trivets for your hot pans!
You can also use it under a plant pot (I have my African violet sitting on top of the one I made and it looks so pretty!)
Want to remember this? Save this Chunky Round Macrame Coasters tutorial to your favorite DIY Pinterest board!

(This post may contain affiliate links. If you click one and make a purchase, I may receive a small commission at no extra cost to you. Read the disclaimer here. Thank you for your support!)
With this pattern, you can make your cords longer and turn this pattern into a place mat as well. This is a really versatile pattern.
Don’t worry if you’re new to macrame, this DIY pattern is very easy and only requires two knots: the cow hitch knot and the double half hitch.
Check out this post to learn all the important beginner macrame knots!
How big is this macrame coaster?
My coaster ended up being between 5.5″ and 6″ across depending on where you measure. It’s not perfectly circular, but it’s close.
This pattern makes a mug rug that’s a bit oversized and perfect for your BIG coffee cups.
How much cord do you need for a macrame coaster?
To make one of these coasters I used 46 feet of cord. The cord is 8 mm and decently chunky so it works up fast.
You can make it larger or smaller by reducing or increasing the number of knots. If you want to make a larger version for a place mat or bigger trivet, you’ll need a bit more cord.
SUPPLIES YOU’LL NEED //
- 8 mm single strand macrame cord cut in the following lengths
- 1 @ 6 feet long
- 5 @ 48″ long (5 first working cords)
- 6 @ 36″ long (first 6 extra working cords)
- 2 @ 12″ long (last 2 extra working cords)
- Cork board
- T-Pins to hold your work
- Sharp scissors
- Large eye needle or crochet hook to weave in ends
- Brush for fringe
- Coffee cup for size reference
Chunky Round Macrame Coasters Tutorial //
Check out the video tutorial below, and scroll a little further for the written tutorial!
Step 1: Make loop and attach 5 cords
Lay your cork board down on your work space, and grab the long 6’ piece of cord. Make a loop in one end of the cord.
Then attach the 5 pieces of 48” cord to the loop using cow hitch knots. (They’re just lark’s head knots, but you bring the loop under instead of over when you’re attaching them.)
Space them out evenly and tighten up the ends of the long cord to close up the loop.
Use your T pins to secure it down to the cork board and it’s time to start knotting!
Step 2: Double half hitch knots
You’re going to start tying double half hitch knots going to the left in a spiral. The long cord you attached the 5 cords to will be your filler cord for the whole coaster (which is why it’s so long).
the long cord will be the filler cord tie a double half hitch knot with the first cord to the left tying the second half of the knot continue tying double half hitch knots until you have a large space between working cords
I tied 13 double half hitch knots before I ended up with a big gap in between the working cords. When that happens, it’s time to add another piece of cord.
Step 3: Add extra cord in space
To add more cord, grab one of the 36” pieces of cord, fold it in half, and attach it to the filler cord with a cow hitch knot.
here’s the first big gap add the next working cord to the space with a cow hitch knot then continue tying double half hitch knots until you reach another gap and repeat
Then just keep knotting as usual until you get to another big gap. When you reach another gap, add another cord and keep on going.
Use the longer cords first, and then use the two shorter cords last. They’ll be on the last row.
Step 4: Continue spiraling around
Continue tying double half hitch knots and adding extra cords until the coaster is the size you want.
I stopped when my coaster was about 5.5” to 6” across. If you made your cords longer to start you can make yours however big you want!
After you’ve worked several rounds, go ahead and flip the coaster over and trim off the excess cord coming out of the center.
Step 5: Cut the fringe and finish
Once you get the knotting finished, it’s time to weave in the end of the filler cord and cut the fringe.
Get a large eye yarn needle and thread the end of the filler cord through it the best you can. Mine didn’t totally fit but it worked well enough.
Thread it under a few knots on the back of the coaster, and then cut the excess. I made the end stick out where the fringe was and just cut it to blend in with the fringe.
Speaking of fringe, now it’s time to cut and brush it! I cut mine down to about an inch long and brushed it out. Trim it nice and even and your chunky macrame coaster is complete!
In Conclusion
I hope you enjoyed this pattern for chunky round macrame coasters!
If you make some of your own, please take a picture, share it over on Instagram, and tag me @marchingnorth so I can see. I love seeing all of your awesome creations!
Related Macrame Posts
- Hexagon Macrame Mug Rug Coaster | Pattern & Tutorial
- Simple Macrame Place Mat | Pattern & Tutorial
- How to Estimate Macrame Cord Lengths (the Easy Way!)
- Ultimate Guide to Macrame Plant Hangers (Everything You Need to Know!)
- Unique Macrame Knots and Patterns
These make excellent Christmas gifts! Thanks for the pattern!
looks doable.