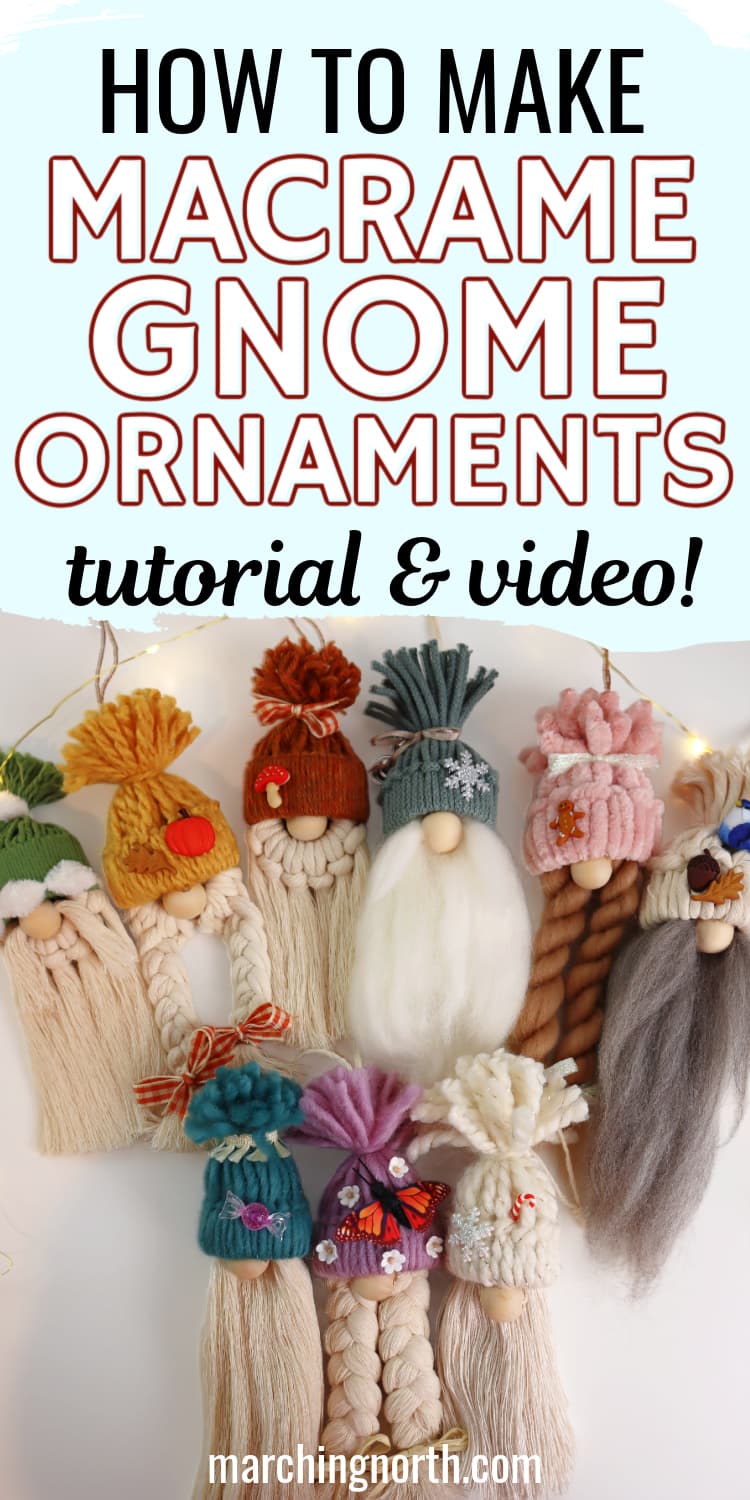
How to Make Easy DIY Macrame Gnome Christmas Ornaments
Add some cozy charm to your holiday decor with these adorable macrame gnome ornaments!
These little guys (and gals) are the perfect blend of whimsy and warmth, and they’re surprisingly easy to make.
Plus, they’re a great way to use up those scraps of yarn that have been cluttering up your craft stash.
Don’t forget to pin this for later!
(This post may contain affiliate links. If you click one and make a purchase, I may receive a small commission at no extra cost to you. Read the disclaimer here. Thank you for your support!)
In this post, I’ll show you how to make your very own macrame gnome ornaments. I’ll walk you through the steps, from choosing your yarn to tying your knots (there are only a couple).
Plus I’ll share some tips and tricks along the way!
Down below you’ll find the free tutorial, and there’s a video tutorial to follow as well.
Even if you’re a total macrame newbie, don’t worry – you can totally make these! By the time you’re done reading this post, you’ll be a gnome-making pro.
So grab a cup of cocoa, put on your favorite holiday tunes, and let’s get started on this fun and festive Christmas tree ornament project.
Who knows, you might just end up with a whole adorable gnome ornament family by the time you’re done!

Grab your PRINTABLE copy
Macrame Gnome Ornaments – Printable PDF Pattern!
Reference this pattern any time you want with the printable PDF version! It’s ad free, and includes the written patterns and step-by-step photo tutorial!
Supplies You’ll Need for these Easy DIY Gnome Ornaments
These cute gnome Christmas ornaments and a great project because you can use up a lot of scraps and recycle your toilet paper rolls!
A few weeks before you start making these, begin collecting your empty toilet paper rolls and set them aside.
You’ll also need some 10 to 12 inch long pieces of macrame string, and some random odds and ends of yarn for the hats.
For the noses, you’ll need a wooden bead that’s about 3/4″ across.
You can use a small wooden ball if you want, but if you want to add a mustache you’ll want to use a bead with holes to thread the mustache through.
Sometimes you can find wooden beads at the Dollar Tree around the Christmas season.
One of the best ways to customize these gnomes is by using different kinds of yarn or string for the hats.
Some of my favorite versions were the ones I did with chenille yarn and roving yarn.
But feel free to use whatever you have on hand!
Last year I made a set of macrame ornaments that featured a tassel gnome, and I used natural macrame rope and string for his hat and his beard which gave it a more minimalistic, Nordic look.
It’s so much fun coming up with different ideas for your DIY gnomes!
Also, for these gnomes I was using up lots of scrap macrame cord. Which means I didn’t use any one specific cord, I just grabbed whatever was in my scrap bin.
If you don’t have any scrap cord on hand and want to purchase some, check out this post for my favorite places to buy macrame cord and supplies to see some great shops to get cord from.
Alright, let’s get started! First, we’re going to make hats for our gnomes.
Video Tutorial for DIY Macrame Gnomes
Check out the video tutorial for these cute gnome ornaments over on my YouTube channel, and don’t forget to subscribe!
Making the Gnome’s Hat
Before we dive into all the different gnome patterns, let’s talk about how to make the hats since it’s the same for each ornament.
Supply List for the Gnome Hats
- Empty toilet paper rolls
- Assorted yarn, string, cord, etc.
Step 1: Cut the toilet paper rolls
Take one of your empty toilet paper rolls, flatten it down a bit and cut it in half.
Then cut each half in to 3 equally sized rings.
Now you have enough rings to make 6 gnome hats!
Step 2: Add yarn to the ring
Cut your yarn or cord into about 10 to 12 inch long pieces.
If you’re using thinner yarn, 10″ should be fine. For thicker yarn or cord you’ll want to make the pieces a little bit longer at around 12″ long.
You have to cut a lot of yarn (especially if it’s finer yarn), so it’s a good idea to find something you can wrap it around to measure it out instead of measuring out each piece.
I used my small 24 peg knitting loom and just wrapped the yarn around it and then cut the whole bundle at once.
The pieces ended up being a bit longer than 10″, so I had a little waste yarn, but I was OK with that.
(I’m planning to fill clear glass ornaments filled with random off cuts of yarn and cord for my DIY Christmas tree this year!)
Once you get your yarn pieces cut, attach them to the cardboard ring with a lark’s head knot.
Continue attaching the yarn pieces until the whole cardboard ring is filled in.
If you use thicker yarn, this will be a much quicker process!
Step 3: Tie off the hat
Hold all the yarn or cord together so it’s neat. Then cut a short piece of yarn (or you can use a piece of twine) that’s about 6 inches long.
Use that piece to tie around the whole bundle of cords about an inch away from the cardboard brim.
Tie a double knot and either pull the ends of the tying cord up to match the other cord ends and trim them, or feed them down inside the hat with your yarn needle and trim off the excess.
Step 4: Shaping the pom pom at the top of the hat
Grab your scissors and trim the ends of the yarn to make a cute little pom pom shape at the top of the hat.
Done!
You can easily customize your gnome hats with different colors, thicknesses and textures of yarn or macrame cord.
I made a bunch of different ones using wool yarn, cotton yarn, roving yarn, chenille yarn and macrame cord scraps. It’s a great way to use up odds and ends you have laying around your craft stash!
Now you can set your cute little gnome hat aside and start making gnomes!
More Christmas Gnome Ornaments Hat Options
Another option is to use a piece of felt to create a cone-shaped gnome hat.
You’ll want to have your gnome done except the hat, so have the nose in place and all that.
You would just cut a wedge shape, kind of like a triangle with a rounded bottom, out of the felt.
Roll the triangle up into a cone. If your felt has a right side and a wrong side, make sure the top of the felt sheet is facing out.
Hot glue the overlapping edges of the felt cone-shaped hat together to hold it closed.
Once you get your gnome ready to go, thread the hanging cord from your gnome onto a large eye needle and feed it up through the cone shaped hat so it’s sticking out the top of the hat.
You can just add some hot glue to the inside bottom edge of the hat and press it down onto your gnomes head.
I think a red hat made out of felt would be super cute for a Santa gnome!
Wood Ring Macrame Gnome Ornament
Supply List
- 6 pieces of scrap macrame cord in about 10″ lengths (I recommend using 3, 4 or 5 mm for this)
- 3/4″ wood bead or wood ball
- 2″ wooden ring
- scissors
- comb
- yarn needle
- hot glue gun and glue sticks
- decorative twine, butchers twine or jute
- any cute little Christmas decor accessories you want to add to the finished gnome
The first type of ornament we’re going to create is the simple wooden ring ornament. These ones are easy to make and you can do several different things to customize them!
I’ll show you how to make a boy and girl version of this gnome, plus a couple other fun options, like how to add a mustache.
Wooden Ring Macrame Gnome Ornament Tutorial
Step 1: Attach beard or hair to wooden ring
Take one of your pieces of macrame cord and fold it in half. Attach it to the wooden ring with a lark’s head knot.
Repeat that with the remaining 5 pieces of cord.
Step 2: Style the beard or hair
Now you have to decide if this gnome will have a beard or braids.
For braids, divide the cords so there are 3 on one side and 3 on the other.
Braid the cords on each side to make pigtails.
Tie off each braid at the bottom with a piece of twine. If you want you can tie a decorative bow in the twine, or just cut the excess off.
Trim the ends of the braids so it looks nice and neat.
For a beard, simply brush the cords out really well, then trim it into a nice, neat beard shape.
Step 3: Attach the nose
For the braided version, separate the braids a bit so you can see the wooden ring in between them.
Put a dab of hot glue on the wooden ring in the center and glue the bead on with the hole facing down on the hot glue blob.
You want the bead to lean forward a bit so it sticks out like a nose.
For the bearded version, just glue the bead on top of the center of the beard, leaning forward slightly.
Again, make sure the hole of the bead is facing right down onto the blob of glue. The top hole will be hidden under the hat.
Step 4: Attach the hanging cord
Cut a piece of twine for the hanging cord. You want it to be long enough that it’ll stick up out of the hat for you to hang the ornament on the tree. 20″ should be about right.
Fold the cord in half, and attach it to the top of the wooden ring with a lark’s head knot.
Step 5: Attach the hat
Grab one of your hats and now we’re going to attach it to our gnome.
Thread the ends of the hanging cord onto your yarn needle and insert it up inside the hat and bring it out right through the center of the pom pom.
Slide the hat down onto your gnomes head. Then add a couple of dabs of hot glue to the wooden ring up inside and to the top of the nose that sits inside the hat.
Press the hat down and let the glue dry for a couple of seconds.
Tie an overhand knot in the top of the hanging cord above the gnome’s hat and cut off the excess hanging cord.
Done!
Mustache nose option
Another thing you can do with the nose is thread a short piece of macrame cord through the hole to be a mustache.
If you want to do that, go ahead and make your gnome through to step 5 without adding a nose.
Then thread the short piece of macrame cord through the wooden bead and hot glue the bead in place against the wooden ring and the hat.
Here are all 3 adorable finished gnomes!
Tassel Gnome Ornament
Supply List
- 10″ long pieces of scrap cotton macrame string (enough to make a 1″ thick tassel)
- 3/4″ wood bead
- decorative twine, butchers twine or jute
- scissors
- comb
- yarn needle
- hot glue gun and glue sticks
- any cute little Christmas decor accessories you want to add to the finished gnome
Tassel Gnome Ornament Tutorial
Step 1: Making the tassel
Take your bundle of 10″ long piece of macrame string and hold them all together.
You can use really any size of macrame string for this. If you’re using smaller cord like 3 mm, you’ll need more pieces. If you’re using a chunkier cord you’ll need less.
You can also mix and match different sizes, as long as their all single strand string it should work fine.
(If you use macrame rope you’ll get a wavy bearded gnome, which is fine too.)
Grab a piece of twine that’s about 20″ long. Use it to tie the bundle of cords together right in the center.
If you’re making the gnome with braids, keep the two sides separate and brush them both out.
Separate each side into 3 sections and braid them. Tie the braid off with a small piece of twine.
Trim the ends of the pigtails so they’re neat.
For the bearded gnome, hold both sides together to make one tassel and brush it out really well.
Step 2: Adding the nose – option 1
First let me show you the no glue option.
This only works for the bearded gnome. For the braided one you’ll want to use option 2.
Take a short piece of butcher twine or a few strands of your macrame string.
Thread it through the wooden bead, and tie it to a small section of the tassel on the front.
Cut off the excess cord from the knot. The knot will be on the inside of the tassel so you won’t see it.
Adding the nose – option 2
The other option for adding the nose is just hot gluing it to the tassel, but you’ll want to wait until after you’ve attached the hat if you want to go that route.
Step 3: Adding the hat
Thread the hanging cord onto your yarn needle and feed it up through your gnome’s hat.
Pull the gnome beard or hair tassel up into the hat. Tie an overhand knot in the top of the hanging cord and cut off the excess.
If you are gluing the nose in place instead of tying it on, go ahead and do that now.
You want to make the nose go slightly up under the hat and this time I recommend making it so the holes are on either side.
If you want to, you can add a short piece of macrame string through the nose holes for a mustache!
For the braided version, glue the nose right in the middle of the braids, but be careful the glue doesn’t come through and burn you.
Done!
Roving Gnome Ornament
I have to admit, this gnome is one of my favorites! The roving makes the beard or hair so nice and fluffy.
Plus it’s super fast and easy to make.
Supply List
- 3/4″ wood bead
- 10 to 12 inch strips of wool roving – color depends on if you want white beards, brown, or whatever color you like! I did white, brown and gray.
- scissors
- comb
- hot glue gun and glue sticks
- decorative twine, butchers twine or jute
- any cute little Christmas decor accessories you want to add to the finished gnome
Roving Gnome Ornament Tutorial
Step 1: Make the roving tassel
Take a 10 or 12 inch section of roving and lay it on your desk.
Note: If you want to make the roving shorter, pull it apart with your hands. Don’t cut it with scissors!
It’ll look much nicer and have a tapered end that way.
Grab a piece of twine that’s about 20″ long and center it under the roving. Tie the roving right in the center with the twine.
Pigtail Gnome
If you want to do the pigtail version, keep the two sides separate and we’re going to make pigtails.
I decided to do twists for this instead of braids, but you can do either option.
To do the twists, divide each side into two sections and twist them in one direction.
Then twist the two twisted up sections together going the opposite direction.
Tie them off at the end and do the same with the other side.
Beard Gnome
If you want to do a bearded gnome, just hold all the roving together like a tassel.
Smooth it out with your fingers so the gnome’s beard looks nice and cohesive.
Step 2: Add the hat
Thread the hanging cord onto your yarn needle and feed it up through the hat.
Tie an overhand knot in the end of the hanging cord and cut off the excess.
Step 3: Add the nose
Use hot glue to attach your gnome nose to the roving and inside the front of the hat.
Make it so the holes are facing left and right.
For the pigtail gnome, carefully glue it to the center where the pigtails meet and then up inside the hat.
If you want to add a mustache to your gnome, thread a short piece of roving through the holes of the bead.
Done!
In Conclusion
I hope you enjoyed making these cute macrame gnome ornaments!
If you make some of these, please share a pic over on Instagram and tag me @marchingnorth so I can take a look. I love seeing all of your awesome creations!
More Macrame Posts
Check out these other macrame tutorials and posts below!
I would like to say thank you for the presentation at the HobbyScool Summit. My brother (who’s birthday in on Thanksgiving Day this year) passed away 2 1/2 years ago and his 2 artistic outlets were Architecture (his job) and Paracording. I once told him “Oh that’s macrame!” He responded that it was NOT macrame (which I learned in brownie scouts LOL), it was Paracord Knotting. I was like “ok, it just uses the same knots as macrame.” Anyways, we haven’t gone through his “knotting” supplies yet and I will probably use some of your patterns with his supplies when we do. We all want to keep some of his supplies (there’s 5 sisters) and I hope there’s enough for me to make keychains, ornaments and bracelets.