Make a Cute and Easy Crochet Flower (Free Pattern!)
Looking for a quick, cute and easy crochet pattern to try? You gotta check out this easy crochet flower pattern!
Want to remember this? Post this free Crochet Flower Pattern to your favorite DIY Pinterest board!
(This post may contain affiliate links. If you click one and make a purchase, I may receive a small commission at no extra cost to you. Read the disclaimer here. Thank you for your support!)
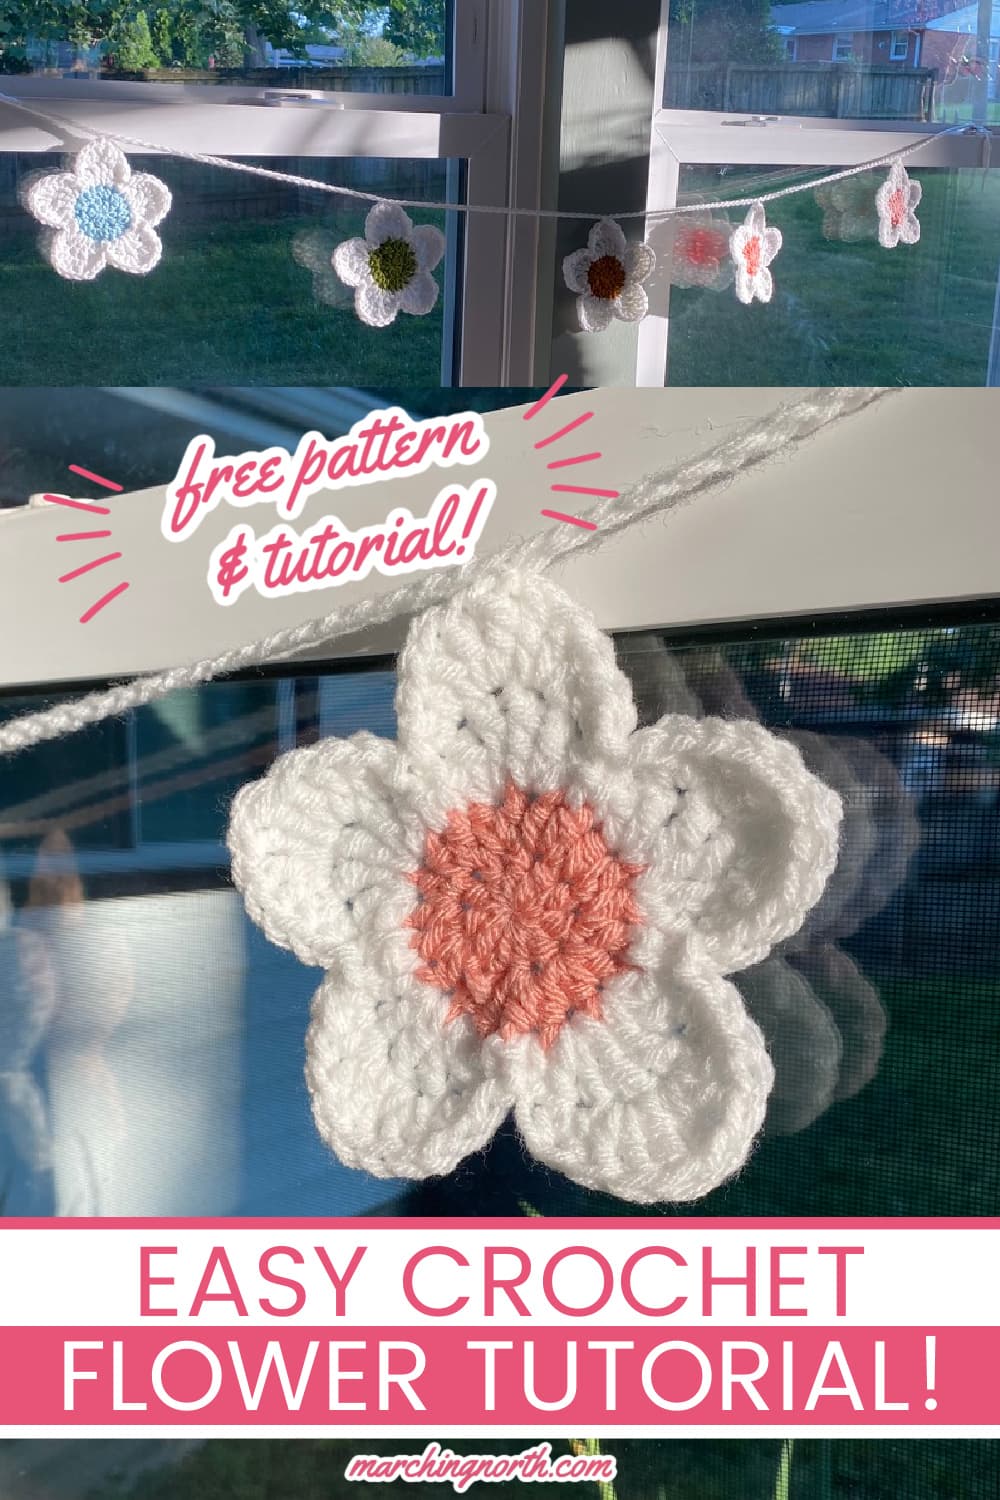
You can sew these simple flowers to onto hats, backpacks, pillows, scarves, or your favorite sweater! Or, string a bunch of them together to make a fun garland- that’s what I did. It looks so colorful and pretty in our sun room!
You can make a whole crochet bouquet using different colors for each flower. It’s a great way to add a touch of color to your decor.
This is a perfect easy crochet project for beginner crocheters. You’ll upgrade your crochet skills with a some basic stitches and a few different techniques, and I’ll walk you through the whole process with step-by-step instructions.
Grab your hook and a cup of coffee and let’s get started!
What Yarn Should I Use for Crochet Flowers?
Well, that all depends on how you plan to use them.
For example, I used the flowers I made during the filming of this tutorial to make a cute little garland to hang on the wall.
I chose acrylic yarn, and I used a mix of worsted weight and heavy worsted weight (it says chunky, but it’s basically heavy worsted). It’s what I had on hand so I went with it.

You could also use cotton or wool yarn for these flowers. I think it would look super cute to sew one onto crochet hats, like this crochet bucket hat, and if you used cotton yarn for the hat I would recommend using cotton yarn for the flower as well.
Really you can use any type of yarn though, just make sure if you plan to wash your flowers that you use a washable variety of yarn. I recommend acrylic or cotton.
Also, if you have some odds and ends of scrap yarn in your stash, you can use it to make the centers of these flowers and then use white for the petals to tie them all together! It’s a fun way to use up some left over yarn.
Do I have to do the dreaded magic circle/magic ring technique for this?
I know, I know, the magic circle is one of those things that people either love or hate. But hear me out.
The crochet magic circle might seem complicated at first, but it’s actually really easy. It just takes a minute to wrap your mind around it.
The main advantage of the magic ring method is that you don’t have a hole in the center of whatever you’re making.
There are other ways to start your circular crochet projects, but you’ll end up with a noticeable hole in the center.
If you use the magic circle technique, you won’t!
I’ll show you how to do the magic ring down below, and there’s a video tutorial as well. You got this!
If you’re still struggling with the magic circle, check out this ultimate crochet magic circle tutorial! It’ll help you out.
Looking for more easy crochet projects?
I have lots of free crochet tutorials on my site! Check out all my free crochet patterns right here.
Cute 5 Petal Crochet Flower: Free Pattern
Materials Needed
- worsted weight yarn (or chunky works too)
- for the center of the flower, I used Love Crafts Paintbox “Simply Chunky” – colors are up to you
- for the petals, I used Lion Brand “Pound of Love” in white – feel free to try a different color if you want!
- 5.0 mm crochet hook
- Tapestry needle to weave in your ends
Gauge
- Gauge isn’t super important for this pattern. My flower ended up being about 5″ across.
- If you use a different yarn weight, use whatever size hook is appropriate for that size.
- If you use a finer yarn, you’ll end up with a small flower, and if you use a thicker yarn you’ll end up with a larger flower.
Abbreviations
- st(s) – stitch(es)
- sl st – slip stitch
- sk – skip
- hdc – half double crochet
- dc – double crochet
- tr – treble crochet
- hdc inc – half double crochet increase. That just means work 2 hdc in the same st.
Notes
- Skill level – easy
- Pattern is in US terms
- We’ll be doing a crochet magic ring or magic loop for the center of this flower. This is an adjustable loop (or adjustable ring) that forms the center of our flower. Don’t be intimidated, you can do it!
Once you get the hang of it, it’s a piece of cake. If you need a step by step tutorial for the magic loop that’s cool, you’ll find one right here. - If you want to make a flower with smaller petals, you can leave off the second petal round. It’s still super cute!
- Want to make an adorable flower garland like I did? Be sure to check out the video tutorial, I’ll show you how I made it at the end!
Video Tutorial
Check out the video for this free crochet pattern over on my YouTube channel Yarn Stash with Marching North, and don’t forget to subscribe! ?
Flower Center Instructions
Round 1
Make a magic ring and ch 2.
Work 10 hdc into center of the ring, then pull the yarn tail end to tighten ring.
Sl st to first hdc. (Ch 2 does NOT count as a st for this round.) That completes the first round of stitches. (10 sts)
Round 2
Ch 2. Make 1 hdc in same st.
Work hdc inc in remaining sts. (Ch 2 DOES count as a st for this round.)
Sl st to top of ch 2, cut working yarn and finish off. Weave in ends. That completes the second round. (20 sts)
Flower Petal Instructions
Round 1
Attach petal color in any st. I attached it to the 2nd st to the left of where I finished off the last round. Tie a knot to attach yarn securely.
Insert hook in same st where yarn is tied on and make a sl st to get started.
NOTE: If you crochet over the yarn end, that’s one less end you have to weave in later!
Petal 1: Make (2 dc, 1 tr) in next st.
Make (1 tr, 2 dc) in next st.
Make a sl st in next st.
Petal 2 – 5: Over the next 4 sts, do the following: sl st, (2 dc, 1 tr), (1 tr, 2 dc), sl st. Repeat for the rest of the petals.
After you complete the 5th petal, sl st to first stitch where you attached your yarn at the beginning of the round.
Round 2
Petal 1: Sk next st, sl st in next.
Make 2 hdc in next st, (2 dc, 1 tr) in next, (1 tr, 2 dc) in next, 2 hdc in next, and sl st in next.
Petal 2 – 5: Sk next 2 sts, sl st in next. Make 2 hdc in next st, (2 dc, 1 tr) in next, (1 tr, 2 dc) in next, 2 hdc in next, and sl st in next. Repeat that for all the petals.
After you complete the 5th petal, sk 2 sts, sl st in next, cut yarn and finish off.
Finishing
If you crocheted over the yarn end for the petals, you can go ahead and trim that end off. Then you just have to weave in the last yarn end. Otherwise, weave them both in and trim off the excess yarn.
You did it!
I hope you enjoyed making these easy crochet flowers! I’d love to see what you made, feel free to share a picture over on Instagram and tag me @marchingnorth so I can take a look!
Looking for more free patterns and projects? Check out the links below!