Quick and Easy Macrame Napkin Rings (only uses 3 knots!)
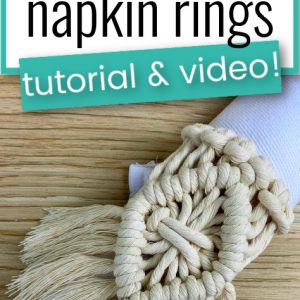
Learn how to make these super cute and easy macrame napkin rings in this step by step tutorial and video!

I’m continuing on my Thanksgiving DIY decor theme with these easy macrame napkin rings!
Of course, you could make them year round and they’ll look great, it doesn’t have to be just for the holidays.
These would pair wonderfully with these macrame placemats to create an awesomely boho tablescape!
Lately, I’ve been seeing more and more boho and farmhouse decor mixed together at all the fun home decor shops.
One of my favorite places to browse home decor is Target. They always have all the fun Joanna Gaines stuff which I love, plus the dollar spot. You gotta love the dollar spot!
Last time I was there, I saw a macrame table runner and I started thinking hey, some macrame napkin rings would go great with that!
These are really quick and easy and they only use three knots: the lark’s head knot, double half hitch, and square knots.
If you’re new to macrame and haven’t mastered those yet, check out this Basic Macrame Knots for Beginners tutorial. It includes a link to get my free printable PDF with the 5 most important macrame knots, including the ones needed for this tutorial!
Keep scrolling to read the full tutorial, and there’s a video version as well!
(This post may contain affiliate links. If you click one and make a purchase, I may receive a small commission at no extra cost to you. Read the disclaimer here. Thank you for your support!)
WANT TO REMEMBER THIS? SAVE THIS MACRAME NAPKIN RINGS TUTORIAL TO YOUR FAVORITE DIY PINTEREST BOARD!
Supplies You’ll Need to Make Macrame Napkin Rings
- 3mm single strand cotton macrame string in the following lengths:
- 1 @ 12 inches
- 6 @ 34 inches
- Cork board or Macrame board
- T-Pins
- Sharp scissors
How to Make Macrame Napkin Rings | Tutorial
Step 1: Attach the working cords to the holding cord
Tie a knot in each end of the 12″ piece of cord and pin it down to your cork board or macrame board.
Then, take the six long cords, fold them in half and attach them to the shorter cord with lark’s head knots.
Step 2: Tie the top diagonal double half hitch knots
Now we’re going to tie the top half of the diamond shape.
Take the seventh cord from the left and use it as the filler cord, then tie six diagonal double half hitch knots going down and to the left.
Then, grab the sixth cord from the right and use it as the filler cord for five diagonal double half hitch knots going down and to the right.
Step 3: Tie the big square knot
Now you’re going to take the second cord from the left and from the right, and tie a square knot going around all of the inner cords.
Step 4: Tie the bottom diagonal double half hitch knots
To finish the diamond shape, grab the farthest cord to the left and use it to tie five diagonal double half hitch knots down and to the right.
Then, use the farthest cord to the right and use it as the filler cord to tie six diagonal double half hitch knots down and to the left.
Step 5: Trim and brush out the fringe
Now you can cut the fringe in a V shape and brush it out. Give it another trim and its ready to tie on your napkin!
Done!
I hope you enjoyed this macrame napkin ring tutorial!
If you make this project, please take a moment to share a pic on Instagram and tag me @marchingnorth. I love to see your creations!
Related Posts
- Macrame Mermaid Tail Keychain // Tutorial & Video
- Half Circle Macrame Wall Hanging // Tutorial & Video
- Where to Get Awesome Macrame Cord and Supplies
- DIY Cowrie Shell Macrame Bracelet (Free Pattern + Video Tutorial)
- Easy Beaded Macrame Bracelet with Sliding Knot (Beginner Tutorial + Video)
- 35 Free Step-By-Step Macrame Plant Hanger Patterns (with Tutorials & Video!)
- How to Make a Boho Fall Floral Macramé Wreath for Your Front Door (+ Video!)
- Macrame Bookmark Tutorial | Cute DIY Paperclip Bookmarks (Great for Gifts!)
- Dip Dye Macrame Plant Hangers = Instant Joy (Tutorial + Video!)