DIY Macrame Toy Hammock (Free Pattern & Video!)
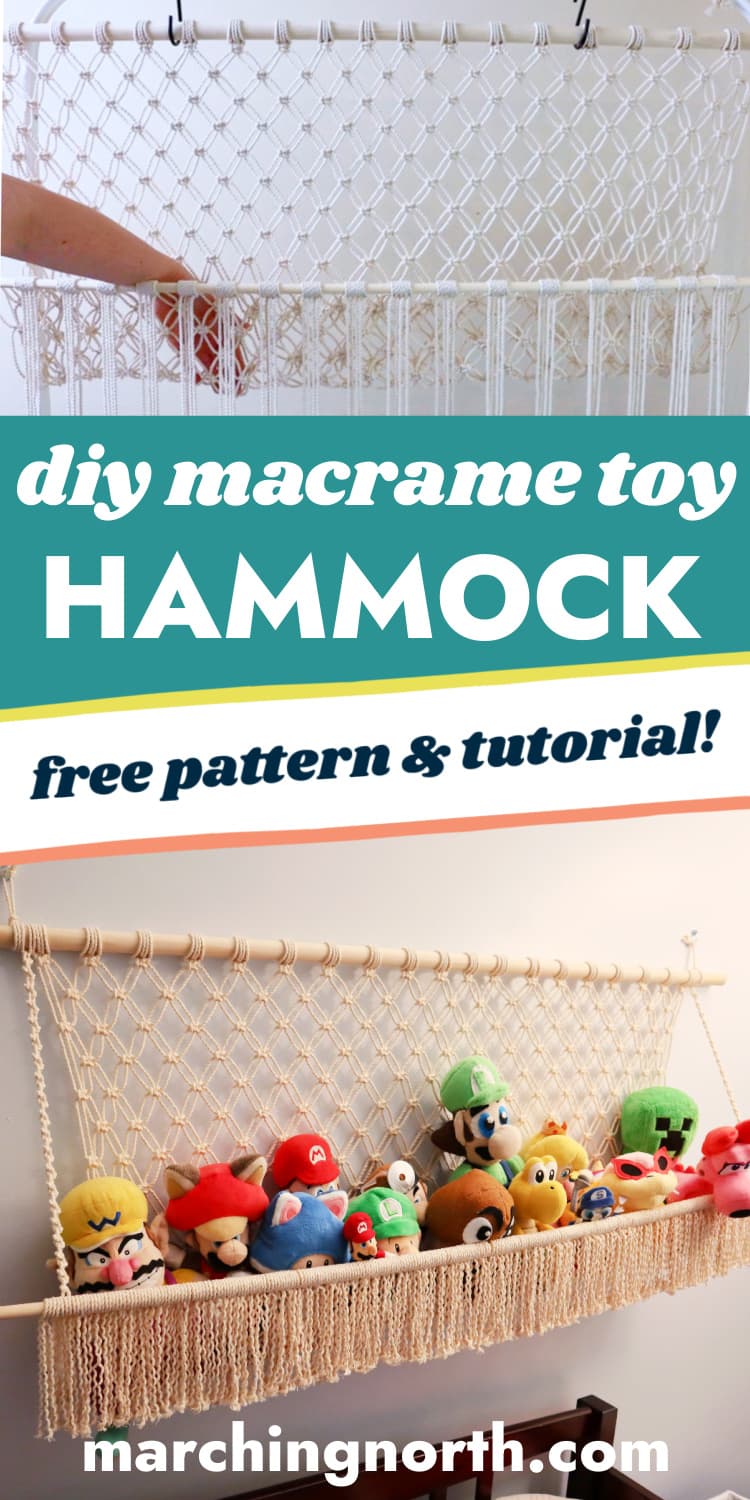
Learn how to make an extra long macrame toy hammock with today’s free pattern and tutorial!
Want to remember this? Post this Macrame Toy Hammock tutorial to your favorite DIY Pinterest board!
(This post may contain affiliate links. If you click one and make a purchase, I may receive a small commission at no extra cost to you. Read the disclaimer here. Thank you for your support!)
You know how handy macrame toy hammocks are for storing stuffed animals and plushies in style, but what if you don’t have a spare corner in your space?
This version hangs flat against the wall, so you can make one even if you don’t have a free corner of the room!
You’ll only need a few basic knots for this macrame hammock pattern, plus some macrame cords, 2 dowels and a pair of scissors.
It’s a great way to create extra stuffed animal storage for any macrame lover that doesn’t have a spare corner of a room for a corner hammock.
We all need some extra storage space, am I right?!
Supplies You’ll Need
- 3 mm cotton rope in the following lengths:
- 40 pieces @ 12 feet long (366 cm)
- 2 pieces @ 8 feet long (244 cm)
- 2 pieces @ 15 inches long (38 cm)
- 2 wooden dowels (7/8″ diameter) that are 48 inches long
- (NOTE: I used a 1/2″ diameter dowel for the lower dowel on the toy hammock in this post, but it bows a little bit so I recommend using another 7/8″ dowel. Replacing it with a thicker dowel shouldn’t effect the fringe length very much.)
- scissors
- tape measure
- piece of cardstock or posterboard that’s 1 inch wide and about 4 or 5 inches long (to use a spacer)
Macrame Stuffed Animal Hammock Step-by-Step Instructions
Check out the video tutorial over on my YouTube channel, and don’t forget to subscribe!
Step 1: Attach the cords to one of the dowels
Grab your 40 pieces of cord that are 12 feet long. Attach each piece to the dowel using lark’s head knots.

You’ll want to arrange them in pairs with about a 2″ space between each pair.
Step 2: Tie square knots
This is gonna take a little bit, so grab something to drink and make sure you’re comfy!
Starting on the far left side, tie a square knot with the first set of cords.
Repeat that across for each cord set.
For the second row I started over on the right, but it doesn’t really matter which side you start on. Skip the first two cords, and tie a square knot with the next four cords.
This knot will be in between the 1st and 2nd knot of the previous row.
This is called alternating square knots and going back and forth like this for each row makes a nice diamond mesh pattern.
Also, this is where your spacer comes into play. You can tie the first half of the square knot, and then slide in your spacer before you finish the knot so you know it’s perfectly spaced.
It really makes a difference if you’re not great at making rows of things perfectly straight naturally (like me, and I’m guessing most people!)
Continue tying rows of alternating square knots until you have 19 rows all together.
Step 3: Attaching the second dowel
Grab your second dowel and hold it in front of your hammock just below the last row of knots you tied.
Tie a double half hitch knot using the far left cord.
Now go all the way across to the right side and tie a double half hitch knot with the far right cord.
That will hold the dowel in place while you tie the rest of the knots going across.
Go back over to the left and continue tying double half hitch knots with each cord until you get back to the right side. Stop before you get to the last set of cords.
Untie the far right knot you tied, and then finish tying the last 4 double half hitch knots.
Step 4: Attach the holding cords
Now it’s time to attach the holding cords on each side. These will hold up the bottom of the hammock.
Take one of the 8 foot long cords, fold it in half and attach it to the left side of the top dowel with a lark’s head knot.
I actually used a cow hitch knot (reverse lark’s head) because I accidentally flipped my dowel around without realizing it and I wanted it to match. Either way is fine!
If you want to keep it more minimalist, you can just go ahead and attach it to the bottom dowel with double half hitch knots now, but I decided to go back and add some alternating half hitch knots for a little extra flair.
If you don’t know how to tie that knot, be sure to check out the video at about the 7:45 mark.
I did 38 alternating half hitch knots, and the attached the two cords to the bottom dowel with double half hitch knots.
Repeat that for the other holding cord on the right side.
Step 5: Cutting the excess cord and making fringe
Now we’re going to deal with the excess cord hanging dowel and make it into fringe!
I measured the short cords on the far left side (from the left holding cord we just attached) and they were roughly 6 inches long.
I used that as my guide and went along and cut the remaining cords off at the 6″ mark.
Then you can take the pieces you cut off and attach them in the spaces between the groups of knots using a cow hitch knot.
You’ll notice you have a one extra long piece on the left and right of the toy hammock. I cut both of them in half so they made 2 pieces of fringe.
I attached 5 pieces in the first space on the left and the right, then 4 pieces in between all the center spaces.
At the end I had 4 pieces of fringe left, so I added 2 on the far left and 2 on the far right.
Trim the fringe so it’s even. At this point you can untwist it if you want, which gives it a pretty, wavy look.
I didn’t brush mine out, but you can if you want to. It’s going in my kids room, so if I brush it out it’ll look like a hot mess in no time!
Step 6: Attach the hanging loops
Last we need to attach a couple of hanging loops. I kept this super simple and took a 15″ piece of cord, attached it with a lark’s head knot, but facing up instead of down.
Then I made an overhand knot in the ends of the cord to form a loop.
Repeat that on the other side of the dowel.
Done!
I hope you enjoyed this macrame toy hammock tutorial and you’ll consider making one for your kids or grand kids!
It’s a lovely pattern that works really well as a toy storage bin for lots of plushies and stuffed animals.
If you make one of these, please share a pic over on Instagram and tag me @marchingnorth so I can take a look. I love seeing all of your awesome creations!
If I was to do two tiers, so two hammocks one on top of other, how would I go about tweaking the directions for myself?
Yes! I’m wanting to do this too. Did you figure it out yet?
Yeah same here! Would love to know how to do a multi tier version of this! Kids have a lot of teddies.
is there a way to make the hammock deeper to hold more ?
What’s the finished length of this please? As in how far between the two dowels is it on the finished item. Thank you.
I don’t have enough cord. Do you have any suggestions for a corner with 109 yards. Thank you for your hands on.
If I want it wider do I need longer cords?
Thank you
If you just want it wider, no you could just add more cords and you could make it as wide as your dowel. If you want it to expand farther out to hold more things (like coming out away from the wall) you would need longer cords for that. I hope that makes sense! 🙂
Hi! I love the look of this but we only have about 3 feet of space to hang this in. Does it matter how many cords I decrease? Does it need to be an even or odd number of cords?
You’ll want to keep it an even number of cords and it should be fine no matter how many you take off- good luck! 🙂
Started well but the double half hitch knots on the bottom just slipping out as i move along the bottom so dowel not secure -any tips? Is there another knit that would secure this?
Hmmm, I just tied the double half hitch knots pretty tight and they stayed for me- but I think if you want to do an alternative you could just tie a double knot around the dowel and pull it tight. It won’t look quite the same but it should still be OK.