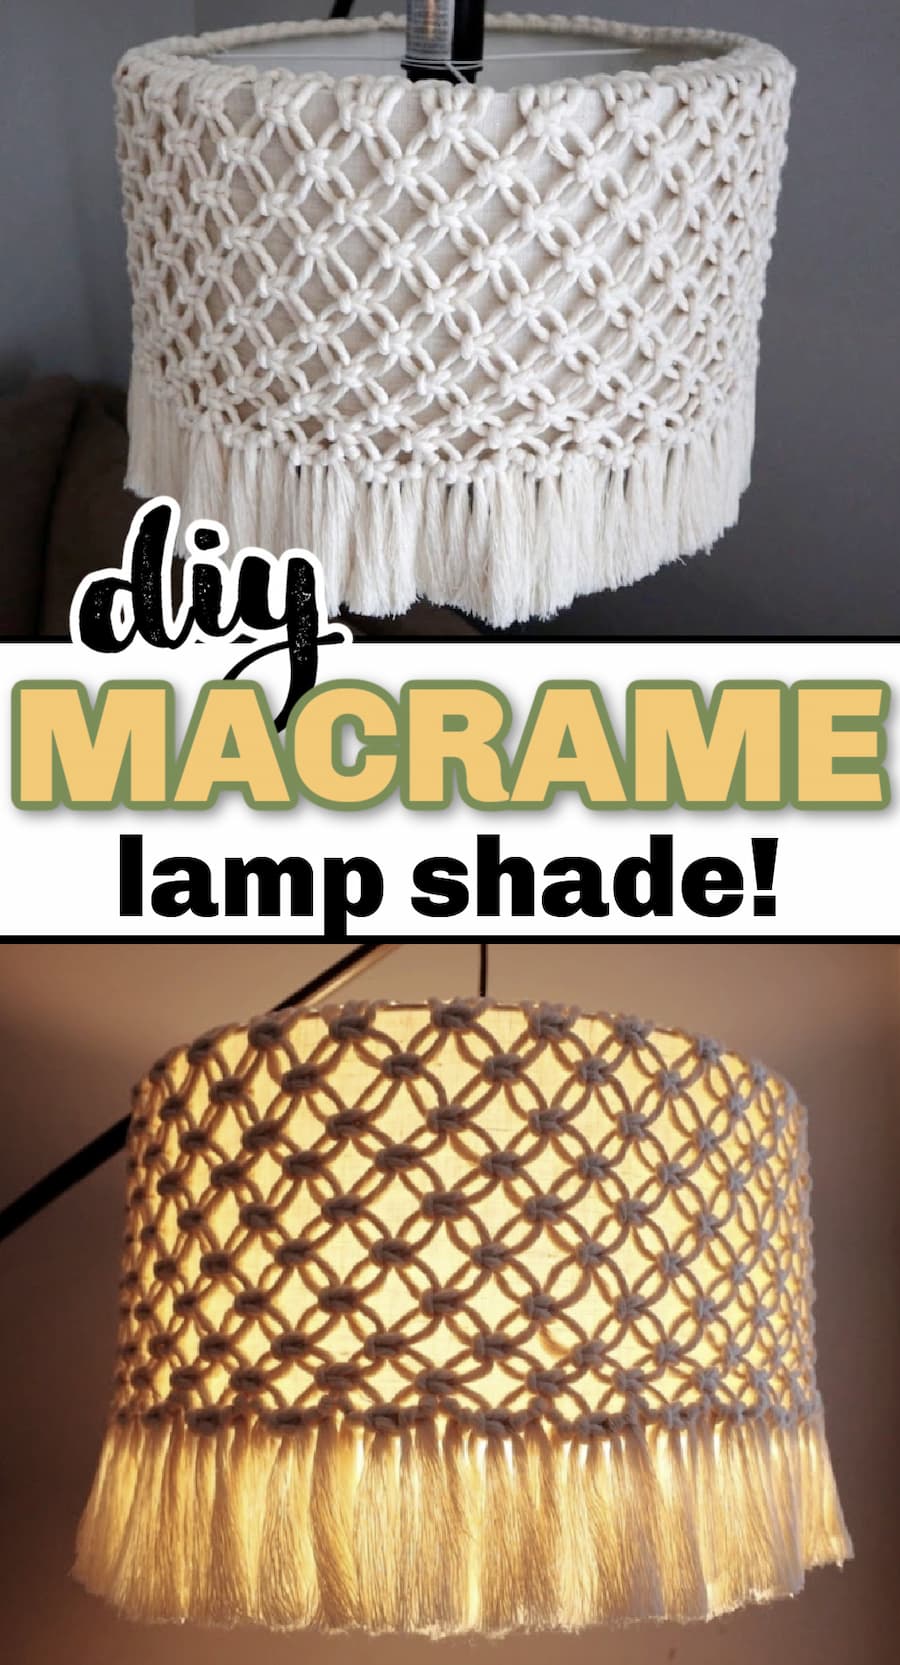
How to Make a Macrame Lamp Shade: DIY Boho Decor (with Video!)
Making a macrame lamp shade is an easy and inexpensive way to add boho decor to your space. All you need is an existing lamp shade, some macrame cord and a few hours!
Follow the step-by-step instructions in this tutorial on how to make a beautiful, bright, boho-rific macrame lampshade.
Want to remember this? Post this DIY Macrame Lamp Shade tutorial to your favorite DIY Pinterest board!
When I was coming up with this pattern, I kept going back and forth between making a lamp shade from scratch with some metal rings (which I still may do) and just using a really boring lamp shade I already had.
One thing people often as is how can I clean this macrame project after it’s been sitting on the wall or wherever collecting dust for months. Well, with this project it’s easy!
You can snip the strings tying the macrame cord to the lamp shade, carefully hand wash it, and tie it back on once it’s clean.
If your lamps are like mine, they’re total dust magnets- so this is a huge plus!

You can use any existing lamp shade you have for this project as long as it’s cylinder shaped and has the cross bars at the top.
Keep in mind, the amount of cord and measurements you’ll need will vary depending on the size and shape of your lamp shade. I’ll show you how to calculate the amount of cord you’ll need for your specific shade.
Below is what I used to make mine, but you’ll definitely need to measure and adjust your cord lengths if your lamp shade is a different size.
Supplies You’ll Need for This Project
- a lamp shade (I used the lamp shade from a floor lamp I bought at Target a few years ago, here’s a similar but smaller model I found on Amazon)
- 4 mm single strand cotton macrame cord (mine took approx. 340 feet of cord – I’ll tell you how to figure out how much you’ll need down below)
- cotton string to secure macrame cord to lamp shade
- sharp scissors
- pet brush for fringe
DIY Macrame Lamp Shade Tutorial
Step 1: Measure your lamp shade and estimate cord lengths
It’s easy to estimate the cord lengths for this project, even if you’re mathematically challenged (like myself).
First, measure the circumference (around) the top of the lamp shade.
I recommend using a cylinder shaped lamp shade like I used, but you’re welcome to experiment and use other shapes. I can’t guarantee the outcome of other shapes though!
Next, measure the height of your lamp shade.
Write both of those numbers down and now it’s time to estimate cord length. Take the height and multiply it by 3. Then multiply that number by 2. This is the length of your working cords.
Next, take the circumference of the lamp shade and add the working cord length to it. This is the length of your holding cord.
The number of cords will depend on how big around your shade is. For mine, I ended up using:
- 59 pieces @ 1 arm span long (approx. 67″)
- 1 piece @ circumference of lamp shade + 67″ (for holding cord)
If your lamp shade is bigger it will take more cords, and if it’s smaller it will take less.
My scientific method for determining the number of cords was figuring out how many it took to cover one third of the shade (there are three cross bars so between two of them) and then doing 3 x that many.
Step 2: Attach the working cords to the holding cord
Take one working cord, fold it in half, and attach it to the holding cord using a lark’s head knot.
Repeat that for all of the cords.
Now, we’re going to add an extra hitch on each side so the cords are spaced out better.
First, bring the right cord up and behind the holding cord, making a loop. Then, bring the end of the working cord down and through the loop, wrapping around the holding cord. Tighten it up. Repeat that same process on the left side. Tighten it and you’re done!
Repeat that for all of the cords. It takes a while but it makes it look much neater at the end, I promise!
Step 3: Tie the cords to your lampshade
Once all the cords are attached, wrap the holding cord around the top of the lamp shade so it and all the working cords are slightly inside the top of the lamp shade. You want them to sort of rest on top.
Now tie an overhand knot with the ends of the holding cord (make sure they’re lined up evenly because you’ll use the ends as working cords in a minute).
Adjust everything so it’s laying evenly over the lamp shade and now we’re going to secure it in place.
Grab a short piece of butchers twine or cotton yarn and tie the holding cord to the cross bars of your lamp shade.
Step 4: Tie several rows of alternating square knots
Now you’re going to tie as many rows of alternating square knots as it takes to fill in your lamp shade.
Leave about an inch of space between your knots and take care to keep everything straight and neat.
Step 5: Trim the fringe and add extra fringe in between
Once all the square knots are finished, it’s time to trim the fringe!
I recommend using a tape measure to get all the fringe the same length. I measured mine at 3″ and cut each section one at a time.
You can leave the fringe as is at this point, but you’ll notice a pretty large gap in between each section.
I didn’t like how this looked, so I added on more fringe pieces in between. Not only does it fill it in, but you’ll use up some of the scrap string from trimming the fringe- win win!
Grab a piece of scrap rope (make sure it’s not too short) and fold it in half Attach it to the right side of one of the square knots (it’ll be the left side of a gap) using a cow hitch knot (reversed lark’s head) Repeat that on the right side of the gap (left side of the next square knot), then brush it out and trim it even.
Add two pieces of fringe in each gap all the way around, brush it out and trim it even.
Done!
Thanks for following along with this simple DIY macrame lamp shade tutorial. I hope you’re inspired to make your own!
If you do, be sure to share it on Instagram and tag me @marchingnorth – that’s one of my favorite things about making these tutorials 🙂
While you’re here, check out these related posts:
- Macrame Mandala Wall Hanging Tutorial
- Hexagon Macrame Coasters Tutorial
- Easy Macrame Placemats Tutorial
- DIY Cowrie Shell Macrame Bracelet (Free Pattern + Video Tutorial)
- Easy Beaded Macrame Bracelet with Sliding Knot (Beginner Tutorial + Video)
- 35 Free Step-By-Step Macrame Plant Hanger Patterns (with Tutorials & Video!)
- How to Make a Boho Fall Floral Macramé Wreath for Your Front Door (+ Video!)
- Macrame Bookmark Tutorial | Cute DIY Paperclip Bookmarks (Great for Gifts!)
- Dip Dye Macrame Plant Hangers = Instant Joy (Tutorial + Video!)
- Macrame Troubleshooting (No More Running Out of Cord!)
- Double Macrame Hat Hanger | Free Pattern & Video!
- Macrame Half Circle Mini Wall Hanging | Free Pattern + Video!