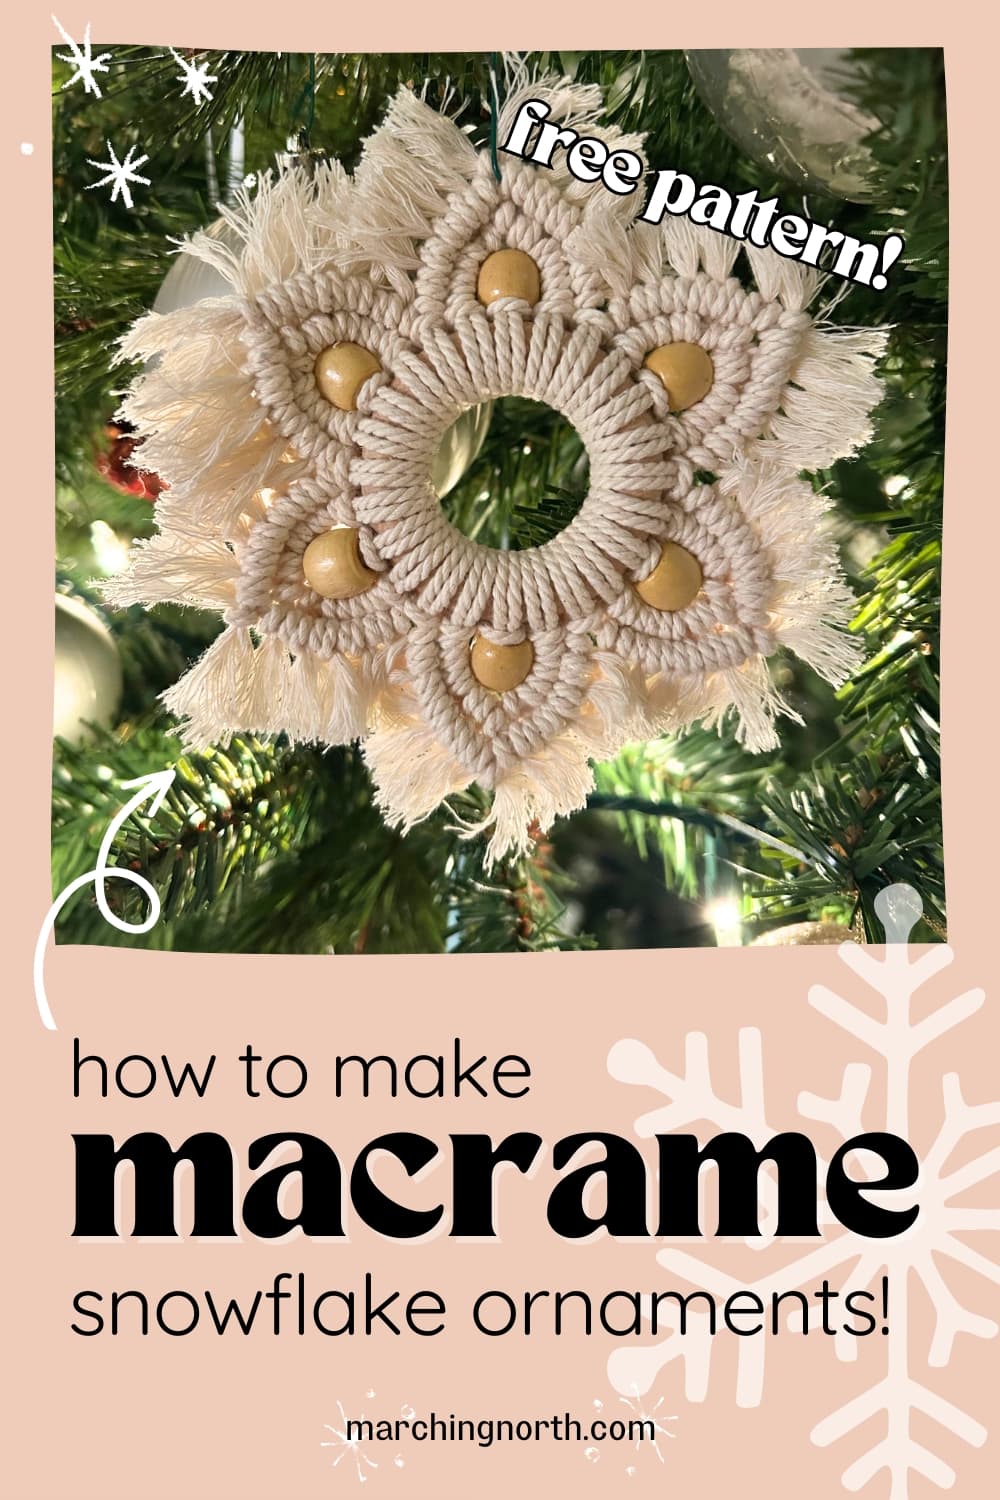
DIY Macrame Snowflake Christmas Ornament Tutorial
Learn how to make a beautiful macrame snowflake ornament for the holidays with this free pattern and step by step tutorial!
Don’t forget to pin this for later!

(This post may contain affiliate links. If you click one and make a purchase, I may receive a small commission at no extra cost to you. Read the disclaimer here. Thank you for your support!)
This macrame snowflake ornament pattern is quick and easy to make, and only requires three knots, and two of them are almost the same: the lark’s head knot, the cow hitch knot, and the double half hitch knot!
Below, you’ll find the free pattern and the video tutorial.
If you’re new to macrame, you’ll want to learn the basic knots before you start this project.
And I can help you with that!
Also, be sure to sign up below for my free printable PDF knot guide for you to have handy while you’re working on your projects!
More Macrame Ornament Patterns
Check out all the other free macrame Christmas ornament patterns available on my website:
- How to Make Cute and Easy Macrame Gnome Ornaments
- 5 Boho Macrame Ornament Patterns
- 7 Beautiful Macrame Ornament Patterns
- Easy Macrame Christmas Tree
Macrame Snowflake Tutorial
Supplies You’ll Need
- 2 mm cotton macrame rope
- 2″ wooden ring
- 6 5/16″ wooden beads with a large hole
- macrame board and T pins (or tape to hold your work)
- scissors
- comb
- large eye needle (optional, for threading on beads)
Cut List
- 24 pieces @ 20 inches long (50.8 cm)
- 12 @ 10 inches long (25.4 cm)
Video Tutorial
Check out the tutorial video for this macrame ornament on my YouTube channel, and don’t forget to subscribe!
STEP 1: Attach Long Cords to the Ring
Take one of the 20 inch pieces of cord, fold it in half, and attach it to the ring with a larks head knot.

Repeat that with the rest of the 20 inch long pieces of cord.
Once all the cords are attached, secure your work to a macrame board or tape it down to your work surface.

STEP 2: Thread on a Bead
Starting with any pair of cords (both ends of one piece of cord), thread on one wooden bead.

STEP 3: First Row of DHHK’s
Use the 2nd cord to the left of the bead as the filler cord and tie one double half hitch knot going down and to the right.


Then, take one of the 10 inch long cords and attach it to the filler cord with a cow hitch knot, right next to the knot you just tied.


Tie one more double half hitch knot right next to the cow hitch knot using the left cord coming out of the wooden bead.

Repeat those steps for the right side going down and to the left.

To join the two side, tie one last double half hitch knot with the two filler cords.

STEP 4: Repeat that Around
Starting from your first wooden bead, count over 4 cord pairs in either direction and thread on your next bead.
(There should be 3 cord pairs in between each wooden bead.)

Then repeat step 3 for each one, making 6 star sections

STEP 5: Second Row of DHHK’s
Grab the right cord of the unused pair of cords to the left of one section,

Use it as the filler cord to tie 5 double half hitch knots going down and to the right. It’ll be right up next to the first row of knots.

Then grab the left cord of the unused pair of cords to the right of that section.
Use it as the filler cord to tie 5 double half hitch knots going down and to the left.

Finish it off by tying one last dhhk with the two filler cords.

STEP 6: Repeat that Around
Repeat step 5 around with each star section.

Step 7: Finishing Up
All that’s left to do is cut the excess cord and comb out the fringe.


If you want to make your ornament a little neater, you can use a stiffening spray to style the fringe. Aleene’s Stiffen Quick is a good choice, and so is hairspray, or watered down Elmer’s Glue.

Add a Christmas tree hook and it’s ready to hang, or attach it to a gift for a beautiful, handmade touch!

In Conclusion
I hope you enjoyed this macrame snowflake ornament pattern and will make some for your Christmas tree!
Or you could give them away as gifts, or even use them in the place of bows on the presents you’ll be giving out this year!
Looking for more macrame patterns to try?

Crystal, I am new to macrame but 84yrs old and am NOT new to all kinds of crafts. I love your work, no matter what it is. This pretty ornament speaks to me. I have everything but the beads already, so as soon as they arrive, off I GO!
I live in a home that has a Gift Shop, so as soon as I get the first dozen finished, I will take it down for them to sell. (and keep the cash for themselves) I will also make some in red and green colors. I bet they will fly out the door.
I live in Chicago, we’ve already had a little snow, and I imagine everyone is about to put up a tree, soon as the turkey is eaten, huh?