How to Loom Knit a Baby Hat (in 2 Sizes!)
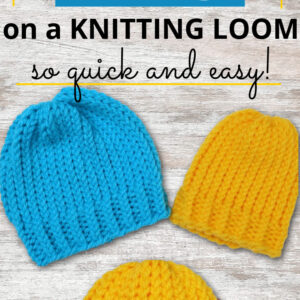
Learn how to make a simple and adorable loom knit baby hat in 2 different sizes!
This step by step tutorial is easy to follow and perfect for loom knitting beginners or anyone looking for a quick and easy baby hat pattern.
Plus, it includes written instructions and a video tutorial!
Want to remember this? Post this Loom Knit Baby Hat Pattern to your favorite DIY Pinterest board!

(This post may contain affiliate links. If you click one and make a purchase, I may receive a small commission at no extra cost to you. Read the disclaimer here. Thank you for your support!)
Have you tried loom knitting yet? It’s so much fun making loom knit beanies, and this baby hat pattern is so quick and easy!
We’ll be using large gauge knitting looms with chunky yarn, and it works up so fast you can have one of these done in an hour.
This pattern includes 2 stitches: the e-wrap knit stitch and the purl stitch. Both techniques are super simple and this is a great way to get comfortable with purling on a knitting loom.
If you want to keep it even simpler, you can adapt my basic adult loom knit hat pattern to the smaller sized looms. That pattern only has one stitch, the e-wrap.
But I promise, this pattern is just as easy and I’ll walk you through the whole process!
What is a Knitting Loom?
A knitting loom is a peg loom that you can use to knit super easily. Sometimes you’ll also see them called a knitting board. There are many different types of knitting looms, and some of the most popular ones include:
- round loom (like we’ll be using today)
- afghan loom
- straight loom (also called long looms)
This loom knitting set works with chunky yarn and is perfect for making hats, gloves, and slipper socks!
There are different brands, like the Knifty Knitter Loom, KB looms, Boye and others. You’ll find them for sale at craft stores like Hobby Lobby or Michael’s and on Amazon.
What Size Loom Will I Need?
For this pattern we’ll be using a large gauge (5/8″) round hat loom, and they come in a few different sizes. You can get them as small as a 12 peg flower loom, all the way up to a 48 peg loom for adult sizes.
The brand I’ll be using is KB, but as long as it’s the same size it doesn’t matter what brand you use. Generally, the baby-knit looms are the 24 peg and the 36 peg.
To make a preemie sized loom knit hat, you’ll want to use a 24-peg loom. You’ll end up with a hat that has a circumference of about 11-12 inches and you can adjust the height depending on the amount of rows you make for the body of the hat.
After making the brim, I knitted 15 rows and ended up with a hat that’s 6 inches tall. It would probably be a bit slouchy on a tiny baby, so if you don’t want it to be slouchy I’d recommend doing 10 rows instead.
To make the newborn to 12 months size hat, you’ll want to use a 36-peg loom. You’ll end up with a hat that has a circumference of about 14 inches and just like the smaller hat, the body can be adjusted by adding or subtracting rows.
After I made the brim, I knitted 18 rows and ended up with a hat that’s 6.5 inches tall. That should work pretty well for a newborn, but you might want to add a few more rows if you’re making this for an older baby.
NOTE: Four rows equals about an inch. So, for a 6 month old I would recommend doing 20 rows, and for a 12 month old I would say 22 rows should do it.
That being said, I don’t have an actual baby in those sizes to test this on, so be sure to measure your baby’s head if you can!
Here’s a handy chart of knit hat sizes for babies that will help you figure out what size you need.
Supplies You’ll Need
- round knitting loom (24 peg for preemie hat or 36 peg for newborn and up)
- knitting hook (this should come with your loom)
- size 5 chunky or bulky yarn (you can generally make multiple hats with one skein of yarn)
- a yarn needle
- stitch marker
- optional: a pom pom for the top
How to Make a Loom Knit Baby Hat
Subscribe to Yarn Stash with Marching North so you don’t miss any new tutorials!
Step 1: Cast on
Make a slip knot in the end of your yarn.
Place your stitch marker on one of the pegs (or the anchor peg if your loom has one), and then place the slip knot over the peg and tighten.
Note: I’m using a scrap piece of yarn for a stitch marker here, that’s what the yellow yarn is.
E-wrap around each peg going to the right until you get back to the first peg. Push the first loops down to the bottom of the peg and then make another row of e-wraps above the first row.
Use the loom hook to bring the bottom loop up, over the top loop, and off the peg, leaving one loop on the peg. Repeat that with each peg going around to the right.
Now your cast on row is done and it’s time to move onto the brim!
Step 2: Make the ribbed brim
The brim is made with a knit one, purl one rib.
Do an e-wrap knit stitch on the first peg going to the right.
Then do a purl stitch on the second peg.
How to Do a Purl Stitch on a Knitting Loom
Repeat that going all the way around until you get back to the first peg. You’ve now completed one row of the brim!
For the preemie hat, make 4 more rows (5 total) for the brim, and for the newborn-12 mo. hat make 5 more rows (6 total).
Brim Row Counts:
- 24 peg hat (preemie): 5 rows
- 36 peg hat (newborn & up): 6 rows
Step 3: Knit the body of the hat
Now it’s time for the super easy part of the hat. The whole body of the hat is made with e-wrap knit stitches.
Just like the cast on row, you e-wrap around each peg and then knit the bottom loop up over the top loop and off the peg. Repeat that for each row.
Remember, 4 rows adds about an inch of length to your hat. Feel free to adjust the amount of rows to customize your baby hat.
Here’s the row amounts for the two sizes of hats I made:
- 24 Peg Hat (Preemie): 15 rows
- 36 Peg Hat (Newborn & Up): 18 rows
Step 4: Removing from the loom & cinching up the top
Wrap your yarn around the loom one and a half times. Cut the yarn at that mark and thread the yarn tail onto your yarn needle.
Starting on the first peg, feed the needle up through the bottom of the loop, pull the yarn through and remove that loop from the peg.
Repeat that with each peg going around to the left. Once you remove the last loop on the last peg, it’s time to cinch up the top of the hat.
Bring the needle that’s still threaded with the yarn tail through the hole to the inside of the hat and turn the hat inside out. Pull the yarn tail to close the hole.
Then you’re going to sew through the stitches surrounding the hole to make it a bit more secure.
Pull the yarn one more time to make sure the hole is totally closed, tie a knot, and weave in the end of the yarn.
Trim off the excess. Now the top is done!
Step 5: Tightening up the cast on row
This part is sort of optional, but I recommend doing it because it looks a lot neater.
You’ll see that the cast on row on the brim of the hat is a bit loose and the loops are sort of large. We can fix that!
Find the slip knot from the start of the hat.
Starting on the left side of the knot, pull on the loops to tighten them up one at a time. It’s the loops right on the edge of the brim that are from our cast on row.
Keep pulling the loops one at a time all the way around, and the loop will get larger and larger as you keep removing slack.
Once you get all the way around to the other side of the knot, use the loom hook to loosen and untie the slip knot. Then you can just pull the end of the yarn and all the accumulated slack will disappear!
Thread the yarn end onto your needle and feed it through the inside of the brim, tie a knot to secure, and weave in the ends. Then trim off the excess.
Done!
Now you can make a cute pom pom and add it to the top if you want, or you can keep it as it is! This pattern is easy to customize with different colors, or you can add extra rows to make a more slouchy hat.
If you’re looking for more baby patterns, this easy crochet baby booties pattern is super quick to whip up!