“Queen Bee” Free Punch Needle Pattern + Tutorial!
Get in the Spring spirit with this free “Queen Bee” punch needle pattern and tutorial!
Don’t forget to pin this for later!

With all the craziness going on right now, it feels really good to get lost in a craft project.
I created this bee punch needle pattern on a whim, and it turned out so good that I decided to make it a free pattern!
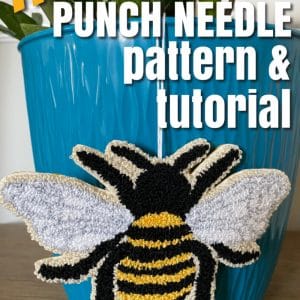
Below you’ll find the video demonstration and the written tutorial to make this adorable “Queen Bee” punch needle ornament.
I’m hanging my bee on the wall by some other fiber art projects, but you could hang it on a cabinet knob, your rearview mirror, or wherever!
You can get the small-sized version (4 ½” x 5 ¾”) of this printable punch needle pattern for free, just fill out the form below!
Once you have your pattern ready to go, it’s time to start punching.
Let’s get started!
(This post may contain affiliate links. If you click one and make a purchase, I may receive a small commission at no extra cost to you. Read the disclaimer here. Thank you for your support!)
Supplies You’ll Need for Queen Bee Punch Needle Pattern
- Embroidery floss in the following colors
- Ultra Punch Needle and Threader
- 7″ No-Slip Embroidery Hoop
- Weaver’s Cloth
- Scissors
- Free “Queen Bee” Punch Needle Pattern (see the form below to grab yours)
To Make it into a Hanger Ornament (optional):
- Felt in a coordinating color
- Fabric glue
- Paintbrush to spread glue
- Needle and 8” piece of white embroidery thread
- Heavy book to weigh it down while the glue dries
Queen Bee Punch Needle Pattern Tutorial
Step 1: Print and Transfer the Pattern
First, print out the pattern.
To transfer it to your weaver’s cloth, you’ll need to tape the pattern up to a sunny window or lay the pattern on a lightbox.
Tape the weaver’s cloth over the pattern and trace over the outlines with a felt tip marker or a pen.
Mark the black areas with a “B”.
Step 2: Stretch the Fabric
Insert the weaver’s cloth into your no-slip hoop, center it, and pull it drum tight. Tighten the screw.
Step 3: Prepare and Thread your Punch Needle
Put the medium-sized needle into your Ultra Punch and put it on a stitch height of 2.
Pull a piece of black embroidery floss out of the skein (make it as long as you can handle without it getting knotted).
Separate the floss so there are three strands. To do that, hold the floss between your two fingers, grab one strand and pull it out while holding the other strands.
The floss will ball up but not get stuck if you do one strand at a time.
Once the first strand is free, straighten out the remaining strands and then repeat with the next one.
Do this three times total so you have two separate pieces of floss with three strands each.
Thread one of the three-strand pieces into your Ultra Punch.
Step 4: Punch the Black Sections of the Bee
Outline and punch all the black sections of the bee. You’ll have to rethread your needle a few times to get it all punched.
Step 5: Punch the Gold Sections of the Bee
Outline and punch all of the gold sections. This part will require rethreading a few times as well.
Step 6: Punch the Light Gray Veins in the Wings
Punch all of the lines in the wings with the light gray floss. Make the stitches close together.
Step 7: Punch the White Inside Sections of the Wings
Fill all the inside sections of the wings with white floss.
Step 8: Punch the Outline Around the Bee with Ecru
Punch two rows around the whole outside of the bee in ecru. This helps tighten up the design. Feel free to do more rows if you want.
Step 9: Poke Everything into Place and Trim the Ends
Flip the bee over so the loop side is facing up and poke any wayward loops into place with the end of your punch needle. This makes a huge difference in the finished design so don’t skip it.
Trim any long ends or long loops so they blend in. Check for any bald spots that need a few more loops punched.
At this point, the main design is finished and you can do whatever you want with it. You could go ahead and punch the background and make it into a wall hanging or frame it.
I turned my punch needle bee into a hanging ornament. Here are the instructions if you want to do the same thing.
Step 1: Apply Glue
Apply a good amount of fabric glue to the back of the design (flat side). Use the paintbrush to evenly spread it out.
Step 2: Add felt backing
Press the piece of felt down on the glue and make sure it’s completely pressed down. Lay a heavy book on top of it and leave it to dry overnight.
Step 3: Cut it out
After it’s dried, trim around the design close to the loops (but don’t cut into the actual loops). The glue will keep the weaver’s cloth from fraying.
Step 4: Add the hanging loop
Thread the 8” piece of embroidery floss onto your sewing needle and thread it through the top of the punch needle ornament. Make a decent sized loop and tie an overhand knot to secure.
You can hang this Queen Bee punch needle ornament on a cabinet knob or on the wall. It would even make a really cute Christmas tree ornament!
I hope you enjoyed this tutorial! If you’re looking for more punch needle patterns, be sure to check out my shop!
Related Posts
- 8 Essential Punch Needle Tips for Beginners
- DIY Punch Needle Wall Hanging Tapestry Tutorial + Video
- Punch Needle on Your Clothes! Tutorial + Free Patterns!
Where do I get the free pattern? I would like to try this.
thanks.
There’s a box to enter your email for my newsletter and it’ll send the pattern to you that way. 🙂