Make an Easy Loom Knit Hair Scrunchie (Free Pattern!)
Learn how to make some super cute and fast loom knit hair scrunchies in this free loom knitting pattern and video tutorial!
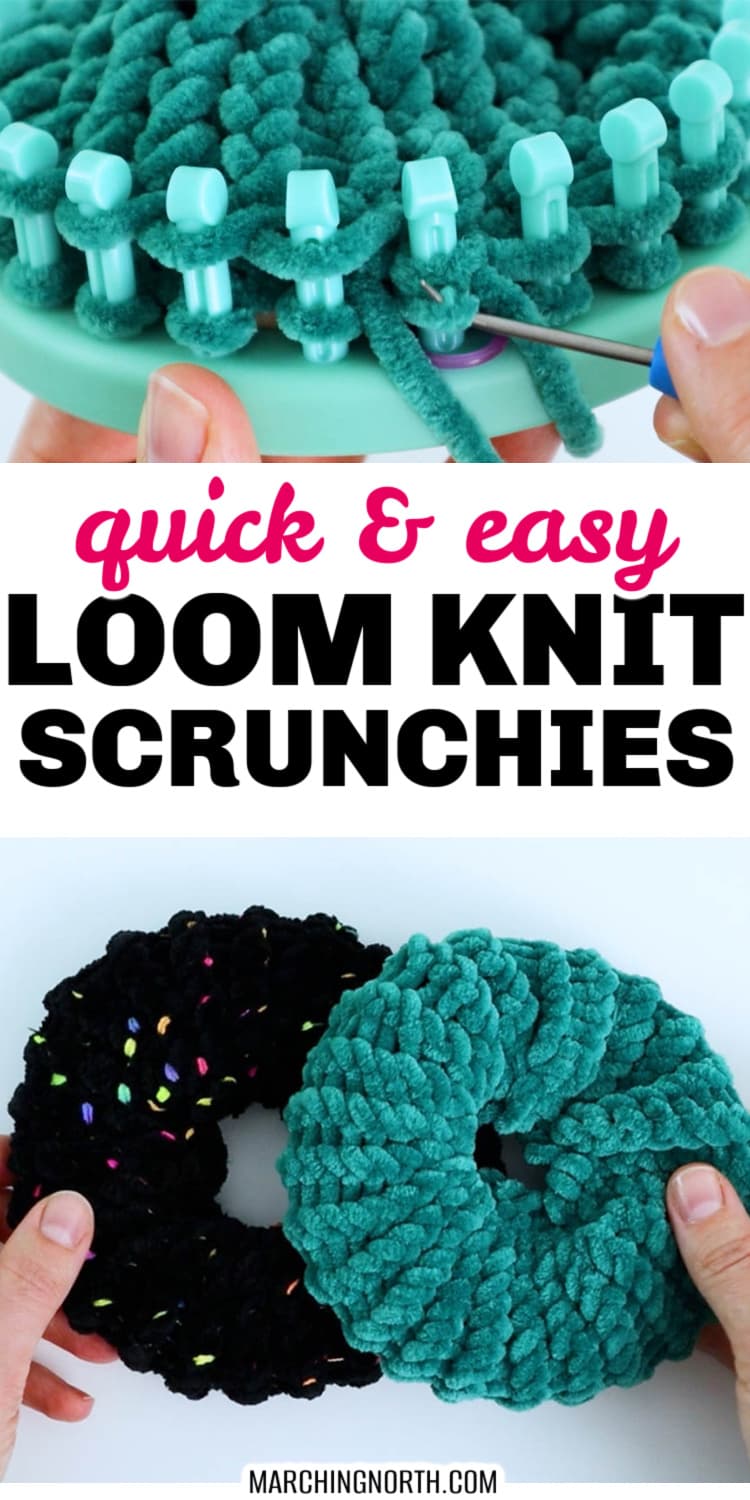
Want to remember this? Post this Loom Knit Scrunchie tutorial to your favorite DIY Pinterest board!
(This post may contain affiliate links. If you click one and make a purchase, I may receive a small commission at no extra cost to you. Read the disclaimer here. Thank you for your support!)
If you’re looking for a quick last minute gift or you just want to jazz up your hair accessories a bit, some loom knit scrunchies is the perfect project to try.
You can make them in different sizes just by using different types of hair elastics, and you can make them larger or thinner by adding or taking away rows.
It’s a super easy, very beginner friendly project and you can have one made in about half an hour.
Loom Knitting Supplies
My favorite way to loom knit is with the large gauge looms. I just love how quickly your project can work up.
For this scrunchie pattern, you’ll need a 24 peg loom, which is the smallest one that comes in the Kb large gauge set of round looms.

This loom knitting set works with chunky yarn and is perfect for making hats, gloves, and slipper socks!
That size is also great for making fingerless gloves, slipper socks, and adorable tiny baby hats.
You’ll also need a loom hook (it also comes with the set) and a stitch marker to mark your starting peg.
Best Yarn for Scrunchies
For these cute scrunchies, I used a chenille yarn to make it extra fun and soft.
You could also use a velvet yarn, or really any bulky yarn you like.
I just think using a soft, fuzzy yarn adds to the fun factor for this scrunchie project!
Supplies You’ll Need
- 24 peg large gauge knitting loom
- chenille yarn (size 6) I used Honey Bunny from Hobbii
- hair elastic (whatever type you prefer)
- loom hook
- large eye yarn needle
- stitch marker (to mark first peg)
Video Tutorial
Check out the video tutorial over on my YouTube channel Yarn Stash with Marching North, and don’t forget to subscribe!
Step 1: Cast on
First you’ll want to place the stitch marker on one of the pegs, and that will be your starting peg.
(If your loom has an anchor peg you can skip that, but mine doesn’t.)
Take your yarn and make a slip knot, then place the loop from the slip knot onto the first marked peg. Tighten it up.
Going to the right, e-wrap around each peg going clockwise around the peg, and continue doing that all the way around the loom.
Hold the yarn with one hand so the loops don’t come off and push all the loops down to the bottoms of the pegs.
Now we’re going to do a U-wrap cast on.
Wrap the yarn around the first peg going around in a counter clockwise motion.
You’re not wrapping all the way around. Instead you’re just making a “U” shape (hence the name).
Hold the yarn behind the peg with one hand while you pull the bottom loop over the top loop and off the peg.
Repeat that with each peg, being careful not to pull too tight for your U-wraps.
Step 2: Knitting the scrunchie
For the next 15 rows, we’ll be doing an E-wrap knit stitch.
To do that, push all the loops on the pegs down to the bottom.
Then, wrap around each peg in a clockwise motion going to the right until you get all the way around the loom.
Knit the bottom loop up over and off the last peg you wrapped first (that way it will hold the yarn in place so your loops don’t start coming off).
Then continue knitting all the bottom loops over the top loops and off each peg all the way around.
That’s one row, and you’ll continue doing that until you have e-wrap knitted 15 rows.
Step 3: Folding up the tube
Before we fold up the tube, we’re going to go ahead and cut our yarn tail.
Wrap the yarn around the loom 3 times, then cut the yarn.
Thread the yarn onto your yarn needle, and set the needle aside for just a minute.
Set the loom on your desk and pull the tube up through the center of the loom.
Grab your pony tail holder and you’re going to bring the scrunchie tube up through the center of the pony tail holder.
Now we’re going to place all the loops from the starting edge onto the pegs, just like you would do for a loom knit hat with a folded brim.
Locate the slip knot from your starting edge, and place that first loop on the starting peg.
Then going around to the left, place each loop from the starting edge onto each peg.
Once you get all the loops put on the pegs, knit the bottom loop up over the top loop and off the peg.
Repeat that around.
Step 4: Stretchy bind off
Pick up your yarn needle with the yarn tail threaded on it and now we’re going to do our stretchy bind off.
Start by bringing the yarn down through the starting peg loop.
Then you’re going to bring the needle up through the peg to the left.
Gently pull the yarn to tighten and bring it behind the peg to the right (which will be the starting peg in this case.)
Now you’re going to go down through the loop to the right, and up through the peg to the left.
Tighten, bring the yarn behind the peg to the right, and repeat until you get all the way back around to your starting peg.
I like to go ahead and sew down through the starting peg again, and up through the peg to the left of it, just to be extra secure.
Now you can use the loom hook to pull each loop off the pegs.
Step 5: Finishing up
Use the yarn needle to bring the long yarn end through the scrunchie so it’s coming out at the same spot as the other yarn tail.
Tie them together in a knot. Then thread both ends on the yarn needle and weave them inside of the scrunchie.
Trim the excess yarn off and stretch the scrunchie out so the yarn ends disappear inside.
If you want, you can sort of twist the scrunchie around so the seam is on the middle of the scrunchie instead of the outside edge.
Done!
I hope you enjoyed this tutorial and will make some of these cute loom knit scrunchies!
If you make one of these, please share a pic over on Instagram and tag me @marchingnorth so I can take a look. I love seeing all of your awesome creations!