Easy Macrame Rainbow (No Sew!) Video + DIY Tutorial
Learn how to make a cute macrame rainbow the EASY way in this DIY tutorial & video!

These adorable macrame rainbows are all over the place. They’re cute as can be, but they can be a real hassle to make!
When I made a larger macrame rope rainbow several months back, I sewed it together with a curved needle and thread. It was quite a job and my hands were super tired by the end of it.
It’s been one of my most popular tutorials though, and I really love the look of it. So I started thinking, how do you make a macrame rainbow easier?
Make it no-sew, of course!
Also it doesn’t hurt to make it on a smaller scale, there’s less wrapping that way.
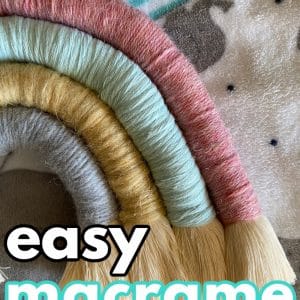
Want to remember this? Post this Easy Macrame Rainbow tutorial to your favorite DIY Pinterest board!
This version of the macrame rainbow is actually pretty fun to make, and you could whip up several of them in one day without terrible hand cramps!
(This post may contain affiliate links. If you click one and make a purchase, I may receive a small commission at no extra cost to you. Read the disclaimer here. Thank you for your support!)
Supplies You’ll Need to Make a DIY No-Sew Macrame Rainbow
- 25 mm single strand cotton macrame cord cut to the following lengths:
- 7 inches
- 9 inches
- 11 inches
- 14 inches
- Four colors of yarn in the colors you want (Feel free to mix different types and thicknesses of yarn. I used wool, cotton, and acrylic that I had laying around.)
- A piece of thick felt approx. 6.5″ x 8.5″
- 7″ piece of string for the hanger (I used 3 mm single strand cotton macrame string, but you can use jute, twine, or whatever you have on hand)
- Tape for the ends of the cord
- Hot glue gun and glue sticks
- Sharp scissors
- Brush for fringe
DIY Macrame Rainbow Tutorial
Click here to watch this tutorial on YouTube
Step 1: Cut the filler cords
First, you need to cut your filler cords down to size.
I have the lengths I used listed above in the supply list, or if you want to make your rainbow a different size, just eyeball the lengths like I did in the first photo above.
Be sure to wrap the rope with tape in the spots your going to cut BEFORE you cut it, because this stuff unravels and frays like crazy. I just wrap it and then cut right in the middle of the piece of tape.
Step 2: Wrap with yarn
Now it’s time to wrap our rainbow bands. I’m using some random yarns from my stash for this one, and they’re all different types of yarn.
This project is a great stash buster!
To wrap the bands, start by holding the end of the yarn down where you’ll be wrapping. Then start wrapping tightly on the right side of the filler cord, concealing the end.
Continue wrapping all the way to the left, leaving the same amount of exposed filler cord on each end.
Once you’ve gotten it all wrapped, trim the yarn and thread it through a large eye needle. Then feed the needle and yarn down through 2 or 3 wraps and tie a knot to secure.
Then feed the end of the yarn down through several wraps, and trim the yarn flush with the wraps.
Now you’ve finished your first rainbow band!
Repeat these steps for the rest of the bands. Before you tie the ends off, line them up with the previous band and make sure the yarn stops and starts at the same place.
You might have to remove or add a few wraps before you tie it off.
Step 3: Glue it down
Once you have all your bands wrapped, it’s time to glue them down to the felt.
I recommend doing a test fit before you actually glue the pieces down. That way you kind of know where everything’s going to go. Once you hot glue them in place, they’re stuck!
Start with the smallest band. Add hot glue on the back of the yarn wrapped part. Then press it down into place quickly and hold it for a second so the glue can cool.
Before you continue gluing the other bands, add the hanger in the center. Be careful to line it up really straight so your rainbow doesn’t hang crooked.
Then just continue gluing your rainbow bands one at a time until they’re all glued down. Press them firmly together so they’re aren’t any gaps between the bands.
Step 4: Trim it up
Now that everything is glued down, it’s time to trim it up!
First, I trimmed the long ends of the filler cords and removed the tape.
Then, flip it over and carefully trim away the excess felt. Be careful that you don’t cut the yarn or the hanger accidentally, and trim the felt neatly so you can’t see it from the front.
After the felt is all trimmed up, brush out the fringe and give it a trim.
Done!
I hope you enjoyed this tutorial and make your own DIY no-sew macrame rainbow!
If you do, please share a picture of it on Instagram and tag me @marchingnorth so I can see it! I love seeing all of your awesome creations.
Join the Macrame for Beginners and Beyond with Marching North Facebook Group!
If you’re new to macrame or if you’ve been knotting for a while, connecting with other macrame lovers is always a great idea!
Come check out our Facebook group, Macrame for Beginners and Beyond with Marching North. It’s a friendly community where you can ask questions, get inspiration, and share your awesome work with other macrame lovers! Come join the conversation today!
Want to remember this? Post this Easy Macrame Rainbow tutorial to your favorite DIY Pinterest board!
Related Posts
- Semi-Circle Macrame Wall Hanging // Tutorial + Video
- Must Have Macrame Supplies (and Where to Find Them!)
- Macrame Crescent Moon Dreamcatcher // Tutorial + Video
it looks really lovely!<3