DIY Macrame Air Plant Holder {Easy!} Tutorial & Video
Looking for a quick and easy macrame plant hanger project? Looking to bring some more natural elements into your home?
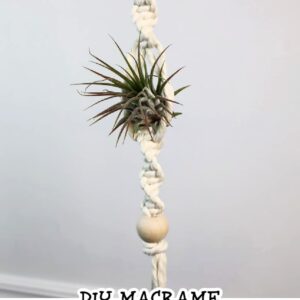
If so, you have to check out this adorable DIY macrame air plant holder pattern!
This macrame project is perfect for beginners or more experienced knotters. If you have a few air plants that need a home, you can even make a longer version with multiple plant nooks!
You can have one of these pint sized macrame plant hangers made in 20 minutes, no joke. This is one of those quick and simple DIY projects you can whip up in no time!
Don’t forget to pin this for later!

(This post may contain affiliate links. If you click one and make a purchase, I may receive a small commission at no extra cost to you. Read the disclaimer here. Thank you for your support!)
Are you new to macrame? If so, check out these helpful beginner resources!
Join the Macrame for Beginners and Beyond Facebook Group!
If you’re new to macrame or if you’ve been knotting for a while, connecting with other macrame lovers is always a great idea!
Come check out our Facebook group, Macrame for Beginners and Beyond. It’s a friendly community where you can ask questions, get inspiration, and share your awesome work with other macrame lovers! Come join the conversation today!
What are Air Plants?
Air plants, also known as Tillandsia plants, are super popular today. They’re a a genus of low-maintenance plants that don’t need any soil, and instead receive all of their nutrients through their foliage.
They make a great indoor plant because they like indirect light, can be placed just about anywhere, and come in so many interesting shapes, colors and sizes!
There are tiny air plants and bigger ones, some have long, straight foliage and some a flat, curly leaves. They come in different colors including green, silvery gray, and shades of burgundy and copper.
Air plants are perfect for macrame plant hangers because you don’t even have to worry about making room for a pot! Just stick the base of your air plant right in the hanger and you’re good to go.
If you don’t already have your own air plant and you’re interested in learning more or adding some to your house plant collection, here are a couple of my favorite air plants:
- Tillandsia Streptophylla (Linguine Plant)
- Tillandsia Bulbosa Belize (Space Onion)
What Can I Use as an Air Plant Holder?
This macrame air plant hanger is perfect for your little planty buddies, but what else can you use to hold your air plants?
Honestly, just about anything! These little plants are so adaptable and easy going, and there are lots of creative ways you can display them. Here’s a few more great ideas for air planter DIY’s:
- wire air plant holders: bend copper wire into a spiral funnel shape on one end, and wrap the other end around a crystal or piece of wood for a beautiful and easy way to display your plants
- geometric planters: pick up a beautiful terrarium planter with cool geometric shapes and display your air plants inside with some different rocks and other small plants
- mason jars: put some natural materials like pebbles and stones in the bottom of a cute mason jar and pop in an air plant for an awesome home decor DIY
Some other ideas for unique air plant holders include:
- wooden frames
- hand painted plant pots
- a grapevine wreath
- wooden boards
- a sea urchin shell
- ombre clay pots
There are so many creative ideas using different materials out there!
For this macrame air plant hanger, you won’t need any hot glue, a wire cutter, or anything fancy. Instead, it just requires some macrame cord, a wooden ring and a wooden bead.
Without further ado, here’s how to make your own DIY Air Plant Hanger!
Supplies You’ll Need to Make this DIY Air Plant Holder
- 4mm single strand macrame cord in the following lengths
- 2 pieces @ 60″ long each
- 2″ wooden ring
- wooden bead with a large hole
- crochet hook that fits through the bead
- an Air Plant 🙂
Related: Best Macrame Cord and Supplies (& Where to Find Them!)
DIY Macrame Air Plant Holder Tutorial
Step 1: Attach the Cords
Fold one of the pieces of cord in half and attach it to the bottom of the wooden ring with a lark’s head knot but don’t tighten it all the way.
Put one end of the second cord through the top of the lark’s head knot, even out the ends, and then tighten the knot. Now you’ll have both pieces of cord attached to the ring.
Step 2: Top Spiral Knot Section
Tie 12 spiral half knots starting right under the lark’s head knot and going downward.
Related: How to Make a Macrame Plant Hanger (Ultimate Guide!)
Step 3: Make the Plant Cubby
Leave a space of about 3 or 4 inches for the air plant to sit, bring the inner cords to the outside (you’re switching the filler and working cords), then tie 12 more spiral half knots under the space.
Step 4: Add the Bead
Thread the wooden bead onto all of the cords using your crochet hook or a large eye needle.
Step 5: Tie the Finishing Knot
Tie an overhand knot under the bead to secure.
Step 6: Trim Up the Fringe
Cut the fringe to your desired length.
Done!
This cute mini macrame air plant hanger is perfect to hold one individual plant.
If you want to hang several with one hanger, you can add extra length to your cord and make multiple cubby holes for your whole air plant collection!
I hope you enjoyed this tutorial and if you make one of these air plant hangers, please share it on Instagram and tag me @marchingnorth so I can take a look. It makes my day!
Related Posts
- Crown Knot Macrame Plant Hanger (Tutorial & Video)
- DIY Macrame Lamp Shade (Tutorial & Video)
- Unique Macrame Knots (Beginner to Intermediate!)
I just made my first air plant macrame hanger and I am in love with this. I am going to make more and more and more! 🙂
I want to also use the macrame hanger that I did for the simple plant hanger but how much extra cord would I need to use for the air plant hanger???
Thank you