DIY Cowrie Shell Macrame Bracelet (Free Pattern + Video Tutorial)
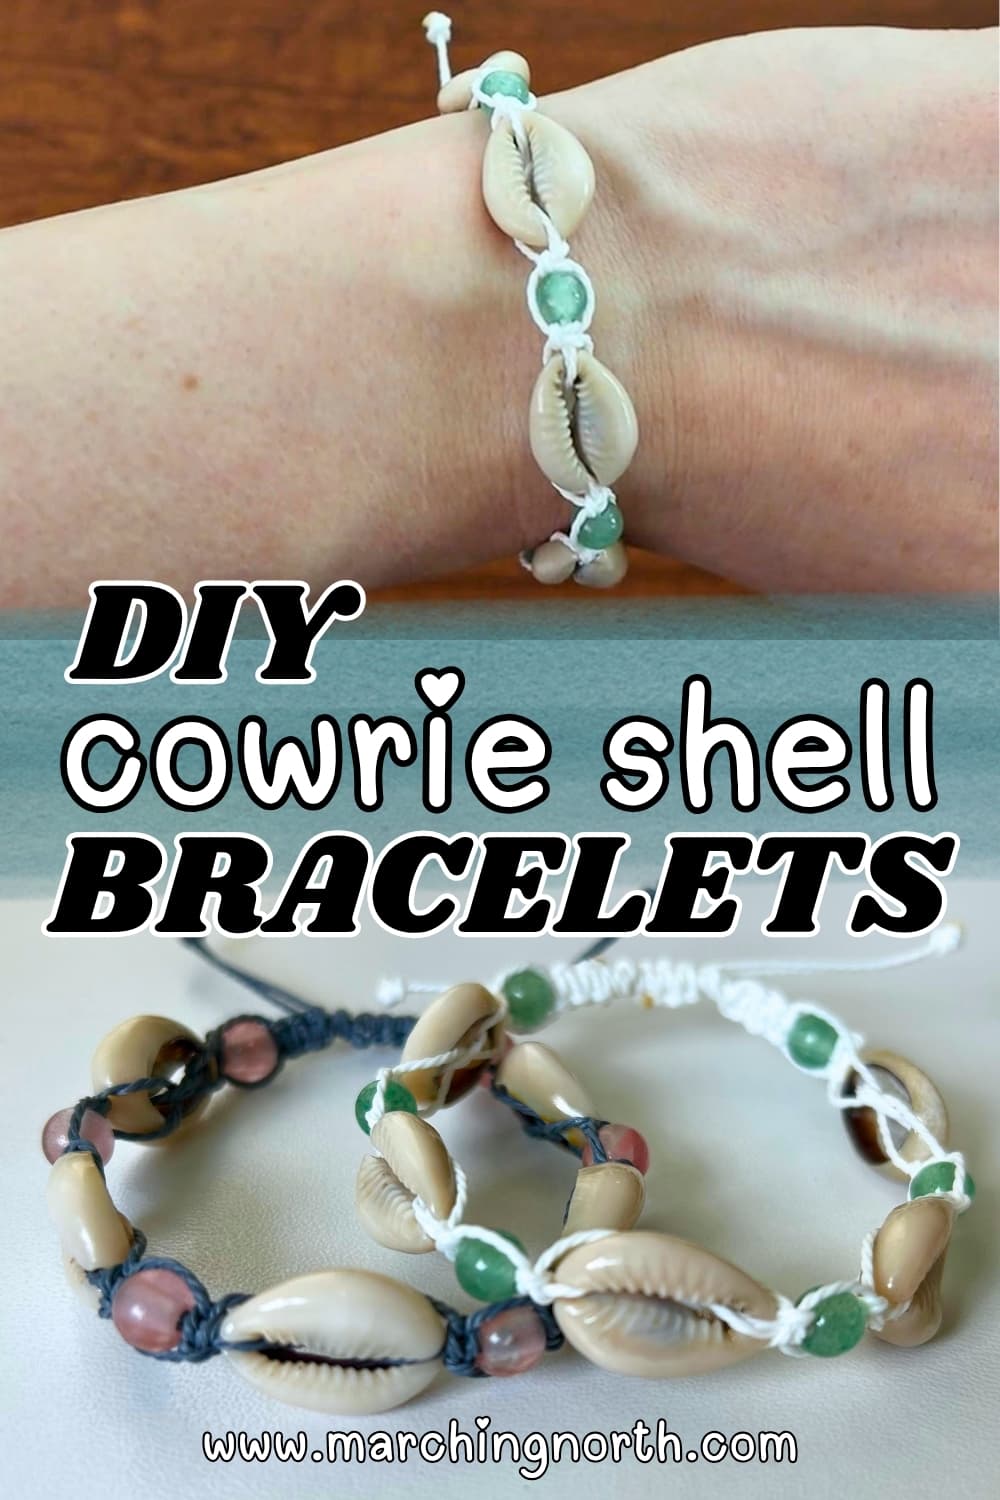
If you’ve been looking for a fun, beginner-friendly macrame project with a little boho flair, this cowrie shell macrame bracelet is it!
It’s simple enough to knock out in an afternoon, and the result is something you’ll actually want to wear. And you’ll have to make a bunch to give out as gifts, because everyone is going to want one!
Don’t forget to pin this for later!
(This post may contain affiliate links. If you click one and make a purchase, I may receive a small commission at no extra cost to you. Read the disclaimer here. Thank you for your support!)
In this tutorial I’ll walk you through every step, including how to attach the cowrie shells, add beads, and finish it off with a sliding closure so it fits any wrist size.
There’s a free pattern below, a PDF version in my shop if you want to save or print it, and the full video tutorial is embedded in this post so you can follow along at your own pace.

Buy the PRINTABLE copy
Macrame Cowrie Shell Bracelet – Printable PDF Pattern!
Reference this pattern any time you want with the printable PDF version!
It’s ad-free, and includes the written pattern with step by step photo tutorial!
Below, you’ll find the free pattern and the video tutorial for this fun project.
If you’re new to macrame and want to learn the basic knots before you dive in, I can help you with that!
Also, be sure to sign up below for my free printable PDF knot guide so you can keep it handy while you’re working on your projects!
More Free Macrame Patterns!
Looking for more macrame ideas? I’ve got lots of them to choose from! Here’s a few to get you started:
- ANOTHER Easy Beaded Macrame Bracelet – Free Pattern
- 17 Free DIY Macrame Bracelet Patterns to Make!
- “Auda” Mini Macrame Wall Hanging – Free Pattern and Video!
- Free DIY Macrame Plant Hanger Pattern (Low Key & Tassel Free!)
- DIY Macrame Diamond Keychain (Free Pattern & Video!)
- Macrame Sling Bag (Phone Holder) Tutorial & Video!
Macrame Cowrie Shell Bracelet Tutorial
Supplies You’ll Need
- 1 mm waxed polyester thread (cut lengths are below)
- 5 cowrie shells (mine are about 3/4″ long)
- 6 – 6 mm large hole beads (mine have a 2 mm hole, you don’t want to go smaller than this or they won’t fit onto the cords)
- Sharp Scissors
- Lighter (to melt cord ends)
- Foam macrame board, or you can tape your cords down to a table while you work
Cut List
- 2 pieces @ 20″ long (50.8 cm)
- 1 piece @ 40″ long (101.6 cm)
- 1 piece @ 12″ long (30.48 cm)
Video Tutorial
Check out the tutorial video for this macrame bookmark on my YouTube channel, and don’t forget to subscribe!
Step 1 – Setting up the filler cords
Line up the ends of your two 20 inch long cords.
Measure 5″ down from the end, and tie an overhand knot.
Slide your cord into one of the slots of your macrame board, or tape it down to your desk above your knot.
These are going to be the filler cords for your bracelet.
Step 2 – Knots, beads and shells
Grab your 40″ long cord, and fold it in half evenly.
Slide the folded end behind the two filler cords, and you’ll be using this cord as the working cord to tie the knots.
Tie 3 square knots, and slide them up so they’re butted up against the overhand knot we tied earlier.
Thread one of your 6 mm round beads onto the two filler cords and slide it up by the knots.
Tie another square knot right up next to the bead we just tied on.
Grab one of your cowrie shells, and lay it behind the two filler cords kind of like the cords are going into the cowrie shell’s “mouth”.
Push the cords through so it forms a loop that sticks out on the back side of the cowrie shell.
Then take the two working cords, and thread the right one through the loop going from right to left, and thread the left on through the loop going from left to right.
Slide the cowrie shell up next to the last square knot we tied, and pull the working cords gently to remove any slack.
Now tie another square knot right at the bottom end of the cowrie shell.
Thread another 6 mm bead onto the filler cords.
Then you’re just going to repeat that process, tying a square knot after the bead, adding on another cowrie shell, etc, until you’ve used all the beads and shells.
After the last round bead, tie 3 square knots to finish the bracelet off.
Then tie an overhand knot in the filler cords right up next to the last square knot.
Step 3 – Melting the working cord ends
Remove your bracelet from the macrame board (or untape it), and cut the working cords (not the filler cords!), leaving just a smidge sticking out.
Then grab your lighter and melt the cord end down CAREFULLY.
Press it against the side of your lighter to flatten it down.
Repeat that with the other working cord end.
Take the bracelet, fold it in half and line up the last overhand knots.
If one side of your cord tails is longer than the other (it probably will be), cut them so they match with the other side.
Sliding Knot Closure
Overlap the cord ends so they’re laying as they would be when wrapped around your wrist.
Grab the 12″ long piece of cord, fold it in half to find the center, and slide in behind the crossed over bracelet end cords.
Tie 3 square knots, then trim the working cords you were just using, leaving just a smidge sticking out, and melt them down with a lighter.
Now go ahead and try the bracelet on, and figure out how big you need the bracelet to be to put it on comfortably.
Take it off, leave the bracelet expanded and make sure both sides are even.
Tie an overhand knot in one of the ends and slide it up right next to the slider we just made.
Do the same thing on the other side.
Now you can trim the excess cord off the bracelet ends and melt it down.
Doing it this will ensure you don’t have super long bracelet tails.
But if you want yours to be longer, you can leave them longer too- I just like them short and not too floppy.
In Conclusion
I hope you enjoyed this macrame cowrie shell bracelet tutorial!
If you make this bracelet, I’d love to see it–
You can share a picture and tag me on social media @marchingnorth or leave a comment below and tell me what colors you chose.
If you enjoyed this project, you might also like some of my other beginner-friendly macrame tutorials. Check out my latest ones down below!